background image

Safety warnings and precautions

3

Safety warnings and precautions

• The mains plug of the power supply cord shall remain readily operable. The AC 

receptacle (mains socket outlet) shall be installed near the equipment and shall 
be easily accessible. To completely disconnect this equipment from the AC 
mains, disconnect the power cord plug from the AC receptacle.

• Do not place this display on an uneven, sloping or unstable surface (such as a 

trolley) where it may fall and cause damage to itself or others.

• Do not place this display near water, like a spa or pool, or in a position which will 

allow the splashing or spraying of water onto the display, like in front of an open 
window where rain water may enter.

• Do not install this display in a confined space without proper ventilation and air 

circulation, such as in a closed cabinet. Allow proper space around the display 
for dissipating heat inside. Do not block any openings and vents on the display. 
Overheating may result in hazards and electric shock.

• Installation of this display should only be performed by a qualified technician. 

Failure to install this display properly may cause injuries and damages to the 
personnels and the display itself. Check the installation regularly and maintain 
the display periodically to ensure the best working condition.

• Use only the accessories approved or recommended by the manufacturer to 

mount this display. Using wrong or unsuitable accessories may cause the 
display to fall and result in serious personal injuries. Make sure that the surface 
and fixing points are strong enough to sustain the weight of the display.

• To reduce the risk of electric shock, do not remove covers. No user serviceable 

parts inside. Refer servicing to qualified service personnel.

THIS EQUIPMENT MUST BE 
GROUNDED
To ensure safe operation, the three-
pin plug must be inserted only into 
a standard three-pin power outlet 
which is effectively grounded 
through normal household wiring. 
Extension cords used with the 
equipment must have three cores 
and be correctly wired to provide 
connection to the ground. Wrongly 
wired extension cords are a major 
cause of fatalities.
The fact that the equipment 
operates satisfactorily does not 
imply that the power outlet is 
grounded or that the installation is 
completely safe. For your safety, if 
you are in any doubt about the 
effective grounding of the power 
outlet, please consult a qualified 
electrician.

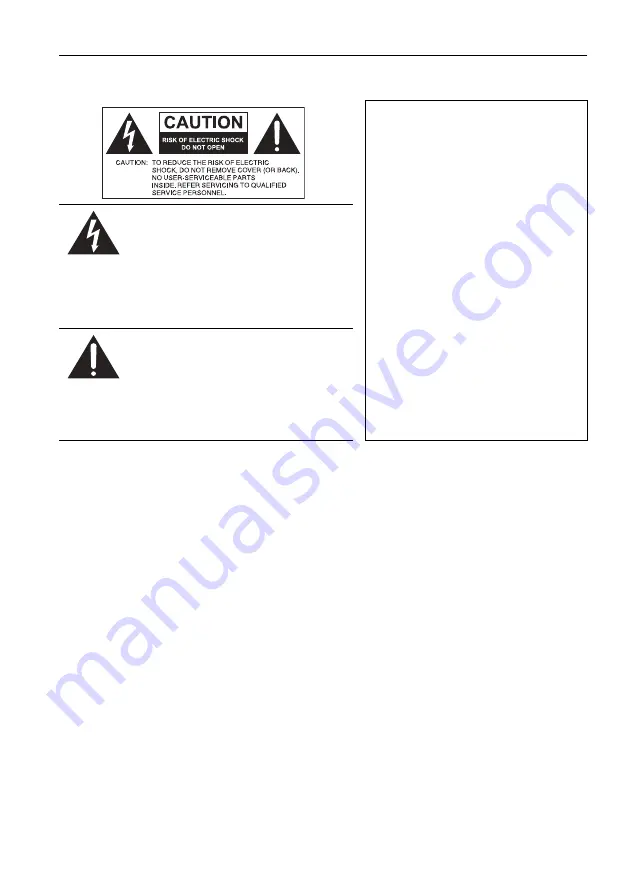
The lightning flash with arrowhead 
symbol, within an equilateral triangle, 
is intended to alert the user to the 
presence of uninsulated "dangerous 
voltage" within the product's 
enclosure that may be of sufficient 
magnitude to constitute a risk of 
electric shock to persons.
The exclamation point within an 
equilateral triangle is intended to alert 
the user to the presence of important 
operating and maintenance 
(servicing) instructions in the 
literature accompanying the 
appliance.

Содержание 55C-TCH

Страница 1: ...55C TCH Touch LED Backlit Display User Manual...

Страница 2: ...tents thereof without obligation to notify any person of such revision or changes Copyright Copyright 2014 by this company All rights reserved No part of this publication may be reproduced transmitted...

Страница 3: ...rol 15 Using the remote control 16 Connection 17 Connecting audio video signals 17 Connecting power 24 Using the Touch Screen for Touch Model Only 25 Important Instructions for Using the Touch Screen...

Страница 4: ...Table of Contents 2 Setting menu 40 Product information 43 Specifications 43 Dimensions 45 Supported input signal resolution 47 Supported PAP input signal combination 49 Troubleshooting 50...

Страница 5: ...commended by the manufacturer to mount this display Using wrong or unsuitable accessories may cause the display to fall and result in serious personal injuries Make sure that the surface and fixing po...

Страница 6: ...Safety warnings and precautions 4 To prevent personal injuries mounting the display or installing desktop stands is required before use...

Страница 7: ...tion when moving the cart apparatus combination to avoid injury from tip over 13 Unplug this apparatus during lightning storms or when unused for long periods of time 14 Refer all servicing to qualifi...

Страница 8: ...the direct heat humidity and avoid fire Do not drop the remote control Do not expose the remote control to water or moisture Failure to do so could result in malfunction Confirm there is no object bet...

Страница 9: ...Important safety instructions 7 There may be local restrictions on the disposal or recycling of batteries Consult your local regulations or waste disposal provider...

Страница 10: ...USB cable DVI cable The type of power cord supplied may differ from that illustrated depending on your region of purchase Before discarding the package check that you haven t left any accessories insi...

Страница 11: ...flat horizontal and object free sur face Make sure that the size of the cloth is larger than the display 2 Gently lay the display on the cloth with the LCD screen facing down 3 Remove the desktop sta...

Страница 12: ...he back cover of the display to the wall Please consult a professional technician for wall mount installations The manufacturer accepts no liability for installations not performed by a professional t...

Страница 13: ...ightness automatically when the Ambient Light Sensor function is activated Indicates the operating status of the display Lights up green when the power is turned on Lights up red when the display is t...

Страница 14: ...button Turns the display on or off Power indicator Indicates the power status of the display Lights up green when the power is turned on Lights up red when the display is turned off Lights up red whe...

Страница 15: ...s DVI signals from an external device such as a computer HDMI 1 HDMI 2 Receives HDMI signals from an external device such as a Blu ray disc player VIDEO IN YPbPr Receives component video YPbPr signals...

Страница 16: ...external device such as a VCR or DVD player AUDIO OUT R L Outputs audio signals to an external device SPEAKERS R L Outputs audio signals to external speakers USB FOR TOUCH Connects the USB cable from...

Страница 17: ...and resolution Numeric buttons 1 9 Input source buttons Performs as numeric buttons when the OSD menu is on Performs as input source buttons when the OSD menu is off SDI and MULTI MEDIA functions are...

Страница 18: ...strong light the remote control may not operate properly In this situation change the light source readjust the angle of the display or operate the remote control from a location closer to display s r...

Страница 19: ...cable itself Always grasp and pull the connectors at the end of the cable Ensure that all cables are fully inserted and firmly seated Connecting the VGA input 1 Connect the VGA IN jack on the display...

Страница 20: ...a DVI D to HDMI conversion cable 2 If needed connect the computer s audio output jack to the AUDIO IN AUDIO1 jack on the display using a suitable audio cable 3 To view video image from this input pres...

Страница 21: ...VCR or DVD player using a component video cable 2 Connect the DVD player s audio output jacks to the AUDIO IN AUDIO2 jacks on the display using a suitable audio cable 3 To view video image from this...

Страница 22: ...eo cable 2 Connect the VCR s audio output jacks to the AUDIO IN jacks on the display using a suitable audio cable 3 To view video image from this input press the AV button on the remote control for th...

Страница 23: ...mplifier on the display allows you to output audio signals through external speakers Connect external speakers to the SPEAKERS R L jacks on the display You can use the remote control or the control pa...

Страница 24: ...t The number of displays you can connect serially depends on the resolution of the input signal you use This RS 232C daisy chain application requires an RS 232C port equipped computer Avoid using HDCP...

Страница 25: ...23 Connecting the touch module Connect the USB cable on the display to a computer The touch module supports easy Plug and Play operations There is no need to install additional drivers on the compute...

Страница 26: ...ord and outlet illustrated may differ from the ones used in your region Only use an appropriate power cord for your region Never use a power cord which appears damaged or frayed or change the plug typ...

Страница 27: ...ing operating systems multi touch plug and play for Windows 7 Home Premium Professional Enterprise and Ultimate versions Windows 8 Android Kernel Version 3 5 Linux Kernel Version 3 5 single touch plug...

Страница 28: ...Pan up Pan down Back Forward Quickly drag your finger Flick in a desired direction Multi touch functions For Windows 7 Home Premium Professional Enterprise and Ultimate versions Right click 1 Press on...

Страница 29: ...ove two fingers in opposing directions Use one finger to pivot around another Supported by specific applications Tap two fingers simultaneously The target should be the midpoint between the fingers Fo...

Страница 30: ...moving drawing or writing Slide can also be used to target small densely packed elements by scrubbing sliding the finger over related objects such as radio buttons Swipe to select command and move Sli...

Страница 31: ...s suggested using a small amount of alcohol to clean the infrared plastic filter To avoid damage to the screen never use any type of abrasive materials to wipe the screen Use a neutral detergent to cl...

Страница 32: ...d then the ENTER button on the remote control Once locked the control panel and remote control buttons do not function unless unlocked Switching input signals Press the INPUT button or those signal se...

Страница 33: ...y is on or in standby mode you can use any computer that is on the same local area network to control the display 1 Enter the IP address of the display in the address bar of your browser and press Ent...

Страница 34: ...ions functions See page Picture Picture Mode Backlight Contrast Brightness Chroma Phase Sharpness Color Temp Noise Reduction Film Mode Reset 35 Sound Sound Mode Treble Bass Balance Surround Speaker Au...

Страница 35: ...lay menu 33 Setting Language Schedule Power Save Control Setting Network Settings Set Monitor ID HDMI Control Advanced Information All Reset 40 Some options are only available when a certain input sig...

Страница 36: ...Press ENTER VIDEO SOURCE to confirm selections 3 Press ENTER to confirm selections 4 Press or to select a feature and press or to adjust settings Press ENTER VIDEO SOURCE to save changes 4 Press and t...

Страница 37: ...contrast Brightness Adjusts the image brightness Chroma Adjusts the color intensity of the image Phase Adjusts the color tint of the image Sharpness Adjusts the image sharpness Color Temp Adjusts the...

Страница 38: ...settings Treble Adjusts the audio treble Bass Adjusts the audio bass Balance Adjusts the audio balance Surround Turns the surround mode on or off Speaker Sets the audio source Line Out Selects the aud...

Страница 39: ...s feature is not available for Video and S Video inputs PAP is not available for all signal source combinations See Supported PAP input signal combination on page 49 for more information on supported...

Страница 40: ...the picture source is 16 9 High definition it displays in the same 16 9 aspect ratio 4 3 Displays all picture source in 4 3 aspect ratio Full 1 Enlarges the picture to fill the screen in the vertical...

Страница 41: ...clock frequency of the VGA input image H Position Adjusts the horizontal position of the VGA input image V Position Adjusts the vertical position of the VGA input image Freeze Freezes the displayed im...

Страница 42: ...Off Timer Sets when to turn on or off the display Set the current time before you set the On Off Timer When schedule settings overlap the Everyday setting takes priority over other weekly settings Po...

Страница 43: ...ignal from the primary display via the RS 232 connection Network Settings See Network connection on page 31 for details Set Monitor ID Assigns an ID number for the current display when multiple displa...

Страница 44: ...t orientation Landscape only models operated in portrait mode may result in premature failure and will not be covered under the warranty OSD Info Box When turned On switching signal inputs or changing...

Страница 45: ...mposite Video BNC jack S Video YPbPr RCA jacks HDMI x 2 DisplayPort Audio L R RCA jacks Line in 3 5 mm jack Control RS 232C D Sub 9 pin LAN RJ45 jack USB SKT USB2 0 A RT4P Output Computer VGA D Sub 15...

Страница 46: ...Product information 44 Specifications and functions are subject to change without notice...

Страница 47: ...Product information 45 Dimensions Unit mm 742 684 4 680 4 28 8 433 171 171 400 75 100 154 155 56 5 110 5 1271 2 350 7 350 7 100 75 569 8 569 8 1213 6 1209 6 56 5...

Страница 48: ...Product information 46 Unit mm 742 684 4 680 4 28 8 433 154 155 56 5 110 5 1271 2 569 8 1213 6 1209 6 56 5 171 171 400 75 100 350 7 350 7 100 75 569 8...

Страница 49: ...z 720 x 400 70Hz 800 x 600 60Hz 800 x 600 75Hz 1024 x 768 60Hz 1024 x 768 75Hz 1280 x 768 60Hz 1280 x 800 60Hz RB 1280 x 800 60Hz 1280 x 960 60Hz 1280 x 1024 60Hz 1360 x 768 60Hz 1366 x 768 60Hz 1400...

Страница 50: ...Product information 48 1080i 50Hz 1080i 60Hz 1080p 50Hz 1080p 60Hz supported Blank not supported...

Страница 51: ...formation 49 Supported PAP input signal combination Main Left picture signal source AV S Video YPbPr VGA DVI HDMI SDI Display Port Sub Right picture signal source AV S Video YPbPr VGA DVI HDMI SDI Dis...

Страница 52: ...he following Have you turned on the mute function on the display or the input source device Turn off the mute function or increase the audio volume level and try again Are there any loose cable connec...

Страница 53: ...tacle between the remote control and the remote control sensor window Check that the remote control sensor window is not under strong fluorescent lighting or in direct sunlight Check for any devices c...

Отзывы: