02
English
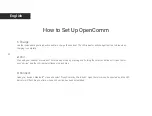
1.
Charge
2.
Pair
3.
Connect
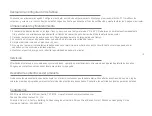
Use the included magnetic induction cable to charge the headset. The LED indicator will change from red to blue when
charging is complete.
Start with your headset powered off. Enter pairing mode by pressing and holding the button until OpenComm
says “pairing” and the LED indicator flashes red and blue.
Open your device’s Bluetooth
®
menu and select “OpenComm by AfterShokz.” OpenComm will say “connected” and the LED
indicator will flash blue one time when a connection has been established.
How to Set Up OpenComm
Содержание ASC100 Series
Страница 1: ...User Guide ...
Страница 2: ......
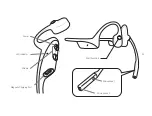
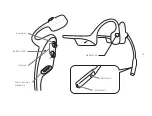
Страница 5: ...03 Magnetic Charging Port LED Indicator Volume Power Multifunction Microphone 1 Microphone 2 ...
Страница 11: ...09 Puerto de carga magnética Indicador LED Volumen Encendido Multifunción Micrófono 1 Micrófono 2 ...
Страница 17: ...15 Port de charge magnétique Voyant LED Volume Alimentation Multifonction Microphone 1 Microphone 2 ...
Страница 23: ...21 Magnetischer Ladeanschluss LED Anzeigen Lautstärke Ein Aus Taste Multifunktionstaste Mikrofon 1 Mikrofon 2 ...
Страница 35: ...33 Porta di caricamento magnetica Spia LED Volume Alimentazione Multifunzione Microfono 1 Microfono 2 ...
Страница 41: ...39 Porta de carregamento magnético Indicador LED Volume Interruptor Multifunções Microfone 1 Microfone 2 ...
Страница 47: ...45 Magnetische laadpoort LED indicatielampje Volume Aan Uit Multifunctie Microfoon 1 Microfoon 2 ...
Страница 59: ...マグネット式充電ポート LEDインジケータ ボリューム 電源 マルチファンクションボタン マイク 1 マイク 2 57 ...
Страница 65: ...마그네틱 충전 단자 LED 표시등 음량 버튼 전원 버튼 다기능 버튼 1번 마이크 2번 마이크 63 ...
Страница 71: ...磁力充电触点 LED指示灯 音量 键 音量 键 开关键 多功能键 麦克风1 麦克风2 69 ...
Страница 77: ...磁力充電觸點 LED指示燈 音量 鍵 音量 鍵 開關鍵 多功能鍵 麥克風1 麥克風2 75 ...
Страница 83: ......
Страница 84: ...8000500046 A1 ...


