background image

Step 6:  

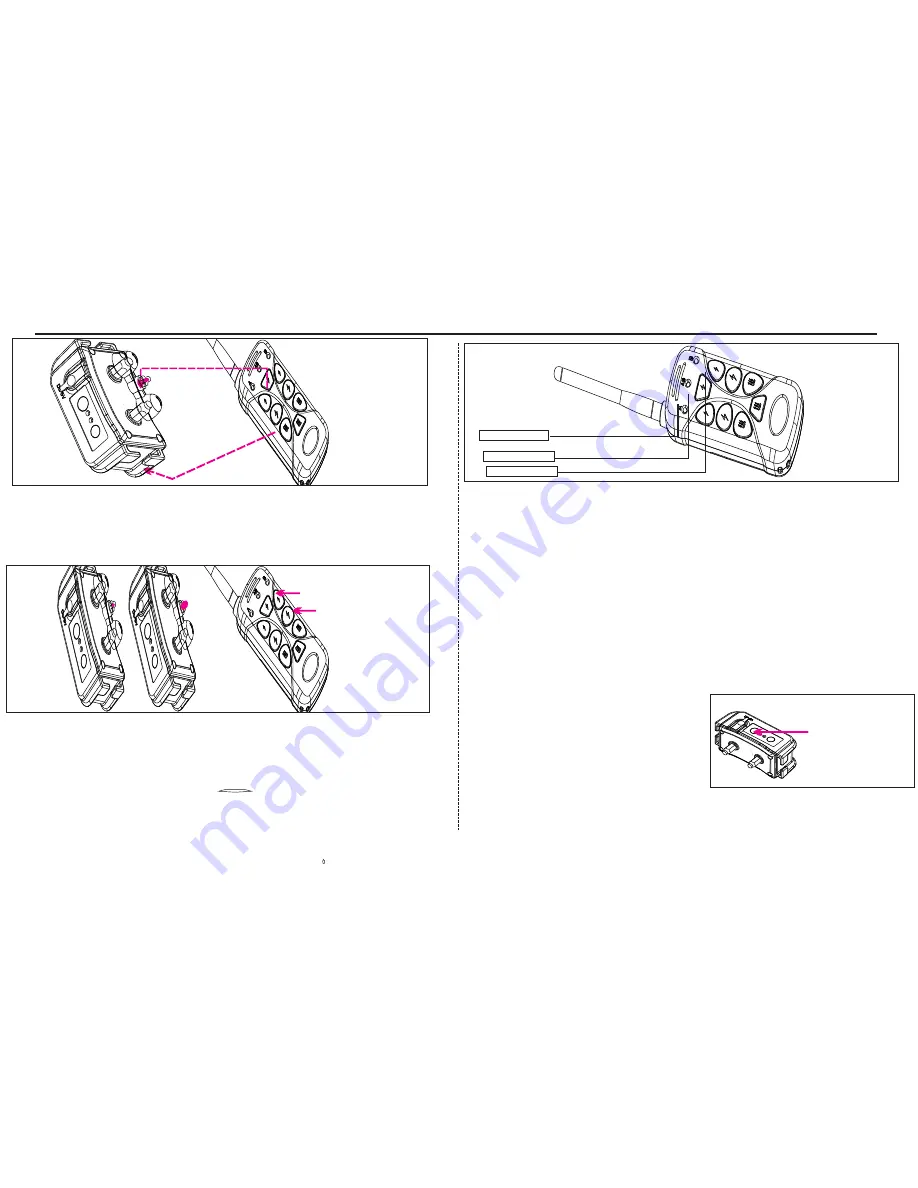
Check the Function buttons (vibrate, shock and strong shock).

 Press the Vibrate button, the receiver will vibrate. To test the shock,

 Cap the shock test kit on the metal prongs, push the shock button. 

If the bulb lights up,  the shock function is ok.

Step7: 

 Adjust shock intensity.  Press the shock button will produce weaker shocking

 effect,  while the strong shock button will produce stronger shocking effect.

Shock

Strong shock

Quick Start 

The 1st dog

The 2nd dog

Both dogs

Step 8: 

Press the three buttons under dog A, the first dog will be 

trained; Press the three buttons under dog B, the second dog will be

 trained; Press the two buttons under dog AB, both dog will be trained.

You need to define one receiver as the first dog, and another receiver 

as the second dog if you need to train two dogs Separately. 


Reset Button
Press and hold
 on Reset button 
for 1 second will
cancel the 
previous sync.

Step 9:


Start to train. Put the collar into the receiver and wear the 

receiver around dog’s neck. Remember to leave one finger place 
between collar and neck, then it’s ready to train.

 Tip 4: After receiver sync with transmitter, if receiver still have power supply and  have been 
manually turned off, just turn it back on. No need to re sync it with he transmitter. But if you 
need to sync  the receiver under different dog 
system, just press and hold the Reset button for  1 
second, then you can sync the receiver under 
another dog system.

-03-

Tip 5: To do a self-test,press the On/Off button of receiver three 
times it should beep, vibrate and shock, indicating a functional unit.


Tip 3:After 3 minutes of inactivity, transmitter will go into sleeping 
mode. To wake it up, just press any of the function key (Vibrate, 
Shock and Strong Shock).

Содержание AT-215

Страница 1: ...R AT 215 Owner s Manual ...

Страница 2: ...www aetertek com Owner s Manual for Professional Remote Dog Trainer AT 215 ...

Страница 3: ...System Included 1 Quick Start 2 3 Trouble Shooting 4 5 Training Tips 6 Safety Guidance 7 Information for Terms of Use Limitation of Liability 8 Warranty Card 9 10 ...

Страница 4: ...Long correction prongs Short correction prongs Test Kit Collar Charger Transmitter Antenna Receiver Long correction prongs Short correction prongs Test Kit Collar Charger AT 215 System Included 01 R Professional Dog Trainer AT 215 ...

Страница 5: ... transmitter If you just finished charging please push any of the function button shock beep vibrate immediately on the transmitter If not you need to turn on receiver by holding on On Off button until the Red LED light stay in solid Once the receiver and transmitter matched the Red LED light turn off and the Blue LED light flashes every 10 seconds Tip 2 If the receiver is already matched with the...

Страница 6: ...ntwodogsSeparately Reset Button Press and hold on Reset button for 1 second will cancel the previous sync Step 9 Start to train Put the collar into the receiver and wear the receiver around dog s neck Remember to leave one finger place between collar and neck then it s ready to train Tip4 Afterreceiversyncwithtransmitter ifreceiverstillhavepowersupplyand havebeen manuallyturnedoff justturnitbackon...

Страница 7: ...3 Make sure the Receiver and Transmitter have enough power E The training system has no effect on my dog 1 Make sure the Receiver is working and the shocking prongs touch dog s skin closely 2 Try increasing the intensity level F Transmitter can t remotely control 1 2 or 1 3 Receivers 1 Make sure you sync different Receiver separately 2 Only in the right dog system can you operate the corresponding...

Страница 8: ...go off for 219 auto mode icon MICROPHONE will disappear for 919 auto mode incon SPEAKER will be hollowed 2 Make sure Receiver has enough power because Receiver will alarm when it runs out of power 3 Make sure any buttons of Transmitter has not been touched 4 Sync Receiver with Transmitter once again K When buying individual Receiver or Transmitter why do I need to double check the edition Aetertek...

Страница 9: ...ed Be consistent with your verbal commands using the same words every time Work with your pet on one behavior at a time to avoid confusion and frustration Use as little stimulus as possible and only to reinforce verbal commands when necessary Do not over correct your dog For example use the beeps as warning by pressing Beep button The dog will become conditioned to the beep preceding the correctiv...

Страница 10: ...he charging hole please dry it before charge the receiver 6 Any collar worn for extended periods can cause a condition similar to bedsores know as Pressure Necrosis To reduce the possibility you must do the followings a Never leave the collar on dog for more than 12 hours per day b Examine the dog s neck daily for any signs of a rash or sore c Supervise your dog during the first 2 days of training...

Страница 11: ...rm injure or provoke Using this product in a way that is not intended could result in violation of Federal State or local laws 4 Limitation of Liability In no event shall Aetertek be liable for any direct indirect punitive incidental special or consequential damages or any damages whatsoever arising out of or connected with the use or misuse of this product Buyer assumes all risks and liability fr...

Страница 12: ...ny incidental or consequential damages To be entitled for 1 year international limited warranty of our dog trainer please fill in the warranty card and keep it safe together with your proof of purchase Failure to provide documentation will void warranty This warranty extends only to original purchaser and is non transferable For Aetertek to Fill in Series No Authorized distributor reseller s signa...

Страница 13: ...e turned on LED light does not turn on Shock correction is not working properly intensity level is not strong enough Vibration correction is not working properly intensity level is not strong enough Beep correction is not working properly intensity level is not strong enough LCD display cannot be turned on back light cannot be turned on Buttons on transmitter do not work properly Collar cannot be ...

Отзывы: