background image

AerAtron >> Silent Efficiency 


IF


THERE


ARE


ANY


PROBLEMS


DURING


INSTALLATION


OF


THE


FAN,


THE


INSTALLER


MUST


CONTACT


THE


AERATRON


HELP


LINE


BEFORE


LEAVING


THE


SITE:


SWISS


PRECISION


+61


410


465


228


Installation - Operation – Maintenance - Warranty


8


Make


LIVE,


GROUND


and


NEUTRAL


connections


from


Mains


Power


(House)


to


Terminal


Block.


Make


LIVE,


GROUND


and


NEUTRAL


connections


from


Remote


Control


Receiver


to


Terminal


Block.


Plug


the


9

Pole


plug


connector


from


the


DC


Motor


into


the


9

Pole


plug


connector


from


the


Receiver.


Preparing


Fan


Motor


Housing


Ensure


that


Motor


Housing


Screw


Covers


are


in


full


open


position


Содержание E502

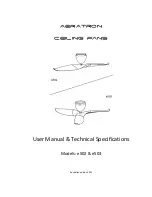
Страница 1: ...AerAtron Ceiling fans User Manual Technical Specifications Models e502 e503 Australian edition 2011 ...

Страница 2: ... Attaching Fan Motor Housing to Motor Assembly 9 Closing Screw Cover 9 Fan Blades and Middle Piece Assembly 10 e502 10 e503 11 Fan Blades to Shaft Assembly 12 Remote Control Set up 13 Code match your transmitter and receiver 13 Code match for Transmitter Hand held and Receiver 13 Technical specifications 14 e503 and e502 14 Sloped Ceiling 15 Care Cleaning 16 If the fan is noisy 16 If the fan rotat...

Страница 3: ...sembly diagrams before installing your new fan This appliance is not intended for use by persons including children with reduced physical sensory or mental capabilities or lack of experience and knowledge unless they have been given supervision or instruction concerning use of the appliance by a person responsible for their safety Children should be supervised to ensure that they do not play with ...

Страница 4: ...ton until ready to be installed After the fan is completely installed check to make sure that all connections are secure to prevent the fan from falling and or causing damage or injury To reduce the risk of personal injury do not bend or damage the motor Drive Shaft or Fan Assembly when handling or installing Aeratron fans are equipped with a self balancing system and do not require manual balanci...

Страница 5: ...on Maintenance Warranty 5 Unpacking your fan Unpack your fan and check the contents Do not discard the carton If warranty replacement or repair is ever necessary the fan should be returned in the original packaging Examine all parts You should have the following Hanger Bracket Motor Assembly Motor Housing Hanger Bracket Fastener Remote Control Receiver Remote Control Transmitter 9V Battery OR HUB ...

Страница 6: ... turning off circuit breaker before commencing work Installation mounted to Ceiling Joist Install mounting bracket to ceiling joist using the screws and washer provided The mounting plate should be able to hold a weight of at least 18kgs NOTE Proper care must be taken when mounting to concrete ceilings For safe mounting these ceilings may require plastic plugs anchors and stronger screws Preparing...

Страница 7: ...nstallation Operation Maintenance Warranty 7 NOTE Installation of multiple fans using independent transmitter require CODE MATCH before installing the receiver see page 13 Installing Remote Control Receiver into hanger bracket Slide Remote Control Receiver After installing receiver re into Hanger Brackets in orientation adjust Fan Motor assembly shown to ensure the drive shaft is vertical ...

Страница 8: ...tion Operation Maintenance Warranty 8 Make LIVE GROUND and NEUTRAL connections from Mains Power House to Terminal Block Make LIVE GROUND and NEUTRAL connections from Remote Control Receiver to Terminal Block Plug the 9 Pole plug connector from the DC Motor into the 9 Pole plug connector from the Receiver Preparing Fan Motor Housing Ensure that Motor Housing Screw Covers are in full open position ...
Страница 9: ...ration Maintenance Warranty 9 Attaching Fan Motor Housing to Motor Assembly Line up fixing hole Install motor housing in Motor Housing with using a clockwise screw hole in chassis Bayonet action and install screw Ensure that Fan Motor Housing fixing point with hole not bayonet slot is aligned with chassis arm from which fixing screw was removed see page 6 Closing Screw Cover Close all three Screw ...

Страница 10: ...ece Assembly CONSTANTLY HANDLE FAN WITH CARE AT ALL TIMES TO AVOID DAMAGING THE FAN SURFACE e502 Place e502 Hub Upper onto a clean working area Line up the three mounting holes in the e500 Fan Blade with the two screw boss and hole in the Hub Upper Fix the e500 Fan Blade tight and firm using 2 Hub screws Fix second e500 Blade tight and firm using 2 Hub screws With care turn the fan over and fasten...

Страница 11: ...AN WITH CARE AT ALL TIMES TO AVOID DAMAGING THE FAN SURFACE e503 Place e503 Hub Upper onto a clean working area Line up the three mounting holes in the e500 Fan Blade with the two screw boss and hole in the Hub Upper Fix the e500 Fan Blade tight and firm using 2 Hub screws Fix second and third e500 Blades tight and firm using 2 Hub screws for each Blade With care turn the fan over and fasten the e...

Страница 12: ...ONTACT THE AERATRON HELP LINE BEFORE LEAVING THE SITE SWISS PRECISION 61 410 465 228 Installation Operation Maintenance Warranty 12 Fan Blades to Shaft Assembly Rotate Screw Cover to hide screw head Note Rotating the Screw Cover will prevent Pivot screw from falling out should it become loose Pivot Screw ...

Страница 13: ...upport heating system to exchange temperature Code match for Transmitter Hand held and Receiver 1 Set the code to be encoded by the Dip Switch of transmitter 2 Switch on the main power to activate the receiver 3 Within 3 minutes after the power is turned on press the transmitter s ON OFF key and do not release for 5 seconds 4 Receiver issues four beep short sounds which indicates successful code m...

Страница 14: ...ty 14 Technical specifications e503 and e502 Colour white silver black Remote control Hand Held RF Dimensions e502 as e503 Operating speed rpm Power Usage Watt e503 Speed 1 51 rpm 3 8 W Speed 2 70 rpm 4 5 W Speed 3 103 rpm 7 5 W Speed 4 119 rpm 9 5 W Speed 5 139 rpm 13 6 W Speed 6 158 rpm 18 W e502 Speed 1 52 rpm 3 9 W Speed 2 73 rpm 4 5 W Speed 3 113 rpm 7 7 W Speed 4 131 rpm 9 6 W Speed 5 153 rp...

Страница 15: ...cy IF THERE ARE ANY PROBLEMS DURING INSTALLATION OF THE FAN THE INSTALLER MUST CONTACT THE AERATRON HELP LINE BEFORE LEAVING THE SITE SWISS PRECISION 61 410 465 228 Installation Operation Maintenance Warranty 15 Sloped Ceiling ...

Страница 16: ...on below WARNING Except for items 1 and 2 below the following require access to areas of the fan which carry lethal voltage There are no other checks which can be carried out by the user Apart from items 1 and 2 the following must be carried out by properly qualified personnel If the fan does not operate properly or turns on or off at random 1 If applicable change the battery in the Remote Control...

Страница 17: ...ts even slightly damaged or bent during vigorous cleaning or bumping can cause wobble and noise This is not covered under warranty but care during maintenance and cleaning should prevent this from occurring Ceiling Fan Warranty You must have the original purchase receipt or bill of sale to make a warranty claim No claim will be accepted unless proof of date of purchase is available at the time of ...

Страница 18: ...y a licensed electrician 3 Repair of a ceiling fan used incorrectly accidentally damaged modified in any way or not serviced in accordance with the maintenance instructions 4 Travelling costs incurred by Aeratron Pty Ltd personnel or service agents and or the cost of transporting and insuring the ceiling fan between the nearest Aeratron Pty Ltd agents service depot and its normal location These co...

Страница 19: ...tron ceiling fan warranty details Please File with your Purchase Receipt Customer Details Name ______________________________________________ Address ____________________________________________ Post Code ___________________________________________ Phone Number _______________________________________ Fan Details Model ______________________________________________ Colour __________________________...

Страница 20: ... PROBLEMS DURING INSTALLATION OF THE FAN THE INSTALLER MUST CONTACT THE AERATRON HELP LINE BEFORE LEAVING THE SITE SWISS PRECISION 61 410 465 228 Installation Operation Maintenance Warranty 20 Thank you Your AerAtron team Australian edition 2011 ...

Отзывы: