


8
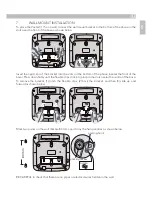
Fix two screws (7 mm head screws required, not supplied) at the marked locations, leaving
approximately 7 mm between the wall and the screw head.
Hang the telephone on the screws using the wall mount slots. You may need adjust the screws so that
the telephone is securely fixed and does not wobble.
Place the handset on the cradle with the parking hook on the cradle arranged to fit in the parking
recess under the earpiece on the handset.
8
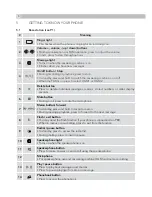
SETTING UP YOUR TELEPHONE
Note:
The system will time out if you leave more than 10 seconds between key presses.
8.1 Set
language
With the phone in standby mode;
t
Press the menu button
.
>The display shows “OPTIONS MENU“.
t
Press the up button
to go to the language setting.
>The display shows “SET LANGUAGE“
t
Press the OK button
to confirm.
t
Press the up
or down
button to select the language.
t
Press the OK button
to confirm.
t
Continue with programming, or press the stop button
to return to standby mode.
9 TELEPHONE
OPERATION
9.1 Ringer
volume
The ringer high / low switch located at the back of the base unit, allows you to adjust the volume of
the ringer.
High volume
Low volume
9.2
To make a call
t
Lift the handset or press the speakerphone button on the base unit.
>Check for dial tone.
t
Dial the telephone number.
>The display shows the duration of the call in minutes and seconds.
OR
Using pre-dialling:
t
Dial the telephone number.
>If you make a mistake you can correct it by using the delete button
to delete digits and then
adding the right ones.
t
Lift the handset or press the speakerphone button on the base unit to dial out the number.


