background image

14

2. Antes de la primera puesta en servicio, el aparato se tiene que instalar cor-
rectamente conforme al apartado "Instalación". En particular, se tiene que
prestar atención a que la tensión y la frecuencia de red coincidan con los
datos del aparato.
3. Retire el acumulador de frío del aparato.
4. Espere hasta que el congelador haya alcanzado los 18° C bajo cero, que
es la temperatura óptima de almacenamiento, y meta el acumulador de frío
en uno de los cajones para que se congele.
5. Al cabo de 24 horas coloque el acumulador de frío delante en el cajón
más alto.
6. Por favor, vuelva a congelar de la misma manera el acumulador de frío
cuando se haya descongelado p. ej. después de la limpieza del aparato fri-
gorífico.

Puesta en servicio

1. Conectar el enchufe de la red en el tomacorriente.
2. Mantener accionada la tecla ON/OFF. La indicación de temperatura y la
iluminación de fondo se encienden y el aparato se conecta.
Ajuste de temperatura especificado en fábrica: +5 °C para el frigorífico, -18
°C para el congelador.
Cuando el congelador está en marcha y el frigorífico se encuentra desco-
nectado, éste último se puede conectar pulsando una de las teclas del fri-
gorífico “+” o “-”.
3. Ajuste de la temperatura deseada para el compartimento frigorífico (véa-
se capítulo "Ajuste de temperatura").
Los productos pueden almacenarse inmediatamente después de la conexión
del aparato frigorífico porque la temperatura en el compartimento frigorí-
fico se alcanza con rapidez.
4. Ajustar la temperatura a -18 °C o a una más fría (véase capítulo "Ajustar
la temperatura").

¡Importante! 

Hay que esperar antes de introducir los productos en el con-

gelador a que la temperatura del compartimento congelador haya alcanza-
do -18 °C o hasta que se apaguen las señales rojas de la alarma.

Ajustar la temperatura

Con las teclas para la selección de temperaturas puede ajustarse separada-
mente la temperatura deseada para el compartimento frigorífico y para el
congelador.
1. Oprima una de las teclas „+“ (MÁS CALOR) o „-“ (MÁS FRÍO).
El indicador de temperaturas cambia de función y visualiza parpa-deando
la temperatura NOMINAL vigente en ese momento.
2. Para ajustar el aparato a temperaturas más altas, oprima la tecla „+“ (MÁS
CALOR). Para ajustarlo a temperaturas más bajas, oprima la tecla

Содержание SANTO 80318-68 KG

Страница 1: ...SANTO 80408 2 KG Frigorífico congelador Fridge freezer Instrucciones de uso Operating Instructions ...

Страница 2: ...on el triángulo de aviso y o mediante señales con palabras Advertencia Precaución Atención se resaltan algunas advertencias muy importan tes para vuestra seguridad o para la funcionalidad de vuestro aparato Es terminantemente necesario ajustarse a cuanto sigue Después de este signo hay informaciones muy importantes acerca del con trol y las utilizaciones prácticas del aparato Con la flor se indica...

Страница 3: ...de mando 11 Puesta en servicio 14 Desconexion del aparato frigorífico 18 Accesorios internos 21 Posicionamento das prateleiras 21 Posicionamento das prateleiras na porta 21 Compartimiento para botellas 21 Control de la humedad 22 Cajón 22 Refrigeración de los alimentos y de las bebidas 23 Congelación y sobrecongelación 24 Calendario de congelación 25 Cubitos de hielo 25 Masa eutectica 25 Descongel...

Страница 4: ...to no presente eventuales daños debidos al trans porte No conectar a la red en ningún caso un aparato estropeado Si presenta daños dirigirse al proveedor Sustancia refrigerante El aparato contiene en el circuito refrigerante un gas natural denominado Isobutano R600a altamente tolerado por el medio ambiente pero que de todas maneras es inflamable Durante el transporte y la instalación del aparato s...

Страница 5: ...bidas superalcohólicas que se pueden poner en el congelador No tragarse los helados ni los cubitos de hielo recién sacados del conge lador El helado o el hielo muy fríos se pueden congelar en contacto con la lengua o los labios provocando heridas No tocar los productos congelados con las manos mojadas Las manos se podrían congelar sobre el producto No utilizar nunca pequeños electrodomésticos por ...

Страница 6: ...r el cable de red sacar o destruir los eventuales cierres de bloqueo De est manera se evita que niños puedan quedar encerrados en el aparato mientras juegan Peligro de sofocación y se evita que puedan encontrarse en otras situaciones peligro sas para su vida Advertencias acerca del desguace El aparato no debe ser tirado a la basura sino que debe ser entregado a organizaciones autorizadas para su e...

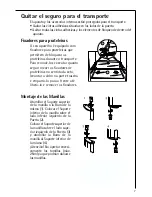
Страница 7: ... executar quanto segue mexer os fixadores de prateleiras no sentido da seta levantar o vidro na parte traseira e empurrá lo para a frente até liberá lo e remover os fixadores A C B Montaje de las Manillas Atornillar el Soporte superior de la manilla a la Barra de la mísma 1 Colocar el Soporte inferior de la manilla sobre el lado inferior izquierdo de la Puerta 2 Colocar el Soporte superior de la m...

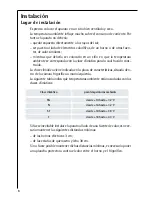
Страница 8: ...Lugar de instalación Es preciso colocar el aparato en un sitio bien ventilado y seco La temperatura ambiente influye mucho sobre el consumo de corriente Por tanto el aparato no debería quedar expuesto directamente a los rayos del sol ser puesto al lado de elementos caloríficos de un horno o de otras fuen tes de calor similares mientras que debería ser colocado en un sitio en que la temperatura amb...

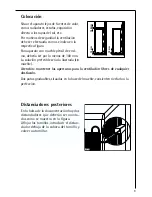
Страница 9: ...parato lejos de fuentes de calor como radiadores estufas exposición directa a los rayos del sol etc Por motivos de seguridad la ventilación debe ser efectuada como se indica en la respectiva figura Para aparato con mueble pénsil de enci ma debería ser por lo menos de 100 mm La solución preferible seria la ilustrada sin mueble Atención mantener las aperturas para la ventilación libres de cualquier ...

Страница 10: ...aracterísticas se cor respondan con los de la red eléctrica general de alimentación por ejemplo AC 230 240 V 50 Hz o bien 220 230 V 50 Hz por tanto de 230 a 240 Voltios en corriente alterna 50 Hertz La placa de características se encuentra dentro de la cámara frigorífica a mano izquierda Antes de la primera puesta en servicio Limpiar el interior del aparato y todos los accesorios antes de poner en...

Страница 11: ...las guardan relación con el indicador de temperaturas Basta con apretar una de las dos teclas MÁS CALOR o MÁS FRÍO para que el indicador pase de la temperatura EFECTIVA el indi cador de temperaturas se enciende a la temperatura NOMINAL el indicador de tem peraturas parpadea Pulsando otra vez cualquiera de las dos teclas la temperatura NOMINAL avanza 1 C Si no se aprieta ninguna de las teclas el in...

Страница 12: ...l indicador de temperatura indi ca al accionar la tecla RESET durante 5 segundos la temperatura más alta hasta la cual se han calentado los alimentos Si el aparato sufre una avería la indicación de temperatura visualizará lo siguiente un cuadrado o una letra en el indicador de temperatura para el frigorífi co para indicar un fallo en el frigorífico un cuadrado o una letra en el indicador de temper...

Страница 13: ...iento SHOPPING FROSTMATIC COOLMATIC FROST MATIC y COOLMATIC HOLIDAY campo vacío durante el funcionamiento normal Alarma TEMPERATURE en caso de alarma de temperatura Fallo de red indicación POWER Fallo funcional indicación SERVICE Tecla RESET Con la tecla RESET se puede desactivar la señal acústica de advertencia como por ejemplo para desactivar señal de advertencia de Puerta Abier ta cuando se col...

Страница 14: ...ando el congelador está en marcha y el frigorífico se encuentra desco nectado éste último se puede conectar pulsando una de las teclas del fri gorífico o 3 Ajuste de la temperatura deseada para el compartimento frigorífico véa se capítulo Ajuste de temperatura Los productos pueden almacenarse inmediatamente después de la conexión del aparato frigorífico porque la temperatura en el compartimento fr...

Страница 15: ...tante No deje de controlar a intervalos regulares el piloto rojo de alarma y el indicador de temperaturas para ver si el congelador mantiene la temperatura de almacenaje correcta Modos de funcionamiento SHOPPING La función SHOPPING es apta para el enfriamiento rápido de grandes can tidades de alimentos en el frigorífico así como pequeñas cantidades de ali mentos congelados en el congelador p ej de...

Страница 16: ...ra una fiesta 1 Vaya pulsando la tecla MODE hasta que parpadea COOLMATIC en pan talla Al cabo de aprox 4 segundos el modo de funcionamiento COOLMATIC está activado y la indicación COOLMATIC encendida La indicación de termóme tro en la pantalla para el frigorífico muestra una columna de temperatura en descenso La función COOLMATIC proporciona ahora una intensiva refrigeración La temperatura PRESCRI...

Страница 17: ...dejarla abierta sin que por ello se produzcan olores desa gradables o moho La ventaja se impide que se cierre la puerta por sí sola o inintencionalmente por otras personas durante la ausencia Sin la conmu tación para vacaciones se produciría inevitablemente olores desagradables y o moho 1 Para activar el modo de vacaciones vaya pulsando la tecla MODE hasta que parpadea HOLIDAY en pantalla Al cabo ...

Страница 18: ...nto el proceso de desconexión se puede cancelar soltando las teclas y Con el frigorífico desconectado se puede activar durante el funcionamiento del congelador únicamente el modo FROSTMATIC Desconexión del congelador 1 Mantenga pulsadas simultáneamente las teclas y para el congela dor En la indicación de temperatura para el congelador se produce un denominado descuento contando hacia atrás de 3 a ...

Страница 19: ...e temperatura para el frigorífico muestra durante 5 segun dos la temperatura más alta que se ha alcanzado durante la alarma de tem peratura en el frigorífico A continuación la indicación de temperatura deja de parpadear y vuelve a conmutar a la temperatura actual en el frigorífico La indicación TEMPERATURE y la iluminación de fondo roja siguen parpa deando mientras persiste la alarma de temperatur...

Страница 20: ...dece probablemente a las siguientes cau sas las puertas se abre muy a menudo o permanece abierta largo rato se ha almacenado cantidades regulares de comestibles tibios o calien tes temperatura ambiente alta el aparato frigorífico ha sufrido un desperfecto Fallos funcionales Si el sistema electrónico del aparato detecta un defecto técnico que nece sita ser reparado por el Servicio postventa suena u...

Страница 21: ...ada em sentido contrário Posicionamento das prateleiras na porta Conforme as necessidades os compartimento de prateleira na porta podem ser extraidos para cima e portanto inseridos em outros apoios D338 Compartimiento para botellas Almacene las botellas con el cuel lo hacia adelante Atención Coloque echadas sólo las botellas sin abrir Para guardar botellas ya abiertas puede usted alzar el compar t...

Страница 22: ...eratura más fría y una menor humedad Cajón El cajón es adecuado para conser var fruta y verdura En el interior del cajón se encuen tra un separador que puede colo carse en varias posiciones para obtener la distribución más ade cuada en cada caso En el fondo del cajón hay una rejilla con el fin de evitar el con tacto de los alimentos con la humedad que podría formarse y depositarse en la parte infe...

Страница 23: ...erla sobre el vidrio encima del cajón de la verdura En esta posición se podrá conservar por uno o dos días a lo sumo Alimentos cocidos platos fríos etc se deben tapar bien y se pueden poner en cualquier sitio del frigorífico Fruta y verdura se deben poner después de lavarlas en el los cajón cajo nes previstos Mantequilla y queso se deben poner en los contenedores previstos o se deben envolver en h...

Страница 24: ...den perder su estanqueidad Peligro de explosión No guardar nunca contenedores con sustancias inflamables como por ejemplo aerosoles encendedores y cartuchos de abastecimiento etc en el frigorífico Las botellas y las latas no se deben poner nunca en el congelador Pueden explotar tan pronto se congela su contenido mientras que los líquidos que tienen anhídrido carbónico bebidas con gas pueden llegar...

Страница 25: ...ongelador 2 Para sacar los cubitos listos basta torcer la bandeja o ponerla por poco tiem po debajo de un chorro de agua corriente Atención Se recomienda no utilizar utensilios puntiagudos ni con cantos para desprender la bandeja que eventualmente se haya quedado pegada Utilizar la paleta para rascar la escarcha incluida en el suministro Masa eutéctica El aparato puede venir equipado con una o var...

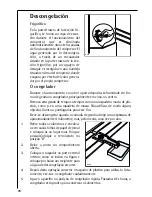
Страница 26: ...empos a tempos com uma raspadeira macia de plá stico como p ex uma rapadeira de massa Não utilizar de modo algum objectos duros ou pontiagudos para esse fim Deve se descongelar quando a camada de geada atingir uma espessura de aproximadamente 4 milímetros mas pelo menos uma vez por ano 1 Retire todos os alimentos e envolva os em varias folhas de papel de jornal e coloque os no lugar mais frio que ...

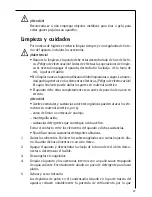
Страница 27: ...tes de ponerlo de nuevo en servicio Atención Aceites esenciales y sustancias solventes orgánicas pueden atacar los ele mentos en material sintético por ej zumo de limón o cortezas de naranja mantequilla ácida sustancias detergentes que contengan ácido acético Evitar el contacto entre los elementos del aparato y dichas sustancias No utilizar nunca sustancias detergentes abrasivas 1 Quitar los alime...

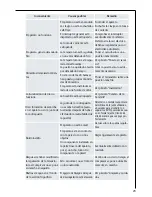
Страница 28: ...nfríen Abrir la puerta sólo por el tiempo necesario No seleccionar una temperatura más fría que lo necesario Poner los alimentos a descongelar en la sección frigorífico El frío genera do por la descongelación contribuye en enfriar la sección frigorífico Mantener constantemente limpio el condensador situado en la parte tra sera del aparato Qué hacer si Remedios en caso de inconvenientes Probablemen...

Страница 29: ...an puesto grandes cantida des de alimentos Abrir la puerta sólo lo estric tamente necesario Gran formación de escarcha en el aparato o en la junta de la contrapuerta La junta de la contrapuerta no es más hermética even tualmente después de haber efectuado la reversibilidad de la puerta Calentar con cautela los puntos no herméticos de la junta utilizando un secador para el cabello no superar los 50...

Страница 30: ...de la toma de red o qui tar el fusible Características de la bombilla 220 240 V máx 25 W empalme E 14 Para la sustitución eventual de la lámpara oprimir el enganche posterior y al mismo tiempo sacar la tapa en dirección de las flechas Atención Sustituir la lámpara por otra de igual potencia la potencia máxi ma está indicada en el difusor de luz ...

Страница 31: ...de la mano os aconsejamos apuntarlos aquí Advertencia Una llamada al servicio técnico no justificada está sujeta a la obligación de pagar los gastos también durante la garantía Disposiciones Normas Directivas El aparato ha sido proyectado para la utilización doméstica y ha sido fabri cado según las normas vigentes para esta clase de aparato Para su pro ducción han sido así mismo tomadas medidas es...

Страница 32: ...g of the appliance are stressed with a warning triangle and or with signal words Warning Caution Attention Please observe the following carefully Supplementary information regarding operation and practical applications of the appliance appear after this symbol Tips and notes concerning economical and environmentally sound use of the appliance are marked with the flower The operating instructions c...

Страница 33: ...ol panel 40 Temperature adjustment 44 Switching the Appliance Off 47 Temperature warning 49 Interior Accessories 50 Storage shelves 50 Door rack 50 Humidity control 50 Drawer 51 Bottle rack 51 Fresh food refrigeration 52 Freezing and storing frozen food 53 Preparation of Ice Cubes 54 Freezing calender 54 Ice pack 54 Defrosting 55 Cleaning and Care 56 Energy Saving Tips 57 What to do if 58 Correcti...

Страница 34: ...e should a damaged appliance be plugged in In the event of damage please contact the vendor Refrigerant The refrigerant isobutane R600a is contained within the refrigerant circuit of the appliance a natural gas with a high level of environmental compa tibility which is nevertheless flammable During transportation and installation of the appliance be certain that none of the components of the refri...

Страница 35: ...ot operate any electrical appliances in the refrigerator freezer e g electric ice cream makers mixers etc Before cleaning the appliance always switch off the appliance and unplug it or pull the house fuse or switch off the circuit breaker When unplugging always pull the plug from the mains socket do not pull on the cable In case of malfunction If the a malfunction occurs on the appliance please lo...

Страница 36: ...ug from mains sever the power cable remove or destroy any snap or latch closures This eliminates the danger that playing children lock them selves into the appliance danger of suffocation or place themselves into other life endangering situations Disposal The appliance may not be disposed of with domestic waste or bulky refuse The refrigerant circuit especially the heat exchanger at the back of th...

Страница 37: ...des is required in order to prevent the for mation of condensation on the outside of the appliance Installation Installation Location The appliance should be set up in a well ventilated dry room Energy use is affected by the ambient temperature The appliance should therefore not be exposed to direct sunlight not be installed next to radiators cookers or other sources of heat only be installed at a...

Страница 38: ...ssipation of heat gene reted during operation Proceed in the sequence illustrated by the figures D594 Fitting the Door Handles 1 Screw the top handle bracket to the handle rod 1 Fit the bottom handle bracket on the lower left hand side of the door 2 2 Fit the top handle bracket on the top left hand side of the door 3 and screw the handle rod to the bot tom handle bracket 4 Attention Do not overtig...

Страница 39: ...nating current 50 Hertz The rating plate is inside the appliance on the left A correctly installed earthed socket is required for the electrical supply The supply must have a fuse rating of at least 10 Amps If the socket is not accessible once the appliance is built in the electrical installation must include suitable means of isolating the appliance from the mains e g fuse cut out current trip or...

Страница 40: ...cator for freezer section with FROSTMATIC Temperature setting buttons The temperature is adjusted using the WARMER and COLDER but tons These buttons are connected to the temperature display The temperature display is switched over from the display of the ACTUAL temperature Temperature display is illuminated to the display of the DESI RED temperature Temperature display flashes by pressing one of t...

Страница 41: ...of the freezer section When the temperature is being adjusted a flashing display indicates the fridge or the freezer compartment temperature currently set DESIRED tem perature Tip When changing the temperature setting wait about 24 hours until the temperature display has stabilised When there is a temperature warning for the freezer compartment if the RESET button is activated the temperature disp...

Страница 42: ...e appears in the display To return to normal operation press the MODE button repeatedly until no words appear in the display Text display The names of the various operating modes that can be set with the MODE button and the words indicating an alarm power cut or electrical fault appear in the text display Operating modes SHOPPING FROSTMATIC COOLMATIC FROSTMATIC and COOLMATIC HOLIDAY empty field wh...

Страница 43: ...the cold accumulation block into a drawer only after the optimal storage temperature of 18 C has been reached and allow to freeze 5 After 24 hours place the cold accumulation block at the front of the upper drawer 6 Re freeze the thawed cold accumulation block in the same fashion e g after cleaning the appliance Initial Start Up 1 Insert plug into mains socket 2 Press and hold down the ON OFF butt...

Страница 44: ...ustable temperature range for the refrigerator compartment 3 C to 8 C HOLIDAY 14 C Note 5 C for the refrigerator compartment and 18 C for the freezer compartment should be considered cold enough as a storage temperature 3 When the buttons are not further pressed after an adjustment has been made after a short period approx 5 sec the temperature display switches over and again displays the ACTUAL t...

Страница 45: ...eezer section runs for 1 hour in continuous operation 1 Press the MODE button repeatedly until SHOPPING is flashing in the display After approx 4 seconds the operating mode SHOPPING is activated the SHOPPING indicator lights up Both thermometer indicators in the display show a falling temperature column The SHOPPING function is automatically switched off after 6 hours The SHOPPING indicator will g...

Страница 46: ...and COOLMATIC functions are combined a desired temperature of 3 C is automatically set for the fridge section for 6 hours Cooling for the freezer section runs for 52 hours in continuous operation 1 Press the MODE button repeatedly until FROSTMATIC and COOLMATIC are flashing in the display at the same time After approx 4 seconds the operating mode FROSTMATIC and COOLMATIC is activated the FROSTMATI...

Страница 47: ...ut ton In both temperature displays there is a countdown from 3 to 1 After 1 is reached OF is displayed briefly then the fridge section and the free zer section are switched off The temperature displays go out Before the countdown has been completed the switch off procedure can be cancelled by releasing the ON OFF button Switching off fridge section when freezer section is switched on Press and ho...

Страница 48: ...ating state as before the interruption of main power If the appliance is not to be used for an extended period 1 Switch appliance off by pressing and holding the ON OFF button see above 2 Remove the mains plug or switch off 3 Defrost freezer compartment and clean thoroughly see section Main tenance and Cleaning 4 Leave the doors open after defrosting to avoid accumulation of odours Control and Inf...

Страница 49: ...erature in the freezer section rises above 11 C In addi tion the temperature display for the freezer section flashes If the temperature in the freezer section falls back below 11 C the alarm automatically switches itself off The TEMPERATURE indicator and the red back lighting continue to flash 1 You can turn off the alarm and the red back lighting using the RESET but ton For 5 seconds the temperat...

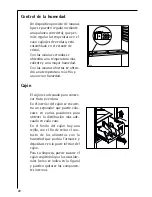
Страница 50: ...l The glass shelf incorporates a device with slits adjustable by means of a sli ding lever which makes it possible to regulate the temperature in the vege table drawer s Close the slots to obtain a warmer temperature and greater humidity Open the slots to obtain a cooler temperature and less humidity PR271 Function Errors If the appliance s electronics recognise a technical problem that has to be ...

Страница 51: ...es from any humidity that may form on the bottom surface To remove the drawer use the side handles as shown in the drawing All parts inside the drawer can be removed for cleaning purposes Bottle rack Place bottles in the rack with the bottleneck to the front Important Only store unopened bottles horizontally The bottle rack can be tilted for storing opened bottles To do this pull the bottle rack f...

Страница 52: ...y store in this way only one or two days at the most Cooked foods cold dishes etc these should be covered and may be placed on any shelf Fruit and vegetables these should be thoroughly cleaned and placed in the special drawer s provided Butter and cheese these should be placed in special airtight containers or wapped in aluminium foil or polythene bags to exclude as much air as pos sible Milk boot...

Страница 53: ...cond time Containers with flammable gases or liquids can leak at low temperatures There is a risk of an explosion Do not store any containers with flamma ble materials such as for example spray cans fire extinguisher refill car tridges etc in the refrigerator freezer Bottles and cans must not be placed in the freezer They can burst when the contents freeze high carbonate content drinks can even ex...

Страница 54: ...he numbers indicate storage times in months for the appropriate types of frozen goods Whether the upper or lower value of the indicated sto rage time is valid depends on the quality of the foods and pre treating before freezing The lower value applies to foods with high fat content Ice pack There are two ice packs in one drawer of the freezer In the event of a power failure or malfunction the ice ...

Страница 55: ...ner complete defrosting should be carried out as follows 1 Remove the frozen food from the freezer wrap it in several layers of newspaper and put it in a very cool place 2 Switch off the appliance and pull out the plug or remove or unscrew the safety fuses 3 Leave the freezer compartment door open 4 Insert the plastic scraper into the recess provided under the defrost water channel and place a col...

Страница 56: ... to the damage of plastic parts The appliance must be dry before it is placed back into service Attention Ethereal oils and organic solvents can attack plastic parts e g lemon juice or the juice from orange peals butyric acid cleansers which contain acetic acid Do not allow such substances to come into contact with appliance parts Do not use any abrasive cleansers 1 Remove frozen food and the food...

Страница 57: ...pliance 7 After everything is dry place appliance back into service Energy Saving Tips Do not install the appliance near cookers radiators or other sources of warmth High ambient temperatures cause longer more frequent opera tion of the compressor Ensure sufficient air circulation and exhaust at the appliance base and at the back wall of the appliance Never cover air vent openings Do not place war...

Страница 58: ...s are to be corrected by an electrician Appliance cools too much Temperature is set too cold Turn the temperature regula tor to a warmer setting tem porarily What to do if Correcting Malfunctions A malfunction may be caused by only a minor fault that you can rectify yourself using the following instructions Do not perform any other work on the appliance if the following information does not provid...

Страница 59: ...e component out of the way Move the appliance slightly Readjust the feet Changing the light bulb Warning There is a risk of electric shocks Before changing the light bulb switch off the appliance and unplug it or pull the fuse or the circuit breaker Light bulb data 220 240 V 1 To switch off the appliance press the ON OFF button 2 Unplug the mains plug 3 To change the light bulb press on the rear h...

Страница 60: ...May 1989 including guideline change notice 92 31 EWG EMV guideline Customer Service If you cannot find the remedy for a malfunction in these operating instruc tions please contact your dealer or our customer service department Addresses and telephone numbers are listed in the accompanying booklet Guarantee Conditions Customer Service Locations Selective ordering of replacement parts can save unnec...

Страница 61: ......

Страница 62: ......

Страница 63: ......

Страница 64: ...AEG Hausgeräte GmbH Postfach 1036 D 90327 Nürnberg http www aeg hausgeraete de Copyright by AEG 2223 407 92 02 07 Con reserva de modificaciones Subject to change without notice ...

Отзывы: