background image

Interior Accessories

26

818 17 59-00/5

Bottle rack

Place bottles in the rack with the 
bottleneck to the front. 

Important:

 Only store unopened 

bottles horizontally. 

The bottle rack can be tilted for 
storing opened bottles. 

0


1.

To do this pull the bottle rack for-
ward until it can be tilted 
upwards, then slide the front sup-
port into the next level up. 

Trays and Compartments

Vario tray-set 

The two large fruit and vegetable trays can be divided with an 
adjustable partition (not included with all models).

Bottle Holder

(not included with all models)

Some models are equipped with a 
bottle holder in the bottle compart-
ment. This is used to prevent 
individual bottles from falling over 
and can be slid sideways.

Содержание SANTO 3150-7 KG

Страница 1: ...SANTO 3150 7 KG Electronic Refrigerator Freezer Combination Operating Instructions 818 17 59 00 5 ...

Страница 2: ...tion and practical uses of the appliance appear after this symbol 2 Tips and notes concerning economical and environmentally sound use of the appliance are marked with the cloverleaf Explanations of the technical terminology used in the operating instructions can be found at the end in the section Technical Terminology The operating instructions contain instructions for the correction of possible ...

Страница 3: ...lignment 10 Electrical Connection 11 Reversing the Door 12 Appliance Description 15 View of Appliance 15 Freezer tray with Cold Accumulation Block 16 Control Panel 17 Temperature setting buttons 18 Temperature Displays 18 Prior to Initial Start Up 19 Initial Start Up 20 Temperature Adjustment 21 COOLMATIC FROSTMATIC 21 COOLMATIC 21 FROSTMATIC 22 Switching the Appliance Off 22 Holiday Mode 23 Contr...

Страница 4: ...tion of Ice Cubes 29 Defrosting 30 The refrigerator is defrosted automatically 30 Freezer Compartment Defrosting 30 Hints and Tips 31 Normal Operating Sounds 31 Food Storage 31 Energy Saving Advice 32 Maintenance and Cleaning 32 Internal Cleaning 32 External Cleaning 33 Replace Light Bulb 33 Something not Working 34 Technical Terminology 36 Regulations Standards Guidelines 37 Guarantee Conditions ...

Страница 5: ...a cable available from your local Service Force Centre Any electrical work required to install this appliance should be carried out by a qualified electrician or competent person Parts which heat up should not be exposed Whenever possible the back of the appliance should be close to a wall but leaving the required distance for ventilation as stated in the installation instructions The appliance sh...

Страница 6: ...use frost freezer burns if consumed straight from the freezer compartment Do not remove items from the freezer compartment if your hands are damp wet as this could cause skin abrasions or frost freezer burns Bottles and cans must not be placed in the freezer They can burst when the contents freeze Manufacturers recommended storage times should be adhered to Refer to relevant instructions Maintenan...

Страница 7: ...aper Please dispose of the packaging with due care for the environment Old Appliances When disposing of your old appliance Make the appliance unusable by cutting off the cable and remove any door catches to ensure small children cannot be trapped inside Help to keep your country tidy use an authorised disposal site Appliance Transport Two persons are required for transport of the appliance There a...

Страница 8: ...d Before Use Packaging 0 1 Remove all adhesive tape and packaging from the interior of the appli ance 3 Any remnants of adhesive can be removed with white spirit 2 Remove the transport protection pieces and pull off the adhesive tape 3 Wash the inside of the appliance with lukewarm water with a little bicarbonate of soda added 5 ml to 0 5 litre of water Do not use soap or detergent as the smell ma...

Страница 9: ... the appliance is affected by the ambient temperature The appliance should therefore not be exposed to direct sunlight not be installed next to radiators cookers or other sources of heat only be installed at a location whose ambient temperature corresponds to the climate classification for which the appliance is designed The climate classification can be found on the rating plate which is located ...

Страница 10: ...anging cabinet a clearance of at least 10 cm between the top of the appliance and the cabinet above it must be maintained Please check whether after installing your appliance and especially after reversing the door the door seal seals tightly A badly fitting door seal may lead to heavy frosting and a higher power consumption see also Something not working Appliance Alignment 0 1 The appliance leve...

Страница 11: ...loured in accordance with the following code Green and Yellow Earth Blue Neutral Brown Live As the colours of the wires in the mains lead of this appliance may not correspond with the coloured markings indentifying the terminals in your plug proceed as follows 1 The wire coloured green and yellow must be connected to the terminal marked with the letter E or by the earth symbol or coloured green an...

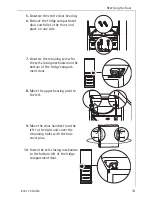
Страница 12: ...ing cover on the plinth from the left Refit to the right 2 Close the freezer compartment door Open the fridge compart ment door and unscrew the retaining screw for the self clos ing mechanism on the top of the freezer compartment door 3 With the freezer compartment door closed remove the cross head screws from the lower door bearing and remove the door bearing downwards 4 Move the bearing pivot fr...

Страница 13: ... side 7 Unscrew the retaining screw for the self closing mechanism on the bottom of the fridge compart ment door 8 Move the upper bearing pivot to the left 9 Move the door handles from the left to the right and cover the remaining holes with the hole cover pins 10 Fasten the self closing mechanism to the bottom left of the fridge compartment door ...

Страница 14: ...e com partment door and fasten to the housing 13 Fasten the self closing mechanism on the top left of the freezer compartment door 14 Carefully slide the freezer com partment door onto the centre bearing pivot and close 15 Place the lower door bearing with the bearing pivot in the lower left of the freezer compartment door and fasten 16 Open the freezer compartment door and fit the plinth ...

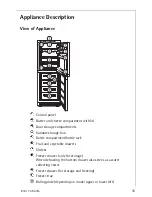
Страница 15: ...orage compartments Variable storage box Bottle compartment bottle rack Fruit and vegetable drawers Shelves Freezer drawer only for storage When defrosting the bottom drawer also serves as a water collecting vessel Freezer drawer for storage and freezing Freezer tray ë Rating plate depending on model upper or lower left ...

Страница 16: ... accumula tion block 3 In the event of power failure or a malfunction of the appliance the cold accumulation block will increase the hold over period by several hours The block may also be used in a cool bag to keep the temperature of food down during transportation Berries for example can be pre frozen on the freezer tray Advantage The berries are not squeezed and maintain their natural form The ...

Страница 17: ...intensive cooling in the refrigerator 7 COOLMATIC button 8 ON OFF indicator light for freezer compartment green 9 ON OFF button for freezer compartment 10 Temperature setting button for freezer compartment for warmer temperatures 11 Temperature display for freezer compartment 12 Temperature setting button for freezer compartment for colder temperatures 13 FROSTMATIC indicator light yellow FROSTMAT...

Страница 18: ...ck after a short period approx 5 sec to the display of the ACTUAL temperature DESIRED temperature means The temperature that has been selected for inside the fridge or the freezer compartment The DESIRED temperature is indicated by flashing numbers ACTUAL temperature means The temperature display indicates the current temperature inside the fridge or the freezer compartment The ACTUAL temperature ...

Страница 19: ... the compressor Otherwise the compressor may be damaged 0 1 Please clean the appliance interior and all accessories prior to initial start up see section Maintenance and Cleaning 2 Remove the cold accumulation block from the freezer tray 3 Place the cold accumulation block into a compartment or drawer only after the optimal storage temperature of 18 C has been reached and allow to freeze 4 After 2...

Страница 20: ...ately after switching on because the storage temperature in the refrigerator is quickly reached Freezer Compartment Start Up 0 1 Press freezer compartment ON OFF button The green power indicator for the freezer compartment lights up A warning tone sounds and the flashing red warning light indicates that the required storage temperature has not yet been reached 2 Press the WARNING OFF button to swi...

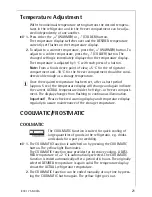
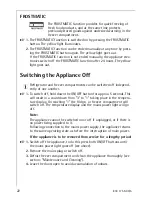
Страница 21: ...ort period approx 5 sec the temperature display will change and again indicate the current ACTUAL temperature inside the fridge or freezer compart ment The display changes from flashing to continuous illumination Important Please check red warning display and temperature display regularly to assure maintenance of the storage temperature COOLMATIC FROSTMATIC COOLMATIC The COOLMATIC function is suit...

Страница 22: ... another 0 1 To switch off hold down the ON OFF button for approx 5 seconds This will result in a countdown from 3 to 1 taking place in the tempera ture display On reaching 1 the fridge or freezer compartment will switch off The temperature display and the mains power light will go off Note The appliance cannot be switched on or off if unplugged or if there is no power being supplied to it Followi...

Страница 23: ... 1 To set the holiday mode press the WARMER or COLDER but ton The temperature display will change and indicate in flashing numbers the DESIRED temperature that is currently set 2 Hold down the WARMER button until the temperature display indicates H for holiday The temperature shown in the temperature display will change in steps of 1 C until it reaches 8 C After 8 C the value 15 C will appear in t...

Страница 24: ...nt temperature an error of the appliance The audible warning can be switched off with the WARNING OFF but ton Both warning display and audible warning are automatically switched off when the ACTUAL temperature in the freezer compart ment falls to the range of the display 3 The warning tone switches off automatically after one hour also if the ACTUAL temperature is still at variance with the DESIRE...

Страница 25: ...sted to various heights 0 1 Pull the storage shelf forward until it can be tipped up or down and removed 2 To insert at a different height use the same procedure in reverse Adjustment for tall items 0 1 Remove the front half of the two part vario glass storage shelf and insert it at a different level Space is then gained for storage of tall items on the storage shelf below Variable Inner Door The ...

Страница 26: ...rack for ward until it can be tilted upwards then slide the front sup port into the next level up Trays and Compartments Vario tray set The two large fruit and vegetable trays can be divided with an adjustable partition not included with all models Bottle Holder not included with all models Some models are equipped with a bottle holder in the bottle compart ment This is used to prevent individual ...

Страница 27: ...of water in the centre of the said shelf with a thermometer inside 2 Leave the fridge door closed overnight and check the temperature first thing in the morning 3 At this point the temperature should read no more than 5 C if it does you need to adjust the temperature regulator to a colder setting For further information on keeping food cool and safe a guide published by the Ministry of Agriculture...

Страница 28: ...essed further cooked into meals may not under any circumstances be frozen a second time 0 1 For freezing the maximum capacity press the FROSTMATIC button 24 hours prior to freezing or 4 to 6 hours for smaller quantities Yellow indicator lights up 3 The FROSTMATIC button need not be pressed for freezing of small quantities of up to 3 kg 2 All foods must be packed air tight prior to freezing so that...

Страница 29: ...ezer compartment with previously frozen goods the required storage temperature of 18 C must be reached Load freezer only with packaged frozen goods so that they do not dry out or lose their flavour and so that no flavour contamination of other frozen goods can occur Please observe maximum storage times and expiry dates of frozen goods 2 When possible store frozen goods separately according to type...

Страница 30: ...ss of the white frost has reached about 4 mm but at least once a year in any case A convenient time for defrosting is any time when the appliance is empty or only minimally loaded 1 Warning Do not use electrical heating appliances or any other mechanical or artificial devices to speed up the defrosting process with the exception of those recommended in these operating instructions Do not use defro...

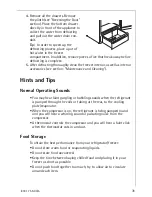
Страница 31: ...ps Normal Operating Sounds You may hear faint gurgling or bubbling sounds when the refrigerant is pumped through the coils or tubing at the rear to the cooling plate evaporator When the compressor is on the refrigerant is being pumped round and you will hear a whirring sound or pulsating noise from the compressor A thermostat controls the compressor and you will hear a faint click when the thermos...

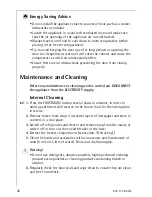
Страница 32: ...arried out DISCONNECT the appliance from the ELECTRICITY supply Internal Cleaning 0 1 Press the FROSTMATIC button several hours in advance in order to build up sufficient chill reserve in the frozen food for the interruption in service 2 Remove frozen food wrap it in several layers of newspaper and store it covered in a cool place 3 Switch off refrigerator and freezer and remove plug from the main...

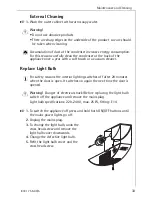
Страница 33: ...ight Bulb 3 For safety reasons the interior lighting switches off after 20 minutes when the door is open It switches on again the next time the door is opened 1 Warning Danger of electrical shock Before replacing the light bulb switch off the appliance and remove the mains plug Light bulb specifications 220 240 V max 25 W fitting E 14 0 1 To switch the appliance off press and hold both ON OFF butt...

Страница 34: ...Cleaning Interior illumination does not function Important The interior lighting switches off automatically after 20 minutes Please refer to Replace Light Bulb section The compressor runs continuously Adjust the thermostat to give correct temperature control Check that the door is closed Large quantities of food have recently been placed in the cabinet and or door is frequently opened Check that a...

Страница 35: ...e that the above checks have been made as the engineer will make a charge if the fault is not a mechanical or electrical breakdown Please note that proof of purchase is required for in guarantee service calls The compressor does not start immediately after changing the temperature setting This is normal the compressor starts after a period of time Symptom Solution ...

Страница 36: ...o evaporate This heat is removed from the interior of the appliance as a result the interior is cooled The evaporator is therefore located inside the appliance or placed in foam immediately behind the inner wall and thus not visible Compressor The compressor looks like a small drum It is driven by a built in electric motor and is mounted on the base of the appliance at the rear The task of the com...

Страница 37: ... purchase invoice or similar documentation The guarantee does not cover commercial use 2 The guarantee covers all parts or components which fail due to faulty workmanship or faulty materials The guarantee does not cover appli ances where defects or poor performance are due to misuse accidental damage neglect faulty installation unauthorised modification or attempted repair commercial use or failur...

Страница 38: ...er user Your new home is within the European Community EC or European Free Trade Area The product is installed and used in accordance with our instructions and is only used domestically i e a normal household The product is installed taking into account regulations in your new country Before you move please contact your nearest Customer Care Centre listed below to give them details of your new hom...

Страница 39: ...ocal AEG Service Force Centre by telephoning 08705 929 929 Help us to help you Please determine your type of enquiry before writing or telephoning When you contact us we need to know 1 Your name address and post code 2 Your telephone number 3 Clear and concise details of the fault 4 Date of purchase 5 This information can be found on the rating plate in the interior of the appliance at the left Cu...

Страница 40: ...AEG Hausgeräte GmbH Postfach 1036 D 90327 Nürnberg http www aeg hausgeraete de Copyright by AEG 818 1759 00 5 0101 ...

Отзывы: