background image

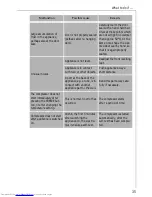
What to do if ...

35

Large accumulation of 
frost in the appliance, 
perhaps also at the door 
seal.

Door is not properly sealed 
(perhaps after re-hanging 
door).

Carefully warm the door 
seal with a hand-held hair 
dryer at those points which 
are not airtight (no warmer 
than approx. 50

°

C). At the 

same time, shape the war-
med door seal by hand, so 
that it is again properly 
seated.

Unusual noises.

Appliance is not level.

Readjust the front levelling 
feet.

Appliance is in contact 
with wall or other objects.

Push appliance away a 
short distance.

A part at the back of the 
appliance, e.g. a tube, is in 
contact with another 
appliance part or the wall.

Bend this part away care-
fully if necessary.

The compressor does not 
start immediately after 
pressing the FREEZE but-
ton, or after changing the 
temperature setting.

This is normal, no error has 
occurred.

The compressor starts 
after a period of time.

Compressor does not start 
after appliance is switched 
on.

Within the first 5 minutes 
after switching the 
appliance on, the electro-
nics initialise a self-test.

The compressor is started 
automatically, after the 
self-test has been comple-
ted.

Malfunction

Possible cause

Remedy

Содержание OKO-ARCTIS SUPER 3173-4GS

Страница 1: ...ÖKO ARCTIS SUPER 3173 4GS Electronic Freezers Operating Instructions ...

Страница 2: ...ning Caution Attention Please observe the following carefully 0 This symbol guides you step by step in the operation of the appliance 3 Supplementary information regarding operation and practical applications of the appliance appear after this symbol 2 Tips and notes concerning economical and environmentally sound use of the appliance are marked with the cloverleaf Explanations of the technical te...

Страница 3: ...t 11 Electrical connection 12 Opening the door 13 Re Hanging Door 14 1 Appliances with base cover 14 2 Appliances without base cover 15 Door Alignment 16 Appliance Description 18 View of Appliance 18 Interior Illumination 19 Freezer tray 19 Ice Packs 19 Control Panel 20 Temperature Regulator 20 Temperature Display 21 FAST FREEZE Button 21 Prior to Initial Start Up 22 Initial Start Up 22 Temperatur...

Страница 4: ...rs 26 Freezing 27 Frozen Storage 28 Preparation of Ice Cubes 29 Storage Goods Symbols Freezing Calendar 29 Maximum Load Stacking Limit 30 Defrosting 30 Cleaning and Care 31 Energy Saving Tips 32 What to do if 33 Correcting Malfunctions 33 Interior Illumination 36 Replace light bulb 36 Adjust door contacter 36 Customer Service 37 Noises during Operation 38 Regulations Standards Guidelines 38 Techni...

Страница 5: ...under any circumstances connect a damaged appliance Please contact your supplier in the event of damage Refrigerant The refrigerant isobutane R600a is contained within the refrigerant circuit of the appliance a natural gas with a high level of environmen tal compatibility which is nevertheless flammable During transportation and installation of the appliance be certain that none of the components ...

Страница 6: ... can freeze to the goods Do not operate any electrical appliances in the refrigerator freezer e g electric ice cream makers mixers etc Before cleaning the appliance switch off and remove the plug from the mains or switch off or turn out the circuit breaker or fuse Placing frozen goods on the top of the appliance can lead to the accumulation of condensate in the cavity of the storage tray through c...

Страница 7: ...n appliances must be disposed of properly This applies to your old appliance and at the end of its service life for your new appliance as well 1 Warning Before disposing of old appliances make them inoperable Remove plug from mains sever the power cable remove or destroy any snap or latch closures This eliminates the danger that playing children lock themselves into the appliance danger of suffoca...

Страница 8: ...ipping 0 Only for appliances with base cover Pull cover up to remove 0 Grip the appliance with the recessed handles positioned as in the dra wing and transport the appliance 0 In order to push the appliance into its final position press carefully at the top of the door and tip the appliance back slightly The weight is thus transferred to the back casters and the appliance can be easily pushed ...

Страница 9: ...right of the outside of the door 3 Tape remnants can be removed with benzene Wipe off benzene 0 Remove all tape and pads from the interior of the appliance 0 Peal off the protective film from the control panel 0 Remove door seal safeguards from door seal at the inside of the door 0 With open door remove transport safeguard at door pivot ...

Страница 10: ...ponds to the climate classification for which the appliance is desi gned The climate classification can be found on the serial plate which is located at the left on the inside of the appliance The following table shows which ambient temperature is correct for each climate classification If the refrigeration appliance is installed next to another refrigerator or freezer a clearance of 5 cm at the s...

Страница 11: ... cabinet a clearance of at least 10 cm between the top of the appliance and the cabinet above it must be maintained 0 Insert both wall spacers packed with the door handle into the sockets in the back of the appliance as shown in the diagram so that the required clearance for air exhaust at the back of the appliance is maintained Appliance Alignment 0 The appliance must have a solid level footing P...

Страница 12: ...rier ist lost A replacement cover carrier must be obtained from an electri cal goods retailer If the socket outlets in your home are not suitable for the plug fitted to the appliance then the plug must be cut off and an appropriate one fitted When fitting the plug please note the following points Important The wires in the mains lead are coloured in accordance with the following code Green and Yel...

Страница 13: ...fety shock hazard Ensure that the cut off plug is disposed of safely Voltage 220 240V AC Fuse rating 13 amps See rating plate for further information The rating plate is inside on the left Opening the door If the door is closed when the appliance is in operation it cannot be immediately opened again because a vacuum occurs which holds the door closed until pressure has been equalised The door can ...

Страница 14: ...cted to the mains Remove plug from the mains beforehand 1 Appliances with base cover 0 Pull base cover forward to remove and reposition the door pivot cover from the left to the right 0 With door closed screw pivot pin A out of the lower door pivot 0 Romove door carefully to the front and set aside 0 Reposition upper pivot pin to the left side 0 Pry out cap at upper left of the door with a small s...

Страница 15: ...dle and hole plug pins as shown in the dia gram 0 Replace base cover 2 Appliances without base cover 0 Lay the left side of the appliance onto a soft pad e g rug blanket etc 0 Turn pivot pin A out of lower door pivot 0 Romove door carefully and set aside 0 Turn the 4 phillips head screws B out of the base and remove the base 0 Reposition door pivot C as well as base dummy pivot D as shown in the d...

Страница 16: ...ry out cap at upper left of the door with a small screwdriver and reposition it to the right side 0 Carefully set door into upper pivot pin and close 0 Place washer between door and door pivot at bottom left and turn pivot pin A into lower door pivot at the left 0 Reposition door handle and hole plug pins as shown in the diagram ...

Страница 17: ...ic pivot bushings at the top and or at the bottom of the door as needed with a small screw driver turn as shown in the dia gram and press back into place The diagram only shows a right opening door For left opening doors please proceed accordingly at the left of the door at top and or bottom 0 Replace the door see section Re Hanging Door ...

Страница 18: ...iption View of Appliance various models Freezer tray Refrigerator compartments with lid s and drawers for storage and freezing Drawer for storage only When defrosting the bottom drawer serves as a water collecting vessel ...

Страница 19: ...hapter Replace light bulb Freezer tray A freezer tray is inserted at the very top of the freezer compartment at the back behind the freezer compartment flap 3 Berries for example can be pre frozen on the freezer tray Advantage The berries are not squeezed and maintain their natural form The fro zen berries can then be stored in compartments or drawers packaged in individual portions Ice Packs not ...

Страница 20: ...e temperature regulator must be freed from its recessed position Briefly pressing on the temperature regulator frees it from its reces sed position Pressing on the temperature regulator returns it to its recessed posi tion SET means With temperature regulator freed from recessed position temperature which should exist in the freezer compartment SET temperature can be adjusted in increments of 1 C ...

Страница 21: ...mpartment temperature actual temperature and the highest temperature to which the frozen goods have warmed If a malfunction has occurred at the appliance the temperature dis play alternately indicates the current freezer compartment temperature actual temperature and an error message The error message is coded e g F1 F2 etc and assists the customer service technician in error diagnosis If the temp...

Страница 22: ...p 0 Insert plug into mains socket 0 Press ON OFF button The green stand by display lights up The tempe rature display shows the current freezer compartment temperature actual temperature The blinking red warning display indicates that the required storage temperature has not yet been reached Note Within 5 minutes after the appliance has been switched on the electronics initialise a self test The c...

Страница 23: ...lay immediately indicates the newly selected adjustment Note From a food sciences standpoint 18 C is considered to be a suf ficiently cold storage temperature 0 Push temperature regulator into its recessed position The temperature display is switched back to indication of the current actual freezer compartment temperature Important Please check red warning display and temperature display regularly...

Страница 24: ...ching off the appliance with the ON OFF button an audible warning signal makes you aware of the power interruption The warning signal can be temporarily silenced with the WARNING OFF button but it nevertheless sounds again after 2 hours In this case con nect the appliance to the mains again and press and hold the ON OFF button for about 5 seconds If the appliance is to be removed from service for ...

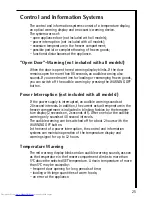
Страница 25: ...on not included with all models If the power supply is interrupted an audible warning sounds at 20 second intervals In addition the current actual temperature in the freezer compartment is indicated in blinking fashion by the tempera ture display 2 seconds on 2 seconds off After one hour the audible warning only sounds at 40 second intervals The audible warning can be switched off for about 2 hour...

Страница 26: ...st temperature to which the frozen goods have warmed and the current actual temperature in the freezer compartment If suspicion of partial or complete thawing exists please check the qua lity of the foods to determine if they can be used As soon as the temperature in the freezer compartment has again fal len below the critical thawing temperature of 4 C the partial com plete thaw warning can be sw...

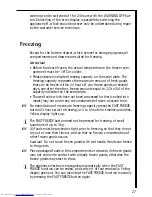
Страница 27: ...ocessed further cooked into meals may not under any circumstances be frozen a second time 0 For exploitation of maximum freezing capacity press the FAST FREEZE button 24 hours prior to freezing or 4 to 6 hours for smaller quantities Yellow display lights up 3 The FAST FREEZE button need not be pressed for freezing of small quantities of up to 3 kg 0 All foods must be packed air tight prior to free...

Страница 28: ...rer Frozen Storage Attention Before initial loading of the freezer compartment with previously frozen goods the required storage temperature of 18 C must be reached Load freezer only with packaged frozen goods so that they do not dry out or lose their flavour and so that no flavour contamination of other frozen goods can occur Please observe maximum storage times and expiry dates of frozen goods 2...

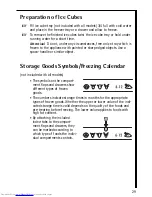
Страница 29: ... similar object Storage Goods Symbols Freezing Calendar not included with all models The symbols on the compart ment flaps and drawers show different types of frozen goods The numbers indicate storage times in months for the appropriate types of frozen goods Whether the upper or lower value of the indi cated storage time is valid depends on the quality of the foods and pre treating before freezing...

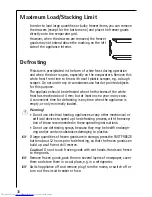
Страница 30: ...ast once a year in any case A convenient time for defrosting is any time when the appliance is empty or only minimally loaded 1 Warning Do not use electrical heating appliances or any other mechanical or artificial devices to speed up the defrosting process with the excep tion of those recommended in these operating instructions Do not use defrosting sprays because they may be health endange ring ...

Страница 31: ...ppliance off and remove the plug from the mains or switch off or turn out the circuit breaker or fuse Never clean the appliance with a steam cleaner Moisture could accu mulate in electrical components danger of electrical shock Hot vapours can lead to the damage of plastic parts The appliance must be dry before it is placed back into service Attention Ethereal oils and organic solvents can attack ...

Страница 32: ...h ambient temperatures cause longer more frequent operation of the compressor Ensure sufficient air circulation and exhaust at the appliance base and at the back wall of the appliance Never cover air vent openings Do not place warm foods into the appliance Allow warm foods to cool first Only leave door open as long as necessary Do not set temperature any colder than necessary Place frozen goods in...

Страница 33: ...is not switched on Switch appliance on Mains plug is not inserted or is loose Insert mains plug Fuse has blown or is defec tive Check fuse replace if necessary Mains socket is defective Mains malfunctions are to be corrected by an electri cian Appliance does not function green stand by display is not lit tempera ture is indicated as blinking display audible warning sounds at regular inter vals 1 M...

Страница 34: ...n Appliance is next to a source of warmth Please refer to the section Installation Location Interior illumination does not function 1 Light bulb is defective 2 Please refer to Interior Illumination in this sec tion If the door remains open for more than 5 minutes the interior illumination blinks and is switched off after 2 This is normal no error has occurred Please refer to Interior Illumination ...

Страница 35: ...or other objects Push appliance away a short distance A part at the back of the appliance e g a tube is in contact with another appliance part or the wall Bend this part away care fully if necessary The compressor does not start immediately after pressing the FREEZE but ton or after changing the temperature setting This is normal no error has occurred The compressor starts after a period of time C...

Страница 36: ...of electrical shock Before replacing the light bulb switch appliance off and remove the mains plug or switch off or turn out the circuit breaker or fuse Light bulb specifications 220 240 V max 15 W socket E 14 0 To switch the appliance off press and hold both ON OFF buttons for about 5 seconds 0 Remove mains plug 0 Replace defective light bulb The light bulb is accessible from the back side of the...

Страница 37: ... telephone numbers are listed in the accompanying booklet Guarantee Conditions Customer Service Locations Selective ordering of replacement parts can save unnecessary travel and costs For this reason always provide the following appliance infor mation This information can be found on the serial plate in the interior at the left of the appliance We recommend that you enter this information here so ...

Страница 38: ...idelines This appliance was designed for household use and was manufactured in accordance with the appropriate standards The necessary measures in accordance with appliance safety legislation regulations GSG acci dent prevention regulations for refrigeration appliances VBG 20 and the regulations of the German Society of Electrical Engineers VDE were observed in the manufacture of this appliance Th...

Страница 39: ...erior which is thus cooled Like all fluids refrigerants require warmth in order to be evaporated For this reason the evaporator is located in the appliance interior Compressor The compressor looks like a small bin It is powered by an electric motor and is housed at the back in the base of the appliance It is the task of the compressor to withdraw vaporous refrigerant from the evaporator to compres...

Страница 40: ...AEG Hausgeräte GmbH Postfach 1036 D 90327 Nürnberg http www aeg hausgeraete de Copyright by AEG H 271 282 400 04 0598 ...

Отзывы: