background image

Technical data

Height x Width x Depth

82x60x54.5 cm

Depth with door opened 

95 cm

Height adjustment 

± 13 mm approx.

Load (depending on programme) 

5 kg max.

Use domestic
Drum speed during washing

max. 55 rpm

Drum speed during spinning 

1200/900/700/500 rpm (L12710VIT)
1400/900/700/500 rpm (L14710VIT)

Water pressure

0.05 - 0.8 MPa

This appliance complies with the following EC directives:

-

73/23/EEC of 19.2.1973 “Low voltage directive”, including directive 93 /
68 / EEC

-

89/336/EEC of 3.5.1989 “Electromagnetic Compatibility Directive”.

43

132984531.qxd  28/11/2005  16.32  Pagina  43

Содержание LAVAMAT TURBO 12710 VIT

Страница 1: ...Y START STAIN QUICK SPIN SPEED PRE WASH EASY IRON RINSE CLEAN FILTER PREWASH WASH DRY END DRAIN SPIN COTTON EASY CARE 50 DRYING DELICATES WOOL RESET SPIN DRAIN SOFT ENER RINSES SOAK 95 L 12710 VIT 30 40 ON OFF 5 mm Washer Dryer Instruction Booklet PERFEKT IN FORM UND FUNKTION LAVAMAT TURBO 12710 VIT LAVAMAT TURBO 14710 VIT ...

Страница 2: ...ine are marked with the clover symbol If you require assistance or advice on your appliance please contact our cus tomer care department by letter or telephone Customer Care Department AEG ELECTROLUX Major Appliances Addington Way Luton Bedfordshire LU4 9QQ Tel 08705 350 350 calls to this number may be recorded for training purposes Important Your machine is fitted with a balance control device wh...

Страница 3: ...SPIN SPEED 14 RINSE HOLD 15 PREWASH 15 STAIN 15 QUICK 15 EASY IRON 16 Display 16 Programme progress display 16 Cancelling Altering a programme 17 Opening the door after the programme has started 17 Detergent dispenser drawer 18 Before the first wash 18 Preparing the wash cycle 19 Sorting out and preparing the laundry 19 Weight of laundry 20 Types of fabric and care labels 20 Detergents and additiv...

Страница 4: ...ection of the desired wash programme 28 Selection of the SPIN SPEED or RINSE HOLD option 28 Selection of the STAIN PREWASH or QUICK WASH option 28 Selection of the EXTRA RINSE option 28 Selection of the DELAY START option 29 Starting the programme 29 At the end of the programme 30 How to dry 31 Drying only 31 Automatic washing and drying NON STOP programme 31 Programme charts 32 33 Programme chart...

Страница 5: ...d electrical connection 48 Safety instructions for the installer 48 Dimensions of the appliance 49 Front view and side view 49 Rear view 49 Installation 50 Unpacking 50 Positioning 51 Levelling 51 Water inlet cold water connection only 52 Water drainage 52 53 In the interest of the environment 54 Electrical connections 54 55 Permanent connection 55 Building in 56 59 5 Contents ...

Страница 6: ...worktop are damaged allowing inner components to be accessible Unplug the appliance before carrying out any cleaning or maintenance operations Never pull the mains cable to remove the plug from the socket always take hold of the plug itself During high temperature wash programmes and during the drying cycle the door glass may get hot Let the water cool down before carrying out emergency emptying o...

Страница 7: ... inside During use Always unplug the appliance and turn off the water tap after use This appliance is designed for domestic use only If the machine is used for any other purposes or is not used correctly the manufacturer accepts no responsibility for any possible damage that might occur For safety reasons the appliance must not be modified Use only detergents suitable for washing machines and foll...

Страница 8: ...at this prod uct may not be treated as household waste Instead it shall be handed over to the applicable collection point for the recycling of electrical and electronic equipment By ensuring this product is disposed of correctly you will help prevent potential negative consequences for the envi ronment and human health which could otherwise be caused by inappropri ate waste handling of this produc...

Страница 9: ...he energy saving programme when washing normally soiled garments The machine works more economically if it is fully loaded for both wash ing and drying cycles When small loads are washed use only half to two thirds of the recom mended amount of detergent The machine will consume less energy if the laundry is adequately spun before being dried With adequate pre treatment stains and limited soiling ...

Страница 10: ... water setting the drain pro gramme Speed for the final spin can be reduced to 900 700 or 500 rpm RINSE HOLD the laundry is left immersed in the final rinse water to pre vent creasing DELAY START delayed start programme start can be delayed by 30 minutes to 23 hours e g to times with a more economical power rate Programme progress display showing the programme steps selected and the programme phas...

Страница 11: ... 30 60 40 30 60 E 60 40 30 MINIPROGRAMM 50 RINSE HOLD 1200 900 700 500 START PAUSE DRYING TIME WASH TIME DELAY START STAIN QUICK SPIN SPEED PRE WASH EASY IRON RINSE CLEAN FILTER PREWASH WASH DRY END DRAIN SPIN COTTON EASY CARE 50 DRYING DELICATES WOOL RESET SPIN DRAIN SOFT ENER RINSES SOAK 95 L 12710 VIT 30 40 ON OFF 5 mm ...

Страница 12: ...ions Cotton Easy cares Synthetics Delicates Woollens hand washing Special programmes The selector dial can be turned either clockwise or anticlockwise A B C E G H J F L 12710 VIT 30 40 DRYING COLD 40 30 60 40 30 60 E 60 40 30 MINIPROGRAMM 50 RINSE HOLD 1200 900 700 500 START PAUSE DRYING TIME WASH TIME DELAY START STAIN QUICK SPIN SPEED PRE WASH EASY IRON RINSE CLEAN FILTER PREWASH WASH DRY END DR...

Страница 13: ...ic If you have selected the DELAY START option the machine starts its hourly countdown b Pause To interrupt a programme which is running press the START PAUSE button the information on the display remains lit and the START PAUSE pilot light starts to flash To restart the programme from the point at which it was interrupted press the START PAUSE button again DELAY START button The wash programme ca...

Страница 14: ...e desired programme and before depressing the START PAUSE button When these buttons are pressed the corresponding pilot lights come on When they are pressed again the pilot lights go out When an incorrect option is selected the button light flashes for 2 se conds and in the display the Err message appears SPIN SPEED Press this button to reduce the maximum speed of the final speed proposed by the m...

Страница 15: ...ashing with stain remover extended main wash with time optimised stain action phase not selectable for wool handwash or programmes with temperatures lower than 40 C This function cannot be used with PREWASH QUICK By pressing this button the washing time is reduced For use when washing lightly soiled laundry This option is not available with the wool handwash and Economy pro gramme EASY IRON Select...

Страница 16: ...es the last 2 hours Alarm code indicating a fault in the machine operation see page 38 Programme progress display By selecting the wash programme the pilot lights corre sponding to the various phases making up the programme come on After the machine has started only the running phase pilot light stays on When the programme has finished the END pilot light comes on Cancelling a programme To cancel ...

Страница 17: ...tarted You can open the door after having set the machine to PAUSE provided the following conditions exist the machine is not in the heating or drying phase beyond 55 C the level of the water is not high the drum is not turning If these requirements are met when you pause the machine the door can be opened Should it not be possible to open the door and should it be absolutely nec essary to do so s...

Страница 18: ...tied at the beginning of the wash cycle Compartment for liquid additives fabric softener starch It is emptied at the last rinse The quantity of additives must not exceed the MAX mark in the draw er Before the first wash Before your first wash we recommend that you run a cotton cycle at 95 C without any laundry in the machine to remove any manufacturing residue from the drum and tub Pour 1 2 a meas...

Страница 19: ... and fabrics with trim inside out Wash small and delicate items baby socks tights inside a laundry net or in a pillow case closed with a zip or in larger socks Treat curtains with special care Remove all metal or plastic hooks or put them in a net or a bag We decline any responsibility in case of damage Whites and coloureds must be washed separately white items can loose their whiteness New colour...

Страница 20: ...colourfast and can be washed at 60 C Cotton Garments marked with these symbols have delicate colours therefore the washing temperature must not exceed these values Synthetics Easy cares Mixed and synthetic fabrics marked with these symbols require a gentle wash programme and they must therefore be washed using the specific pro gramme 60 40 30 40 60 95 20 Sort of laundry Preparing the wash cycle Ap...

Страница 21: ... Fabrics such as wool wool mix or silk marked with this symbol are particu larly sensitive to machine washing The WOOLLENS programme is suitable for this type of fabric Fabrics marked with the symbol wool can be machine washed only if the label indicates does not felt or machine washable If the label has the symbol do not wash the garments must not be machine washed 40 30 40 21 Preparing the wash ...

Страница 22: ...aning and stain removal COLOUREDS For coloured items you should use a detergent which is designed to clean while maintaining the original colour Ariel Color does not contain bleach and therefore helps to preserve colours DELICATE ITEMS When washing delicates such as woollens you should use a product which is specially designed to care for fine fabrics Dreft Automatic is suitable for woollens and o...

Страница 23: ...maller dosage Follow the manufacturer s instructions to ensure the most economical usage Pour the detergent directly into the dispenser drawer or alternatively measure the detergent into the specially designed dosing device which should be placed on top of the laundry and at the back of the machine drum If you use a dosing device in a washer dryer please ensure the dosing device ball is removed be...

Страница 24: ...icularly delicate items such as synthetic curtains woollen and silk gar ments with metal inserts nylon stockings bulky garments such as anoraks bedcovers quilts sleeping bags and duvets must not be machine dried Garments padded with foam rubber or materials similar to foam rubber must not be machine dried they represent a fire hazard Also fabrics containing residues of setting lotions or hair spra...

Страница 25: ... more familiar with the appliance you will discover the drying times that best suit your needs according to the various type of fabric It is a good idea to make a note of these times Modification of the drying time If you wish to modify the drying time when a drying programme is running first depress START PAUSE button to set the machine to PAUSE After modi fying the time depress START PAUSE again...

Страница 26: ...g Should the laundry still be too wet at the end of the programme set anoth er short drying cycle Warning To prevent the formation of creases or shrinking of fabrics avoid excessive drying 26 Preparing the drying cycle ...

Страница 27: ...o compartment Important Do not use normal detergent for the STAIN Action programme always use a STAIN remover such as VANISH Pour the fabric softener into compartment without exceeding the MAX mark Close the drawer pushing it fully in Switching the machine on To switch the machine on press the ON OFF but ton if the pro gramme selector dial is on the RESET position three flashing dashes will be dis...

Страница 28: ... washing 900 r p m Selection of the desired option depending on the degree of soil of the laundry and on the type of fabric The corresponding light comes on Selection of the DELAY START option To delay starting of a programme press the DELAY START button before starting the machine The figures corre sponding to the selected delay will be displayed for about 3 seconds after which the duration of th...

Страница 29: ...ther laundry or cancel the delay time Load other laundry press the START PAUSE button Open the door Load the laundry Close the door and press the START PAUSE button again Cancel the delay time press the START PAUSE button Press the DELAY START button until on the display appears 0 if you wish to cancel it Press the START PAUSE button again to let the pro gramme restart Programme progress display B...

Страница 30: ...SPIN programmes At the end of the programme the selector dial must be turned to position RESET and the machine must be switched off by pressing the ON OFF button Remove the laundry from the drum Check that the drum is empty so as to avoid any forgotten items being damaged in a subsequent wash e g shrinking or their colour running into a load of whites Close the water tap Leave the door open to pre...

Страница 31: ...tand the high temperature during dry ing Pour the liquid detergent directly into the main wash compartment Switch the machine on by depressing the ON OFF button Select the wash programme Select the required options by means of the relevant buttons If possible do not select a spin speed lower than that proposed by the appliance to avoid a too long drying time so saving energy When automatically was...

Страница 32: ...N SPEED RINSE HOLD PREWASH STAIN QUICK EASY IRON Max load 5 kg 60E Cotton ECONOMY Whites 60 Cotton and linen for example normally to lightly soiled sheets and household linen SPIN SPEED RINSE HOLD PREWASH STAIN EASY IRON 5 kg Coloured cottons 60 50 40 30 Coloured cotton or linen fabric shirts underwear towels SPIN SPEED RINSE HOLD PREWASH STAIN QUICK EASY IRON 5 kg Easy cares 60 50 40 30 Synthetic...

Страница 33: ...D EASY IRON 5 kg Softeners Hand washed garments to be starched or softened 1 rinse with liquid additive Long spin SPIN SPEED RINSE HOLD EASY IRON 5 kg Drain Foremptyingout thelastrinsewater inprogrammes withtheRinse Holdoption or attheendofpro grammeSoak The water is emptied out Spin Separate spin Long Spin SPIN SPEED 5 kg Minipro gramm Lightly soiled fabrics except wool Wash at 30 C 2 rinses Shor...

Страница 34: ...5 1200 110 120 1400 50 60 1200 55 65 1400 95 105 1200 100 110 1400 40 50 1200 45 55 1400 65 75 1200 70 80 1400 30 35 1200 35 40 1 kg Store dry Suitable for items to put away without ironing Iron dry Suitable for ironing Cotton and linen towels T shirts bathrobes 2 5 kg 1 kg Easy cares and mixed fabrics jumpers blous es underwear household linen 1 5 kg 900 100 110 1 kg 900 55 65 Cotton and linen sh...

Страница 35: ...rum We recommend that a maintenance wash be performed on a regular basis To run a maintenance wash The drum should be empty of laundry Select the hottest cotton wash programme Use a normal measure of detergent must be a powder such as Ariel Futur Exterior Clean the outside of the cabinet with soap and water only Rinse with clean water and dry Important do not use methylated spirits solvents or sim...

Страница 36: ...ning Door seal Regularly check to see if there are deposits or foreign objects in the rubber seal behind the door and remove them Drain filter The drain filter collects threads and small objects inadver tently left in the laundry Check regularly that the filter is clean Place a container under the filter and unscrew it some water will come out of the filter Pull out the filter Clean the filter und...

Страница 37: ... is built in the kitchen furniture slightly loosen the drain fil ter after placing a bowl on the floor to let the water come out slowly At the end screw the filter again Frost precautions If the machine is installed in a place where the temperature could drop below 0 C proceed as follows Close the water tap and unscrew the water inlet hose from the tap Place the end of the drain hose and the inlet...

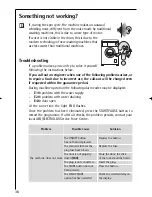
Страница 38: ...uring machine operation the following alarm codes may be displayed E10 problem with the water supply E20 problem with water draining E40 door open At the same time the light END flashes Once the problem has been eliminated press the START PAUSE button to restart the programme If after all checks the problem persists contact your local AEG ELECTROLUXService Force Centre 38 Problem The machine does ...

Страница 39: ...to the manufacturer s instructions An unsuitable detergent Use a suitable washing has been used that machine detergent creates too much foam One of the connectors on Check that the hose is the water inlet hose is firmly screwed on at both leaking ends The drain filter has not Fully screw the filter into been properly screwed on place after cleaning Solution The machine does not fill The water tap ...

Страница 40: ...he water must be emptied out The machine is heating the Wait until the end of the water or drying the heating or drying phase clothes Solution The machine vibrates or is noisy The transit bolts have Check that the machine not been removed has been unpacked as described in the Installation section The feet have not been Carefully level the machine adjusted There is little laundry in Correct operati...

Страница 41: ... after about 6 minutes the laundry is still tangled the machine will not spin Therefore if the laundry is still wet at the end of the cycle it is advisable to redistribute it manually inside the drum and to select the spin programme again Problem Possible cause Solution The machine will not dry or the laundry is not dry enough The water tap is not open Open the water tap E10 The drying time has no...

Страница 42: ...me was too low Fabric softener especially the concentrated type has come into direct contact with the laundry Wash these stains immediately and pour fabric softener carefully Foam is still visible even after the last rinse Modern detergents often produce foam even in the last rinse However the laundry has been completely rinsed White residue is left on the laundry This is due to insoluble componen...

Страница 43: ...estic Drum speed during washing max 55 rpm Drum speed during spinning 1200 900 700 500 rpm L12710VIT 1400 900 700 500 rpm L14710VIT Water pressure 0 05 0 8 MPa This appliance complies with the following EC directives 73 23 EEC of 19 2 1973 Low voltage directive including directive 93 68 EEC 89 336 EEC of 3 5 1989 Electromagnetic Compatibility Directive 43 ...

Страница 44: ...spare parts contact your local AEG ELECTROLUX Service Force Centre by telephoning 08705 929 929 Help us to help you Please determine your type of enquiry before telephoning When you con tact us we need to know 1 Your name address and post code 2 Your telephone number 3 Clear and concise details of the fault What is the fault When does the fault occur Does the multi display issue an error message E...

Страница 45: ...tion on AEG ELECTROLUX products please contact our Customer Care Department at the address below or visit our website at www aeg electrolux co uk Customer Care Department AEG ELECTROLUX Major Appliances Addington Way Luton Bedfordshire LU4 9QQ Tel 08705 350350 Calls to this number may be recorded for training purposes ...

Страница 46: ...pair commercial use or failure to observe requirements and recommendations set out in the instruction book This guarantee does not cover such parts as light bulbs removable glass ware or plastic dust bags or filters 3 Should guarantee repairs be necessary the purchaser must inform the near est customer service office AEG ELECTROLUX s service or authorised agent AEG ELECTROLUX reserves the right to...

Страница 47: ...n the European Community EC or European Free Trade Area The product is installed and used in accordance with our instructions and is only used domestically i e a normal household The product is installed taking into account regulations in your new country Before you move please contact your nearest Customer Care Centre listed below to give them details of your new home They will then ensure that t...

Страница 48: ...levant paragraph Any electrical work required to install this appliance must be carried out by a qualified electrician or competent person Any plumbing work required to install this appliance must be carried out by a qualified plumber or competent person After having installed the machine check that it is not standing on its elec trical supply cable If the appliance is placed on a carpeted floor e...

Страница 49: ...NSE HOLD 1200 900 700 500 START PAUSE DRYING TIME WASH TIME DELAY START STAIN QUICK SPIN SPEED PRE WASH EASY IRON RINSE CLEAN FILTER PREWASH WASH DRY END DRAIN SPIN COTTON EASY CARE 50 DRYING DELICATES WOOL RESET SPIN DRAIN SOFT ENER RINSES SOAK 95 L 12710 VIT 30 40 ON OFF 5 mm 540 90 525 950 Cold water 340 170 25 15 45 85 Power cable Drain ...

Страница 50: ...es This can be avoided by plac ing one of the corner packing pieces between the machine and the floor Remove the polystyrene base and take off the bottom panel by unscrewing the central screw Carefully slide out the right poly thene bag Repeat the opera tion for the left and central poly thene bags Re fit the bottom panel using the 4 screws supplied with the door hinges in the plas tic bag and the...

Страница 51: ...rect any unevenness in the floor by putting pieces of wood cardboard or similar materials under the machine If it is impossible to avoid positioning the machine next to a gas cooker or coal burning stove an insulating panel 85x57 cm covered with alumini um foil on the side facing the cooker or stove must be inserted between the two appliances The machine must not be installed in rooms where the te...

Страница 52: ...e to nat ural ageing of the hose This fault is shown by a red sector in the window A Should this occur turn the water tap off and refer to your Service Force Centre to replace the hose Water drainage TThis appliance is designed to be perma nently plumbed into your home s drainage system using one of the following methods 1 Into a drainage standpipe Firstly form a hook in the end of the drain hose ...

Страница 53: ...re a loop is formed in the drain hose see diagram to prevent waste from the sink entering the washing machine The drain hose may be extended to a maximum of 4 metres An additional drain hose and joining piece is available from your local Service Force Cen tre The joining piece must have an internal diameter of 18 mm If you intend the drain hose from the machine to empty into a sink make sure that ...

Страница 54: ...easure not be observed If the plug that is fitted to your appliance is not suitable for your socket outlet it must be cut off and the appropriate plug fitted Remove the fuse from the cut off plug The cut off plug should then be disposed of to prevent the hazard of shocks in case it should be plugged into a 13 Amp socket in another part of your home Important The wires in the mains lead are coloure...

Страница 55: ...rates a fuse For replacement use a 13 Amp BS1362 fuse Only ASTA or BSI approved fuses should be used The plug must not be used if the fuse cover carrier is lost The cover carrier is indicated by the coloured insert at the base of the plug A replacement cover carrier must be obtained from your local AEG ELEC TROLUX Service Centre Permanent connection In the case of a permanent connection it is nece...

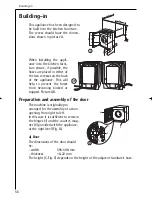
Страница 56: ...d or trapped Picture AB Preparation and assembly of the door The machine is originally pre arranged for the assembly of a door opening from right to left In this case it is sufficient to screw in the hinges 1 and the counter mag net 6 provided with the appliance at the right level Fig B a Door The dimensions of the door should be width 595 598 mm thickness 16 22 mm The height C Fig C depends on th...

Страница 57: ...uneven thickness of the door To align the door perfectly it is necessary to loosen the screw 3 Fig B adjust the door and tighten the screw again d Counter magnet 6 The appliance is pre arranged for a magnetic closure of the door To enable a correct operation of this device it is necessary to screw the counter magnet 6 steel disk rubber ring into the inner side of the door Its position must corresp...

Страница 58: ...s of timber are glued and screwed to the under side of the base see Fig F Position the base into the recess with its front edge as far forward as the adjoining plinth line will allow The reason for placing the base in this position is to allow a small strip of bead ing to be fitted in front of the appliance feet Fix the base firmly to the floor using four appropriate countersunk screws see Fig H 5...

Страница 59: ...be carried out with the machine on spin with a load this will identify the need for any further fine adjustment to the feet A strip of beading approximately 605 mm W x 5 mm H x 25 mm D must be screwed down into the base directly in front of the machine s feet this will provide additional security If required an additional door magnet part number 1242394 00 3 and disc part number 1242393 00 5 are a...

Страница 60: ...up The world s No 1 choice The Electrolux Group is the world s largest producer of powered appliances for kitchen cleaning and outdoor use More than 55 million Electrolux Group products such as refrigerators cookers washing machines vacuum cleaners chain saws and lawn mowers are sold each year to a value of approx USD 14 billion in more than 150 countries around the world ...

Отзывы: