


20
20
1
2
3
2
1
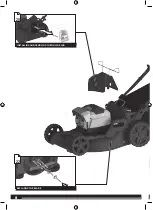
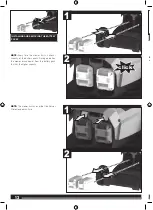
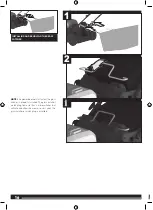
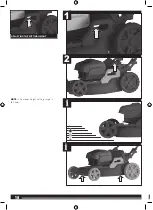
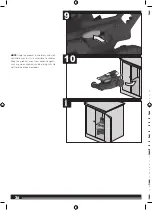
1. Pull the mulch plug handle to its maximum
length.
2. Insert the mulch plug assembly into the rear
discharge chute, ensuring that the metal frame
is properly aligned with its slot.
3. Push down on the mulch plug handle until the
metal frame is fully inserted into its slot.
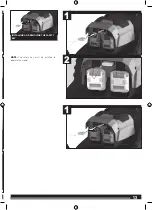
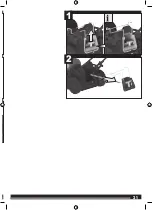
NOTE:
The mower does not start unless
the mulch plug is properly installed. The
grass catcher/mulch plug frame slot has 2
microswitches that activate and allow the
mower to start when the grass catcher or
mulch plug is installled.
INSTALLING AND REMOVING THE MULCH
PLUG
Содержание ALM58SP24
Страница 1: ...ALM58SP24 Original instructions ...
Страница 3: ...3 3 x 1 x 2 x 1 x 1 x 1 x 1 x 1 ALM58SP24 ...
Страница 6: ...6 6 20 22 INSTALLING AND REMOVING THE MULCH PLUG REPLACING THE BLADE ...
Страница 7: ...7 7 10 15 14 START UNFOLDING THE HANDLES USING THE SELF PROPEL FEATURE OPERATING THE MOWER ...
Страница 8: ...8 8 18 24 12 ADJUSTING THE CUTTING HEIGHT INSTALLING AND REMOVING THE BATTERIES STORING THE PRODUCT ...
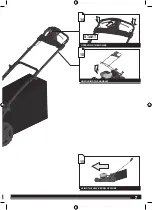
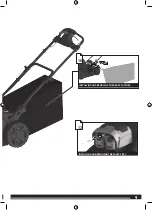
Страница 9: ...9 9 16 13 INSTALLING AND REMOVING THE SAFETY KEY INSTALLING AND REMOVING THE GRASS CATCHER ...
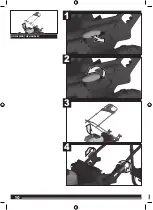
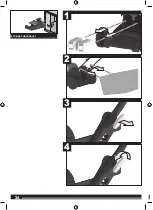
Страница 10: ...10 10 1 2 3 4 UNFOLDING THE HANDLES ...
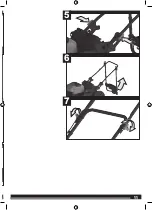
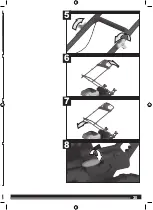
Страница 11: ...11 11 5 6 7 ...
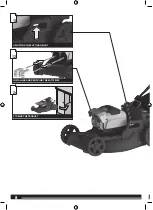
Страница 13: ...13 13 1 2 1 INSTALLING AND REMOVING THE SAFETY KEY NOTE The safety key must be installed to operate the mower ...
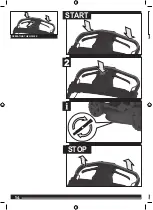
Страница 14: ...14 14 STOP START 2 OPERATING THE MOWER US ...
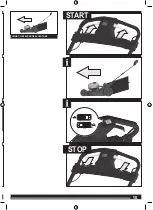
Страница 15: ...15 15 START STOP USING THE SELF PROPEL FEATURE ...
Страница 17: ...17 17 2 1 ...
Страница 18: ...18 18 1 2 NOTE The mower height cutting range is 18 75mm ADJUSTING THE CUTTING HEIGHT ...
Страница 19: ...19 19 2 1 ...
Страница 21: ...21 21 2 1 ...
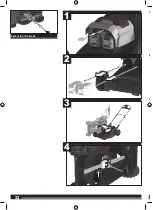
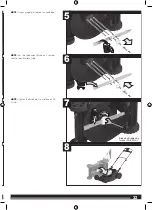
Страница 22: ...22 22 3 1 2 4 REPLACING THE BLADE NOT NOT see NOT 40 N ...
Страница 24: ...24 24 3 4 1 2 STORING THE PRODUCT ...
Страница 25: ...25 25 8 7 5 6 ...
Страница 31: ......