background image

5. If the power plug socket is loose, do not insert the power plug. There is a risk of

electric shock or fire.

6. You must not operate the appliance without the lamp cover

5)

 of interior lighting.

• This appliance is heavy. Care should be taken when moving it.

• Do not remove nor touch items from the freezer compartment if your hands are damp/

wet, as this could cause skin abrasions or frost/freezer burns.

• Avoid prolonged exposure of the appliance to direct sunlight.

• Bulb lamps

6)

 used in this appliance are special purpose lamps selected for household

appliances use only. They are not suitable for household room illumination.

Daily Use

• Do not put hot pot on the plastic parts in the appliance.

• Do not store flammable gas and liquid in the appliance, because they may explode.

• Do not place food products directly against the air outlet on the rear wall.

7)

• Frozen food must not be re-frozen once it has been thawed out.

• Store pre-packed frozen food in accordance with the frozen food manufacturer's in

-

structions.

• Appliance's manufacturers storage recommendations should be strictly adhered to. Refer

to relevant instructions.

• Do not place carbonated or fizzy drinks in the freezer compartment as it creates pressure

on the container, which may cause it to explode, resulting in damage to the appliance.

• Ice lollies can cause frost burns if consumed straight from the appliance.

Care and cleaning

• Before maintenance, switch off the appliance and disconnect the mains plug from the

mains socket.

• Do not clean the appliance with metal objects.

• Do not use sharp objects to remove frost from the appliance. Use a plastic scraper.

• Never use a hair drier or other heating appliances to speed up defrosting. Excessive heat

may damage the plastic interior, and humidity could enter the electric system making it

live.

Installation

For electrical connection carefully follow the instructions given in specific paragraphs.

• Unpack the appliance and check if there are damages on it. Do not connect the appliance

if it is damaged. Report possible damages immediately to the place you bought it. In that

case retain packing.

• It is advisable to wait at least four hours before connecting the appliance to allow the

oil to flow back in the compressor.

• Adequate air circulation should be around the appliance, lacking this leads to overheat

-

ing. To achieve sufficient ventilation follow the instructions relevant to installation.

• Wherever possible the back of the product should be against a wall to avoid touching

or catching warm parts (compressor, condenser) to prevent possible burn.

5) If the lamp cover is foreseen

6) If the lamp is foreseen

7) If the appliance is Frost Free

22

Safety information

Содержание A85280-GA

Страница 1: ...A85280 GA A85320 GA Gebruiksaanwijzing Vriezer User manual Freezer Notice d utilisation Congélateur Benutzerinformation Gefriergerät ...

Страница 2: ...itschakelen 6 Vries of koelmodus kiezen 6 Temperatuurlampje 7 Temperatuurregeling 7 TURBO FROSTMATIC functie 7 COOLMATIC functie 7 Alarm bij hoge temperatuur 8 Alarm bij hoge temperatuur 8 Alarm deur open 8 HET EERSTE GEBRUIK 9 De binnenkant schoonmaken 9 DAGELIJKS GEBRUIK 9 Vers voedsel invriezen 9 Het bewaren van ingevroren voedsel 9 Ontdooien 9 Vriesmandjes uit de vriezer verwijderen 10 NUTTIGE...

Страница 3: ... van het apparaat Houd kinderen uit de buurt om te voorkomen dat ze met het apparaat gaan spelen Houd alle verpakkingsmateriaal buiten het bereik van kinderen Gevaar voor verstikking Als u het apparaat afdankt trek dan de stekker uit het stopcontact snij de voedingskabel door zo dicht mogelijk bij het apparaat en verwijder de deur om te voorkomen dat kinderen een elektrische schok krijgen of zichz...

Страница 4: ... zijn dit kan uw huid beschadigen of vrieswonden veroorzaken Stel het apparaat niet langdurig bloot aan direct zonlicht Gloeilampjes 2 gebruikt voor dit apparaat is een speciaal lampje voor huishoudelijke apparaten De lampjes zijn niet geschikt voor de verlichting van ruimtes Dagelijks gebruik Zet geen hete potten op de kunststof onderdelen in het apparaat Bewaar geen brandbare gassen of vloeistof...

Страница 5: ...ssor condensator aangeraakt kunnen worden en brandwonden veroorzaken Het apparaat mag niet vlakbij radiatoren of kooktoestellen geplaatst worden Verzeker u ervan dat de stekker bereikbaar is nadat het apparaat geïnstalleerd is Sluit het apparaat alleen aan op een drinkwaterleiding 4 Onderhoud Alle elektrotechnische werkzaamheden die noodzakelijk zijn voor het uitvoeren van on derhoud aan het appar...

Страница 6: ... Vries of koelmodus kiezen Het apparaat kan worden gebruikt als vriesvak of als koelkast Om over te schakelen van de modus Vriezen naar Koelen druk op de Resettoets alarm en de temperatuurknop gedurende een aantal seconden Het temperatuurlampje gaat branden FC gedurende 5 seconden De gewijzigde modus wordt aangegeven door een geluidssignaal en de GEWENSTE temperatuur verschijnt Om over te schakele...

Страница 7: ...et apparaat wordt gebruikt als vriezer VersneltdefunctieTURBOFROSTMATIChetinvriezenvanversvoedselenbeschermtvoedsel dat reeds is geconserveerd tegen ongewenste opwarming Voer de volgende stappen uit om de functie te activeren 1 Druk op de toets TURBO FROSTMATIC 2 Het controlelampje TURBO FROSTMATIC zal branden en het temperatuurlampje ver schijnt SF ong 5 seconden Voer de volgende stappen uit om d...

Страница 8: ...chakeld door op de resettoets alarm te drukken Alarm bij hoge temperatuur Als het apparaat wordt gebruikt als koelkast Een temperatuurstijging in de koelkast bijvoorbeeld doordat de stroom is uitgevallen of doordat de deur open staat wordt aangegeven door een knipperend alarmlampje het knipperen van de temperatuur het geluid van de zoemer Wanneer de normale omstandigheden worden hersteld stopt het...

Страница 9: ...roces duurt 24 uur Vries tijdens deze periode geen ander voedsel in Het bewaren van ingevroren voedsel Als u het apparaat voor het eerst of na een periode dat het niet gebruikt is inschakelt het apparaat minstens 2 uur laten werken voordat u er producten in plaatst De vriesladen zorgen ervoor dat u het voedselpakket dat u wenst snel en makkelijk kan vinden Indien grote hoeveelheden voedsel moeten ...

Страница 10: ...tekende kwaliteit in bereid het voedsel in kleine porties voor zo kan het snel en volledig worden ingevroren en zo kunt u later alleen die hoeveelheid laten ontdooien die u nodig heeft wikkel het voedsel in aluminiumfolie of plastic en zorg ervoor dat de pakjes luchtdicht zijn leg vers nog niet ingevroren voedsel niet tegen het al ingevroren voedsel om te voor komen dat dit laatste warm wordt smal...

Страница 11: ...eders erg geparfumeerde reinigingsproduc ten en waspolijstmiddelen om de binnenkant schoon te maken aangezien deze het op pervlak beschadigen en een sterke geur achterlaten Maak de condensor zwart rooster en de compressor op de achterkant van het apparaat schoon met een borstel of stofzuiger Deze handeling zal de prestatie van het apparaat verbeteren en het energieverbruik verminderen Zorg ervoor ...

Страница 12: ... uw apparaat aan blijft staan vraag dan iemand om het zo nu en dan te controleren om te voorkomen dat het bewaarde voedsel bederft als de stroom uitvalt PROBLEMEN OPLOSSEN Tijdensdewerkingvanhetapparaatkunnenvaakkleine maarstorendeproblemenoptreden waarvoor niet meteen een monteur hoeft te worden gebeld In de onderstaande tabel wordt informatie gegeven over deze problemen om onnodige servicekosten...

Страница 13: ...eur sluiten De deur is te vaak geopend Laat de deur niet langer geopend dan noodzakelijk De temperatuur van het voedsel is te hoog Laat het voedsel afkoelen tot ka mertemperatuur voordat u het conserveert De kamertemperatuur is te hoog Verlaag de temperatuur in de ka mer Er is te veel rijp en ijs De deur is niet goed gesloten Zie De deur sluiten De pakking van de deur is ver vormd of vies Zie De d...

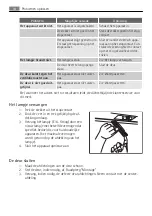
Страница 14: ...taat niet water pas Zie Waterpas zetten De deur is niet goed uit gelijnd Het apparaat staat niet water pas Zie Waterpas zetten Bel wanneer het advies niet tot resultaten leidt de dichtstbijzijnde klantenservice voor dit merk Het lampje vervangen 1 Trek de stekker uit het stopcontact 2 Druk de veer in en trek gelijktijdig de af dekking omlaag 3 Vervang het lampje E14 fitting door een nieuwlampjemet...

Страница 15: ... de klimaatklasse die vermeld is op het typeplaatje van het apparaat Klimaatklasse Omgevingstemperatuur SN 10 C tot 32 C N 16 C tot 32 C ST 16 C tot 38 C T 16 C tot 43 C Plaats Als het apparaat onder een wandkast wordt geplaatst moet de minimale afstand tussen de bovenkant van de kast en de wandkast ten minste 40 mm bedragen om optimale pres taties te garanderen Voor de beste prestatie kunt u het ...

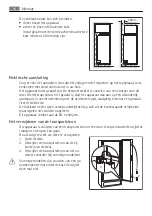
Страница 16: ...reenstemming met de geldende regels raadpleeg hiervoor een gekwali ficeerd elektricien De fabrikant neemt geen verantwoordelijkheid op zich als de bovenstaande veiligheids maatregelen niet worden nageleefd Dit apparaat voldoet aan de EU richtlijnen Het verwijderen van de transportsteun Uw apparaat is voorzien van een transportsteun om te ervoor te zorgen dat de deur tijdens transport niet open kan...

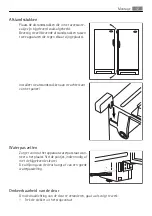
Страница 17: ...er de afstandsstukken aan de achterkant van het paneel Waterpas zetten Zorg er voor dat hetapparaat waterpasstaatwan neer u het plaatst Stel de pootjes indien nodig af met de bijgeleverde sleutel De uitlijning van de deur hangt af van een goede waterpasstelling Omkeerbaarheid van de deur Om de draairichting van de deur te veranderen gaat u als volgt te werk 1 Trek de stekker uit het stopcontact Mo...

Страница 18: ...plaats hem naar de andere kant 7 Plaats de deur terug Schroef het onderste scharnier terug vast Zet het apparaat weer verticaal en instal leer het ventilatierooster 8 Schroef het handvat los Verwijder de af dekking van de gaten op de andere kant of boor er gaten van 3 4 mm in Monteer het handvat Draai het handvat om en monteer het op de andere kant Dek de gaten af met de dopjes die in het zakje me...

Страница 19: ...en behandeld maar moet worden afgegeven bij een verzamelpunt waar elektrische en elektronische apparatuur wordt gerecycled Als u ervoor zorgt dat dit product op de juiste manier wordt verwijderd voorkomt u mogelijke negatieve gevolgen voor mens en milieu die zich zouden kunnen voordoen in geval van verkeerde afvalverwerking Voor gedetailleerdere informatie over het recyclen van dit product kunt u ...

Страница 20: ...od 26 Thawing 27 Removal of freezing baskets from the freezer 27 HELPFUL HINTS AND TIPS 27 Hints for freezing 27 Hints for storage of frozen food 27 CARE AND CLEANING 28 Periodic cleaning 28 Cleaning the ventilation grille 28 Defrosting of the freezer 29 Periods of non operation 29 WHAT TO DO IF 29 Replacing the lamp 31 Closing the door 31 TECHNICAL DATA 32 INSTALLATION 32 Positioning 32 Location ...

Страница 21: ...tuff and or beverages in a normal household as explained in this instruction booklet Do not use a mechanical device or any artificial means to speed up the thawing process Do not use other electrical appliances such as ice cream makers inside of refrigerating appliances unless they are approved for this purpose by the manufacturer Do not damage the refrigerant circuit The refrigerant isobutane R60...

Страница 22: ...cause it to explode resulting in damage to the appliance Ice lollies can cause frost burns if consumed straight from the appliance Care and cleaning Before maintenance switch off the appliance and disconnect the mains plug from the mains socket Do not clean the appliance with metal objects Do not use sharp objects to remove frost from the appliance Use a plastic scraper Never use a hair drier or o...

Страница 23: ...appliance shall be disposed according to the applicable regulations to obtain from your local authorities Avoid damaging the cooling unit especially at the rear near the heat exchanger The materials used on this appliance marked by the symbol are recyclable CONTROL PANEL 1 ON OFF button 2 Pilot light 3 Temperature indicator 4 Temperature regulator and buttons 5 TURBO FROSTMATIC button even for COO...

Страница 24: ...adjusting operation the temperature indicator flashes the appliance temperature currently set DESIRED temperature Temperature regulation To operate the appliance proceed as follows 1 Set the required temperature by pressing the corresponding temperature regulator The temperature indicator flashes the DESIRED temperature 2 Each time the temperature regulator is pressed the DESIRED temperature is ad...

Страница 25: ...e or door is open is indicated by Alarm light flashing flashing temperature sounding of buzzer When normal conditions are restored the acoustic alarm stops the temperature value continues to flash the Alarm light continues to flash When you press the Alarm reset button to deactivate the alarm the highest temperature reached in the compartment appears on indicator for some seconds Then it returns o...

Страница 26: ...e placing the food to be frozen in the freezer compartment Place the fresh food to be frozen in all compartments except the bottom drawer The maximum amount of food that can be frozen in 24 hours is specified on the rating plate a label located on the inside of the appliance The freezing process lasts 24 hours during this period do not add other food to be frozen Storage of frozen food When first ...

Страница 27: ... the maximum quantity of food which can be frozen in 24 hrs is shown on the rating plate the freezing process takes 24 hours No further food to be frozen should be added during this period only freeze top quality fresh and thoroughly cleaned foodstuffs prepare food in small portions to enable it to be rapidly and completely frozen and to make it possible subsequently to thaw only the quantity requ...

Страница 28: ... not pull move or damage any pipes and or cables inside the cabinet Never use detergents abrasive powders highly perfumed cleaning products or wax polishes to clean the interior as this will damage the surface and leave a strong odour Clean the condenser black grill and the compressor at the back of the appliance with a brush or a vacuum cleaner This operation will improve the performance of the a...

Страница 29: ...t on ask somebody to check it once in a while to prevent the food inside from spoiling in case of a power failure WHAT TO DO IF During operation of the appliance some smaller but annoying trouble can often occur which does not require calling a technician out In the following chart information is given about them to avoid unnecessary charges on service The operation of the appliance goes with cert...

Страница 30: ...efer to Closing the door The door has been opened too frequently Do not keep the door open longer than necessary The food temperature is too high Let the food temperature de crease to room temperature be fore storage The room temperature is too high Decrease the room temperature There is too much frost and ice The door is not closed correctly Refer to Closing the door The door gasket is deformed o...

Страница 31: ...rferes with ven tilation grill The appliance is not levelled Refer to Levelling Misaligned door The appliance is not levelled Refer to Levelling As much as the advice does not lead to result call the nearest brand mark service Replacing the lamp 1 Disconnect the appliance from the power socket 2 Press the spring and at the same time pull the cover downwards 3 Replace the bulb E14 socket with one o...

Страница 32: ...esponds to the climate class indicated on the rating plate of the appliance Climate class Ambient temperature SN 10 C to 32 C N 16 C to 32 C ST 16 C to 38 C T 16 C to 43 C Location To ensure best performance if the appliance is positioned below an overhanging wall unit the minimum distance between the top of the cabinet and the wall unit must be at least 40 mm Ideally however the appliance should ...

Страница 33: ...earthed connect the appliance to a separate earth in compliance with current regulations consulting a qualified electrician The manufacturer declines all responsibility if the above safety precautions are not ob served This appliance complies with the E E C Directives Removing the transport support Your appliance is equipped with transport support to secure the door during transportation To remove...

Страница 34: ...the ap pliances Install the spacers on the back side of the panel Levelling When placing the appliance ensure that it stands level If necessary adjust the feet using the ad justment spanner supplied Door alignment is dependent on proper levelling Door reversibility To change the opening direction of the door do these steps 1 Remove the plug from the power 34 Installation ...

Страница 35: ...he opposite side 7 Re insert the door Re screw the lower hinge Raise the appliance and install the venti lation grille 8 Unscrew the handle On the opposite side remove the hole covers by driving a 3 4 mm drift or drill into them Install the handle Fit the handle on to the opposite side by turning it on half circle Install the hole covers provided within the accessory bag 9 Put the cabinet in posit...

Страница 36: ...ken to the appropriate collection point for the recycling of electrical and electronic equipment By ensuring this product is disposed of correctly you will help prevent potential negative consequences for the environment and human health which could otherwise be caused by inappropriate waste handling of this product For more detailed information about recycling of this product please contact your ...

Страница 37: ...teur detempérature sur lebandeau de commande 42 Réglage de la température 42 Fonction TURBO FROSTMATIC 42 Fonction COOLMATIC 42 Alarme haute température 43 Alarme haute température 43 Alarme porte ouverte 43 PREMIÈRE UTILISATION 44 Nettoyage intérieur 44 UTILISATION QUOTIDIENNE 44 Congélation d aliments frais 44 Conservation d aliments congelés 44 La décongélation 44 Retrait des paniers de congéla...

Страница 38: ... appareil doit être mis au rebut veillez à couper le câble d alimentation électrique au ras de l appareil pour éviter les risques d électrocution Démontez la porte pour éviter que des enfants ne restent enfermés à l intérieur Cet appareil est muni de fermetures magnétiques S il remplace un appareil équipé d une fermeture à ressort nous vous conseillons de rendre celle ci inutilisable avant de vous...

Страница 39: ... avec les mains humides les surfaces givrées et les produits congelés risque de brûlure et d arrachement de la peau Évitez une exposition prolongée de l appareil aux rayons solaires Ampoules 10 utilisées dans cet appareil sont des ampoules spéciales dédiées uniquement à un usage avec des appareils ménagers Elles ne conviennent pas à l éclairage des pièces d une habitation Utilisation quotidienne N...

Страница 40: ...iter tout contact avec le compresseur et le conden seur risque de brûlure Placez de préférence votre appareil loin d une source de chaleur chauffage cuisson ou rayons solaires trop intenses Assurez vous que la prise murale reste accessible après l installation de l appareil Branchez à l alimentation en eau potable uniquement 12 Maintenance Les branchements électriques nécessaires à l entretien de ...

Страница 41: ...température et le voyant de fonctionnement s éteignent Sélection des modes Congélation ou Réfrigération Le présent appareil peut être utilisé comme compartiment congélateur ou comme réfri gérateur Pour passer du mode Congélation au mode Réfrigération appuyez sur la touche de réinitialisation et la touche de réglage de la température pendant quelques secondes Le voyant de température affiche FC env...

Страница 42: ... une conservation correcte des aliments sélectionnez la température suivante 18 C en mode Congélation 5 C en mode Réfrigération Fonction TURBO FROSTMATIC Lorsque l appareil est utilisé comme congélateur La fonction TURBO FROSTMATIC accélère la congélation des aliments frais et protège en même temps les denrées déjà entreposées d un réchauffement indésirable Pour activer cette fonction procédez com...

Страница 43: ...larme sonore peut être désactivée en appuyant sur la touche Réinitialisation d alarme Alarme haute température Lorsque l appareil est utilisé comme réfrigérateur Une augmentation de la température en mode Réfrigération par exemple à cause d une coupure de courant ou de l ouverture de la porte est indiquée par le clignotement du voyant Alarme le clignotement de la température le déclenchement d une...

Страница 44: ...au cours de cette période Conservation d aliments congelés À la mise en service ou après un arrêt prolongé faites fonctionner l appareil pendant 2 heures environ avant d introduire les produits dans le compartiment Les tiroirs de congélation vous permettent de trouver facilement et rapidement les aliments dont vous avez besoin Si vous devez stocker une grande quantité d aliments retirez tous les t...

Страница 45: ... uniforme adap tés à l importance de la consommation enveloppez les aliments dans des feuilles d aluminium ou de polyéthylène et assurez vous que les emballages sont étanches ne laissez pas des aliments frais non congelés toucher des aliments déjà congelés pour éviter une remontée en température de ces derniers les aliments maigres se conservent mieux et plus longtemps que les aliments gras le sel...

Страница 46: ...rs Nettoyer le condenseur grille noire et le compresseur situés à l arrière de l appareil avec une brosse ou un aspirateur Cette opération améliore les performances de l appareil et permet des économies d énergie Attention à ne pas endommager le système de réfrigération Lorsque vous déplacez l appareil veillez à le soulever par l avant pour éviter de rayer le sol De nombreux détergents pour la cui...

Страница 47: ...ez la porte les portes entrouverte s pour prévenir la formation d odeurs désagréa bles Si toutefois vous n avez pas la possibilité de débrancher et de vider l appareil faites vérifier régulièrement son bon fonctionnement pour éviter la détérioration des aliments ceci en tenant compte de sa charge et de son autonomie de fonctionnement EN CAS D ANOMALIE DE FONCTIONNEMENT Pendant le fonctionnement de...

Страница 48: ...e en mode Réfrigération Sélectionnez le mode Congéla tion Reportez vous au chapitre Sélection des modes Congéla tion ou Réfrigération Seul le réglage de tempé ratures en dessous de 0 C est possible L appareil fonctionne en mode Congélation Sélectionnez le mode Réfrigéra tion Reportez vous au chapitre Sélection des modes Congéla tion ou Réfrigération Le compresseur fonction ne en permanence Le disp...

Страница 49: ...roduisez de plus petites quan tités d aliments à congeler en mê me temps L appareil ne fonctionne pas L appareil est à l arrêt Mettez l appareil sous tension La fiche d alimentation n est pas correctement branchée dans la prise de courant Branchez correctement la fiche d alimentation dans la prise de courant Le courant n arrive pas à l appa reil La prise de courant n est pas alimentée Branchez un ...

Страница 50: ...nte CARACTÉRISTIQUES TECHNIQUES A85280GA A85320GA Dimensions Hauteur 1650 mm 1850 mm Largeur 660 mm 660 mm Profondeur 680 mm 680 mm Temps de montée en température 25 h 25 h Les caractéristiques techniques figurent sur la plaque signalétique située sur le côté gauche à l intérieur de l appareil et sur l étiquette d énergie INSTALLATION AVERTISSEMENT Pour votre sécurité et le bon fonctionnement de l...

Страница 51: ...ez un espace d au moins 50 mm derrière l élément supérieur Branchement électrique Contrôlez avant de brancher l appareil si la tension et la fréquence indiquées sur la plaque signalétique correspondent à celles de votre réseau L appareil doit être relié à la terre La fiche du câble d alimentation comporte un logement pour mise à la terre Si la prise de courant murale n est pas mise à la terre bran...

Страница 52: ...uipés d un bloc des tiné à réduire le niveau sonore sous la car rosserie Celui ci ne doit pas être retiré Entretoises Installez les entretoises que contient le sachet d accessoires comme indiqué sur les figures Lorsque deux appareils sont placés l un à côté de l autre fixez les entretoises entre les appareils Installez les entretoises à l arrière de l appareil 3 2 52 Installation ...

Страница 53: ...il sur le dos sur une cale en bois 4 Dévissez la charnière inférieure a1 Retirez de la charnière le dispositif de fer meture de la porte et placez la goupille de l autre côté a2 Revissez le dispositif de fermeture de la porte fourni dans le sa chet d accessoires sur le côté opposé 5 Enlevez le dispositif de fermeture de la porte b1 Revissez le dispositif de fermeture de la porte fourni à l intérie...

Страница 54: ...AVERTISSEMENT Si la température ambiante est basse en hiver par exemple il se peut que le joint n adhère pas parfaitement Dans ce cas attendez que le joint reprenne sa taille naturelle EN MATIÈRE DE SAUVEGARDE DE L ENVIRONNEMENT Le symbole sur le produit ou son emballage indique que ce produit ne peut être traité comme déchet ménager Il doit être remis au point de collecte dédié à cet effet collec...

Страница 55: ... Funktion COOLMATIC 60 Temperaturwarnung 61 Temperaturwarnung 61 Alarm Tür offen 61 ERSTE INBETRIEBNAHME 62 Reinigung des Innenraums 62 TÄGLICHER GEBRAUCH 62 Einfrieren frischer Lebensmittel 62 Lagerung gefrorener Lebensmittel 62 Auftauen 62 Entnahme von Gefrierkörben aus dem Gefrierschrank 63 PRAKTISCHE TIPPS UND HINWEISE 63 Hinweise zum Einfrieren 63 Hinweise zur Lagerung gefrorener Produkte 63 ...

Страница 56: ...sind und sich nicht in dem Gerät einschließen können Wenn dieses Gerät mit magnetischer Türdichtung ein älteres Modell mit Schnappver schluss Türlasche an der Tür oder auf dem Deckel ersetzt machen Sie den Schnapp verschluss vor dem Entsorgen des Altgerätes unbrauchbar So verhindern Sie dass das Gerät nicht zu einer Todesfalle für Kinder wird Allgemeine Sicherheitshinweise VORSICHT Die Belüftungsö...

Страница 57: ...ne feuergefährlichen Gase oder Flüssigkeiten in dem Gerät Explosionsge fahr Legen Sie Lebensmittel nicht direkt vor den Luftauslass auf der Rückwand 15 Ein aufgetautes Produkt darf nicht wieder eingefroren werden Abgepackte Tiefkühlkost immer entsprechend den Herstellerangaben aufbewahren Die Lagerempfehlungen des Geräteherstellers sollten strikt eingehalten werden Halten Sie sich an die betreffen...

Страница 58: ...n installiert werden Vergewissern Sie sich dass der Netzstecker des Gerätes nach der Installation frei zu gänglich ist Verbinden Sie das Gerät ausschließlich mit einer Trinkwasserzuleitung 16 Kundendienst Sollte die Wartung des Gerätes elektrische Arbeiten verlangen so dürfen diese nur von einem qualifizierten Elektriker oder einem Elektro Fachmann durchgeführt werden Wenden Sie sich für Reparatur...

Страница 59: ...zeige und die Kontrolllampe erlöschen Auswählen des Gefrier oder Kühlmodus Das Gerät kann als Gefrier oder Kühlraum verwendet werden Zum Umschalten von Gefrieren auf Kühlen drücken Sie die Taste zum Rücksetzen des Alarms und den Temperaturregler einige Sekunden lang In der Temperaturanzeige wird FC angezeigt ca 5 Sekunden lang Ein akustisches Signal bestätigt das Umschalten und die SOLL Temperatur...

Страница 60: ...O FROSTMATIC Funktion ist eine Schnellgefrierfunktion die die Tiefkühlung neu hinzukommender Lebensmittel beschleunigt und gleichzeitig die bereits tiefgekühlten Le bensmittel vor unerwünschter Erwärmung schützt So schalten Sie die Funktion ein 1 Drücken Sie die Taste TURBO FROSTMATIC 2 DieTURBOFROSTMATIC Kontrolllampeleuchtet aufundinderTemperaturanzeigewird SF angezeigt ca 5 Sekunden lang So sch...

Страница 61: ...etzen des Alarms ausgeschaltet werden Temperaturwarnung Wenn Sie das Gerät als Kühlgerät verwenden Ein Anstieg der Temperatur im Kühlmodus zum Beispiel aufgrund eines vorausgegangenen Stromausfalls oder einer geöffneten Gerätetür wird wie folgt signalisiert Die Alarmleuchte blinkt Die Temperaturanzeige blinkt Ein Alarmsignal ertönt Sobald die normalen Betriebsbedingungen wiederhergestellt sind Das...

Страница 62: ...egeben das sich im Inneren des Geräts befindet Der Gefriervorgang dauert 24 Stunden Legen Sie während dieses Zeitraums keine weiteren einzufrierenden Lebensmittel in das Gerät Lagerung gefrorener Lebensmittel Lassen Sie das Gerät bei der ersten Inbetriebnahme oder wenn das Gerät einige Zeit nicht benutzt wurde mindestens 2 Stunden lang eingeschaltet bevor sie Lebensmittel hinein geben Die Gefriers...

Страница 63: ...er Gefriervorgang dauert 24 Stunden Legen Sie während dieses Zeitraums keine wei teren einzufrierenden Lebensmittel in das Gefrierfach frieren Sie ausschließlich frische und gründlich gewaschene Lebensmittel von sehr guter Qualität ein teilen Sie die Lebensmittel in kleinere Portionen ein damit diese schnell und vollständig gefrieren und Sie später nur die Menge auftauen müssen die Sie gerade benö...

Страница 64: ...Prüfen und säubern Sie die Türdichtungen in regelmäßigen Abständen und kontrollieren Sie dass diese sauber und frei von Verunreinigungen sind Spülen und trocknen Sie diese sorgfältig ab Ziehen Sie nicht an Leitungen und oder Kabeln im Innern des Kühlschranks und achten Sie darauf diese nicht zu verschieben oder zu beschädigen Benutzen Sie zur Reinigung des Innenraums keinesfalls Putzmittel Scheuer...

Страница 65: ...ängerem Stillstand des Geräts müssen Sie folgende Vorkehrungen treffen 1 Trennen Sie das Gerät von der Netzversorgung 2 Entnehmen Sie alle Lebensmittel 3 Reinigen Sie das Gerät und alle Zubehörteile 4 Lassen Sie die Tür en offen um das Entstehen unangenehmer Gerüche zu vermeiden Möchten Sie bei einer längeren Abwesenheit das Gerät weiter laufen lassen bitten Sie jemanden gelegentlich die Temperatu...

Страница 66: ...ieren aus Siehe hierzu Aus wählen des Gefrier oder Kühl modus Es können nur Tempera turen unter 0 C einge stellt werden Die Betriebsart Gefrieren ist ausgewählt Wählen Sie die Betriebsart Küh len aus Siehe hierzu Auswählen des Gefrier oder Kühlmodus Der Kompressor läuft ständig Der Temperaturregler kann falsch eingestellt sein Stellen Sie eine höhere Tempera tur ein DieTüristnicht richtiggeschlos ...

Страница 67: ...kt nicht richtig in der Steckdose Stecken Sie den Netzstecker rich tig in die Steckdose Das Gerät bekommt keinen Strom Es liegt keine Spannung an der Netzsteckdose an Testen Sie ob ein anderes Gerät an dieser Steckdose funktioniert Prüfen Sie die Sicherung Kontak tieren Sie einen qualifizierten Elektriker Die Lampe funktioniert nicht Die Lampe ist defekt Siehe hierzu Austauschen der Lampe Die Tür ...

Страница 68: ...Sie den Kun dendienst TECHNISCHE DATEN A85280GA A85320GA Abmessungen Höhe 1650 mm 1850 mm Breite 660 mm 660 mm Tiefe 680 mm 680 mm Ausfalldauer 25 Std 25 Std Die technischen Informationen befinden sich auf dem Typenschild innen links im Gerät sowie auf der Energieplakette MONTAGE WARNUNG Lesen Sie bitte die Sicherheitshinweise sorgfältig vor der Aufstellung des Geräts durch um Gefahren für Sie sel...

Страница 69: ...Fall muss der Platz hinter dem Ober schrank mindestens 50 mm tief sein Elektrischer Anschluss Kontrollieren Sie vor der ersten Benutzung des Gerätes ob die Netzspannung und frequenz Ihres Hausanschlusses mit den auf dem Typenschild angegebenen Anschlusswerten über einstimmen Das Gerät muss geerdet sein Zu diesem Zweck ist die Netzkabelsteckdose mit einem Schutzkontakt ausgestattet Falls die Steckd...

Страница 70: ...nem Geräusch dämmelement unter dem Gerät ausgestattet Bitte entfernen Sie dieses Element nicht Distanzstücke Bringen Sie die im Zubehörbeutel mitgelieferten Distanzstücke wie in den Abbildungen gezeigt an Werden zwei Geräte direkt nebeneinander aufge stellt bringen Sie bitte die selbstklebenden Dis tanzstücke zwischen den Geräten an Setzen Sie die Distanzstücke an der Rückseite der Blende ein 3 2 ...

Страница 71: ...en Träger aus Holz 4 Schrauben Sie das untere Scharnier a1 los Entfernen Sie den Türschließermechanis mus vom Scharnier und versetzen Sie den Bolzen auf die andere Seite a2 Schrau ben Sie den im Zubehörbeutel mitgelie ferten Türschließermechanismus an der gegenüber liegenden Seite wieder an 5 Entfernen Sie den Türschließermechanis mus von der Tür b1 Schrauben Sie den im Zubehörbeutel mit geliefert...

Страница 72: ...en Der magnetische Dichtungsstreifen am Gerät befestigt ist Die Tür korrekt öffnet und schließt WARNUNG Bei niedrigen Umgebungstemperaturen z B im Winter kann es sein dass die Türdichtung nicht richtig am Gerät anliegt Warten Sie in diesem Fall auf die natürliche Anpassung der Dichtung HINWEISE ZUM UMWELTSCHUTZ Das Symbol auf dem Produkt oder seiner Verpackung weist darauf hin dass dieses Produkt ...

Страница 73: ...73 ...

Страница 74: ...74 ...

Страница 75: ...75 ...

Страница 76: ...www aeg electrolux com shop 818361202 00 032010 ...

Отзывы: