12
THE GRILL
CAUTION – Accessible parts may be hot
when the grill is in use. Young children
should be kept away.
USING THE GRILL
The grill on this appliance has been designed to heat
up more quickly than conventional grill elements. It
provides quick, direct heat and no preheating is
necessary.
•
Turn the second oven/grill control clockwise to the
full power setting ( ), then turn down as
necessary.
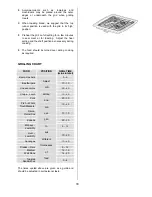
The grill settings are as follows:-
•
( ) grill area at low power.
•
( ) grill area at high power.
•
( ) grill area at full power.
THINGS TO NOTE
•
The cooling fan will operate.
•
Some smoke from fat splashes may be evident as
the grill cleans itself.
•
The second oven
cannot
be operated when the
grill is in use.
THE GRILL PAN AND HANDLE
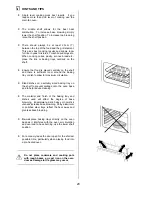
The grill pan is supplied with a removable handle.
To attach the handle, press the button on the handle
with the thumb and insert the lip into the widest part of
the bracket. Slide the handle towards the left and
release the button.
Ensure the handle is correctly located.
To remove the handle, press the button on the handle
with the thumb and slide the handle towards the right.
Release the button.
Always remove the grill pan handle during
grilling.
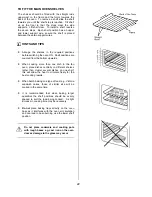
Place the grill pan on the shelf so that the pan is
positioned centrally beneath the grill. Ensure that the
cut out on the underside of the handle bracket locates
between the bars of the shelf.


