AEG Electrolux 24

32

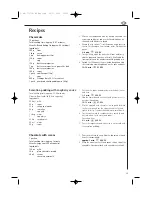
Recipes

Veal cutlet with mozzarella

Total cooking time: approx. 24-31 minutes
Utensils: Shallow square gratin dish with lid

(approx. 25 cm long)

Ingredients

mozzarella cheese (150 g)

500 g 

drained, peeled tinned tomatoes

veal cutlets (600 g)

20 ml 

olive oil

cloves of garlic, sliced
pepper, freshly milled

2 tbsp 

capers (20 g)
oregano, salt

1. Cut the mozzarella into slices. Puree the tomatoes with

the puree attachment of a hand mixer.

2. Wash the cutlets, dry them and beat them flat.

Distribute the oil and the garlic slices over the bottom
of the oven-proof dish. Add the cutlets and pour over
the tomato puree. Sprinkle with pepper, capers and
oregano, cover and cook on the low rack.

15-19 min.  

630 W

Turn the meat slices.

3. Place a few slices of mozzarella on each piece of meat,

add salt and cook uncovered on the high rack.

9-12 min.  

630 W 

After cooking allow to stand for about 5 minutes.

Stuffed Roast Chicken

2 portions
Total cooking time: approx. 36-40 minutes
Utensils: Bowl (2 Iitre capacity)

String

Ingredients
1

chicken (1000 g)
salt
rosemary & majoram, bruised

1

stale bread (roll, 40 g)

1

bunch parsley, finely chopped (10 g)

1 pinch nutmeg
5 tbsp 

butter or margarine (50 g)

1

egg yolk

1 tbsp

sweet paprika

1 tsp

butter or margarine to grease the dish

1. Wash the chicken, dry it and season it internally with

salt, rosemary and marjoram.

2. For the filling soak the bread roll in cold water for

about 10 minutes and then squeeze the water out. Mix
with salt, parsley, nutmeg, butter (20 g) and egg yolk
and stuff the chicken with the mixture. Tie up the
opening with string.

3. Heat the butter (30 g).

ca. 1 min.  

900 W

Stir the paprika and salt into the butter and spread
over the chicken.

4.  Place chicken in the greased dish and cook.

Turn over halfway through cooking. 

35-39 min.  

630 W

Leave the stuffed roast chicken to stand for approx. 3
minutes after cooking. 

Courgette and noodle gratin

Total cooking time: approx. 37-44 minutes
Utensils: Bowl with lid (2 l Inhalt)

Gratin dish (approx. 26 cm long)

Ingredients
500 ml  water

1

/

2

tsp

oil

80 g 

macaroni

400 g 

tinned chopped tomatoes

onion (150 g), finely chopped
basil, thyme, salt & pepper

1 tbsp 

oil to grease the dish

450 g 

courgettes, sliced 

150 g 

sour cream 

2 eggs
100 g 

grated Cheddar cheese

1.  Put the water, oil and salt in the bowl, cover and bring

to the boil. 

3-4 min.  

900 W

2.  Break the macaroni into pieces and add them to the

dish. Stir and allow to soak. 

9 -11 min.  

270 W

Drain the pasta and allow to cool.

3. Mix the tomatoes with the onions and season well.

Add the macaroni and pour over the tomato sauce.
Divide the courgette slices on top.

4. Beat the sour cream and the eggs and pour over the

dish. Sprinkle the grated cheese on top. Place on the
low rack and cook. 

1. 18-21 min.  

900 W

and then 

2. 7-8 min.  

630 W 

Allow the gratin to stand for about 5-10 minutes after
cooking.

1. AG-71+72D-EU English  22/11/2005  15:05  Page 32

Содержание 24" MCD2661EM MicroMat-Duo

Страница 1: ...User s Manual MCD2661EM 24 MicroMat Duo User s Manual...

Страница 2: ...cro ondes avec gril Magnetronoven met grill Horno Microondas con grill Mikrob lgovn med grill Operating instructions Gebrauchsanweisung Notice d utilisation Gebruiksaanwijzing Instrucciones de Manjo B...

Страница 3: ...portant information concerning your safety or the operation of your appliance is noted by this symbol and or mentions words such as Warning Take care Be sure to follow all instructions carefully Throu...

Страница 4: ...tant information 39 Installation 40 41 The symbol on the product or on its packaging indicates that this product may not be treated as household waste Instead it shall be handed over to the applicable...

Страница 5: ...rate the oven if it is damaged or malfunctioning Check the following before use a The door make sure the door closes properly and ensure it is not misaligned or warped b The hinges and safety door lat...

Страница 6: ...Do not attempt to replace the oven lamp yourself or allow anyone who is not authorised by AEG Electrolux to do so If the oven lamp fails please consult your dealer or an authorised AEG Electrolux ser...

Страница 7: ...n procedure Water vapour or drops may occasionally form on the oven walls or around the door seals and sealing surfaces This is a normal occurrence and is not an indication of microwave leakage or a m...

Страница 8: ...rntable rim when removing them from the oven NOTE When you order accessories please mention two items part name and model name to your dealer or authorised AEG Electrolux service agent 1 Grill heating...

Страница 9: ...programmes 5 AUTO COOK PLUS GRILL 1 button Press to select one of the 2 automatic programmes 6 AUTO COOK PLUS GRILL 2 button Press to select one of the 4 automatic programmes 7 AUTO DEFROST button Pr...

Страница 10: ...k 3 Press the COOKING MODE button to change from hours to minutes 4 Set the minutes Rotate the TIMER WEIGHT POWER knob until the correct minute is displayed 35 5 Press the COOKING MODE button to start...

Страница 11: ...microwaves Microwaves penetrate all non metal objects made of glass china earthenware plastic wood or paper This is why the microwaves never make these materials hot Dishes become hot only because the...

Страница 12: ...ly speaking metal should not be used since microwaves do not pass through metal and therefore cannot reach the food There are however exceptions small strips of aluminium foil may be used to cover cer...

Страница 13: ...cause the container to explode The exception is when you are making preserves Cooking times All the times given in this book are guidelines which can be varied according to the initial temperature wei...

Страница 14: ...more evenly in round or oval containers than in containers with corners since the microwave energy concentrates in the corners and the food in these areas could become overcooked Addition of water Ve...

Страница 15: ...d and the food heats up evenly Arrangement of food Place a number of individual portions such as small pudding moulds cups or potatoes in their jackets in a circle on the turntable Keep the portions a...

Страница 16: ...eaux cream cheese and bread should only be partially defrosted and then left to defrost completely at room temperature By so doing you will avoid the outer areas becoming too hot while the inside is s...

Страница 17: ...bles before preparing them clean them and only then weigh the required quantity for the recipe and chop them up Season them as you would normally but as a rule only add salt after cooking Add about 5...

Страница 18: ...p casseroles canned food hot beverages vegetables fish etc 630 W used for longer cooking of dense foods such as roast joints meat loaf and plated meals also for sensitive dishes such as cheese sauce a...

Страница 19: ...n once microwave only 3 Choose desired power by rotating the TIMER WEIGHT POWER knob clockwise 4 Press START QUICK button once to begin cooking x1 NOTE 1 When the door is opened during the cooking pro...

Страница 20: ...e this is normal and not a sign that the oven is out of order To avoid this problem when first using the oven operate the grill without food for 20 minutes This mode uses a combination of Grill power...

Страница 21: ...STAGE 2 5 Enter desired time by rotating TIMER WEIGHT POWER knob 6 Choose the desired cooking mode by pressing the COOKING MODE button twice Grill only 7 Press START QUICK button once to begin cooking...

Страница 22: ...power level for 30 seconds by pressing the START QUICK button NOTE To avoid the misuse by children the START QUICK button can be used only within 3 minutes after preceding operation i e closing the d...

Страница 23: ...ng press the START QUICK button For example 1a AUTO COOK The AUTO COOK button has two menus Press the AUTO COOK button once the display will appear as shown 1b AUTO COOK plus GRILL 1 The AUTO COOK PLU...

Страница 24: ...QUICK button once 1 Select the menu required by pressing the AUTO COOK PLUS GRILL 1 button once x1 Check the display Example 2 for AUTO DEFROST To defrost Steak 0 2 kg using Auto Defrost Ad 1 2 Enter...

Страница 25: ...C Gratin dish with microwave cling film 0 5 1 5 kg 500 g initial temp Mince 5 C Casserole dish with lid x1 x2 BUTTON PROCEDURE See recipes for Gratinated Fish Fillet on pages 25 26 Total weight of al...

Страница 26: ...hen audible signals sound turn the food over After cooking remove and stand for approximately 5 minutes Mix the ingredients and spread on the chicken Pierce the skin of the chicken Put chicken breast...

Страница 27: ...d the audible signals sound turn the food over Remove the defrosted parts if possible After defrosting stand for 5 10 minutes until thoroughly defrosted Remove all packaging from the cake Place on a f...

Страница 28: ...t and anchovy butter 2 Place in a gratin dish size depends on weight 3 Sprinkle the Gouda over the fish 4 Wash the tomatoes and remove the stalk spore Cut into slices and place on top of the cheese 5...

Страница 29: ...5 Place on the low rack and cook on AUTO COOK plus GRILL 1 A1 2 Gratin 6 After cooking let stand for 5 10 minutes GRATINATED FISH FILLET A1 1 Fish esterhazy Ingredients 0 5 kg 1 0 kg 1 5 kg 230 g 450...

Страница 30: ...s The times shown in the table are guidelines which may vary according to freezing temperature quality and weight of the foodstuffs Goulash 500 270 W 8 9 stir halfway through defrosting time 10 15 Sau...

Страница 31: ...ace on the high rack turn over after 2 pieces medium 6 8 season after grilling Browning of gratin dishes 8 13 Place gratin dish on the low rack The grilling time depends on the type of cheese used Cro...

Страница 32: ...p grated cheese 40 g 1 Place the butter cut up into pieces in the bowl Add the sliced onion the meat stock and the seasoning Cover and microwave 9 11 min 900 W 2 Toast the slices of bread cut them int...

Страница 33: ...630 W Allow the aubergines to stand for about 2 minutes after cooking Zurich veal stew Total cooking time approx 9 14 minutes Utensils Bowl with lid 2 Iitre capacity Ingredients 600 g veal fillet 1 tb...

Страница 34: ...lling on each slice of the cooked ham and roll up Secure the ham with a wooden toothpick 3 Make a b chamel sauce To do this pour the liquid into the dish cover and heat 2 4 min 900 W Rub the butter in...

Страница 35: ...oram 2 For the filling soak the bread roll in cold water for about 10 minutes and then squeeze the water out Mix with salt parsley nutmeg butter 20 g and egg yolk and stuff the chicken with the mixtur...

Страница 36: ...pprox 16 22 minutes Utensils Bowl with lid 2 Iitre capacity Round souffl dish approx 20 cm diam Ingredients 1 I water 1 tsp salt 200 g tagliatelle 1 clove of garlic 15 20 basil leaves 200 g cream cr m...

Страница 37: ...ou can also use frozen fruit once it is defrosted 1 Reserve some of the fruit for decoration Puree the rest of the berries with the wine Put into the bowl and cook cover 5 7 min 900 W Add sugar and le...

Страница 38: ...milk into the cup Add the chocolate stir and heat Stir occasionally approx 1 min 900 W 2 Whip the cream until stiff and spoon this on top of the chocolate Serve garnished with chocolate vermicelli Ch...

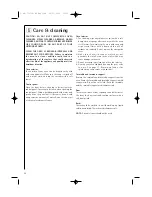
Страница 39: ...1 For cleaning wipe any splatters or spills with a soft damp cloth or sponge after each use while the oven is still warm For heavier spills use a mild soap and wipe several times with a damp cloth unt...

Страница 40: ...authorised AEG Electrolux service agent the interior light is not working Call an authorised AEG Electrolux service agent The interior light bulb can be exchanged only by an authorised AEG Electrolux...

Страница 41: ...ch is improperly installed or calls to appliances outside your country of residence Appliances found to be in use within a commercial environment plus those which are subject to rental agreements Prod...

Страница 42: ...rene eg packaging CFC free PP polypropylene eg packaging straps By using and re using the packaging raw materials are saved and waste volume is reduced Packaging should be taken to your nearest recycl...

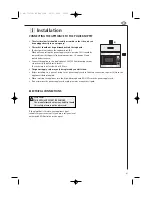
Страница 43: ...oor above and the top of the frame see diagram 5 Fix the oven in position with the screws provided The fixing points are located on the top and bottom corners of the oven see diagram item 10 on page 5...

Страница 44: ...supply cord may only be replaced by an electrician Before installing tie a piece of string to the power supply cord to facilitate connection to point A when the appliance is being installed When inse...

Страница 45: ...egion AEG products are supported by a national service support system Call our customer service department for attention Please retain your invoice AEG to quote should you require service assistance T...

Страница 46: ...formation visit www euro line appliances com www elawest com 871 Cranberry Court Oakville ON L6L 6J7 Canada Toll Free 1 800 421 6332 Showroom 905 829 3980 marketing euro line appliances com 2912 West...

Отзывы: