Installation Manual of Network Camera
4
Figure 2-3
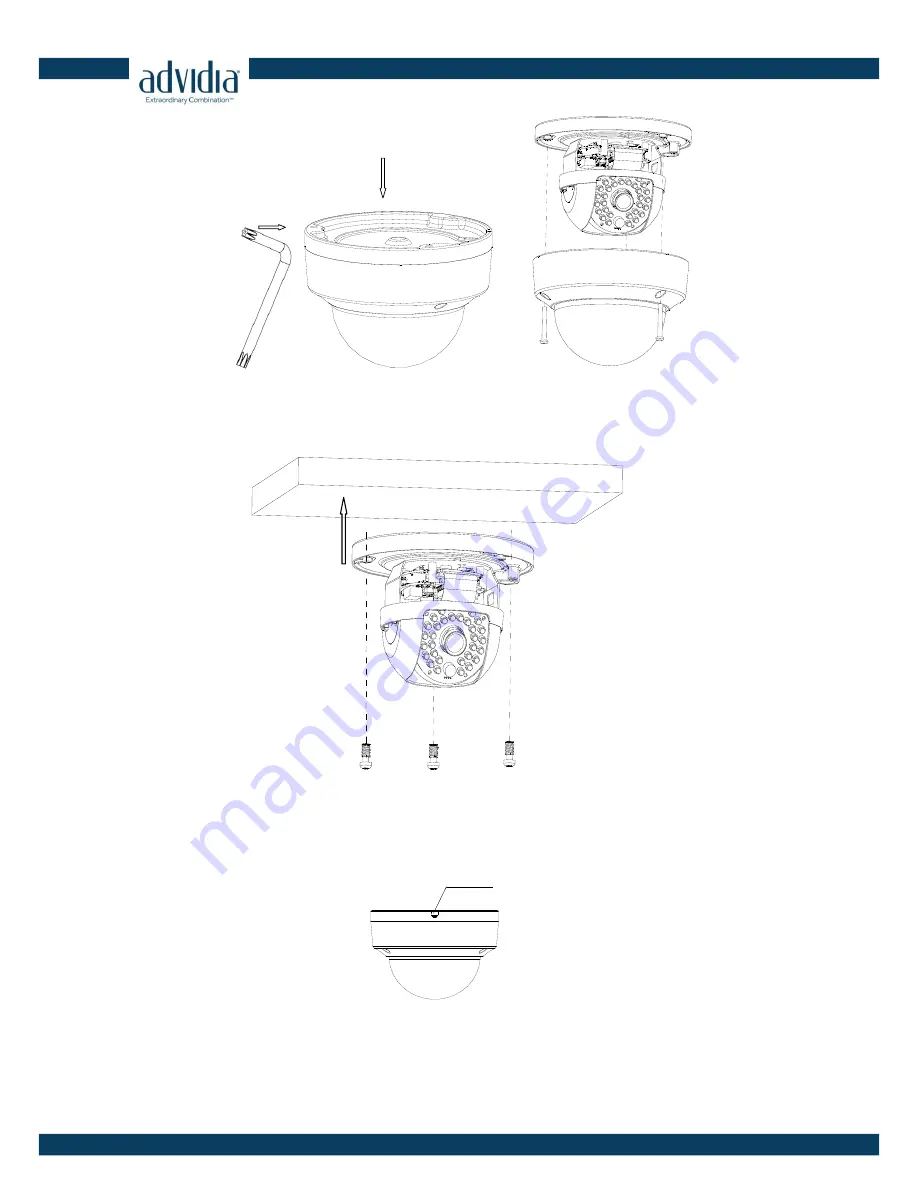
Remove the Lower Dome
3.
Secure the mounting base to the ceiling with screws.
Figure 2-4
Fix the Mounting Base
Note:
If required, you can route cables through the side opening on the side of the mounting
base.
Figure 2-5
Side Opening


