


32
AMM10N
Pairing the Bluetooth System with
Your Mobile Phone and Head Unit
1.
Press the
button (8) to initiate the pairing process.
Keep the mobile phone within 2 meters of the head unit
when pairing. (To terminate the pairing process, press
the
button again.)
2.
Select the Bluetooth setup option on the mobile phone
to be paired (please refer to the phone’s instruction
manual to learn how to enter Bluetooth setup, turn
Bluetooth on/off, and perform pairing).
NOTE: Some phones require a “pass key” or pairing
code to connect. If your phone requires a pass key or
pairing code, you will need to enter this number in the
Pairing Code field under the Bluetooth SETUP menu. The
default pairing code for many phones is “0000”. The
default code for the AMM10N is “1234”. See “Bluetooth
Sub-menu Features” on page 18 for instructions on
entering the pairing code.
3.
Select “AMM10N” from the pairing list on the mobile
phone.
•
If pairing is successful, the TFT will display the
paired mobile phone model number or name (as
specified in your phone’s Bluetooth Setup menu).
•
If pairing fails, “Phone Pairing Fail” is displayed at
the bottom of the screen.
Reconnecting
Once the Bluetooth device has been paired, you can touch
the connect
button to reconnect.
NOTE: You can only connect to a phone using the
buttons on the on-screen Phone interface.
Each time the
button is pressed, the head unit will
automatically reconnect with the mobile phone once (only if
the mobile phone was previously paired with the head unit).
Managing Incoming Calls
When connected to a Bluetooth phone, the unit will mute
audio output, pause CD play, and change to the Bluetooth
screen when a call is received. An incoming phone number
will appear at the top of the screen. If the screen is closed,
the number will scroll across the LCD. If the incoming call has
no caller ID, the TFT or LCD will display “Restricted Number”.
Answering an Incoming Call
To answer the call, touch the
button.
For best reception, speak loudly and clearly. The microphone
is located on the left side of the unit.
To end the conversation, press the
button. The screen will
display the call duration for 3 seconds, and then return to the
previous mode.
Rejecting an Incoming Call
Touch the
button to reject an incoming call. The call will
revert to your phone and can be answered directly or left for
voice mail.
Volume Control
To increase or decrease the volume level, turn the rotary
encoder (5) on the front panel or press the
VOL+/ VOL-
buttons (15, 16) on the remote control.
Microphone Mute
To mute the microphone, touch the
button. Touch again to
resume microphone functionality.
Making an Outgoing Call
NOTE: Press the
button from the main Bluetooth
screen to automatically dial the last call received.
1.
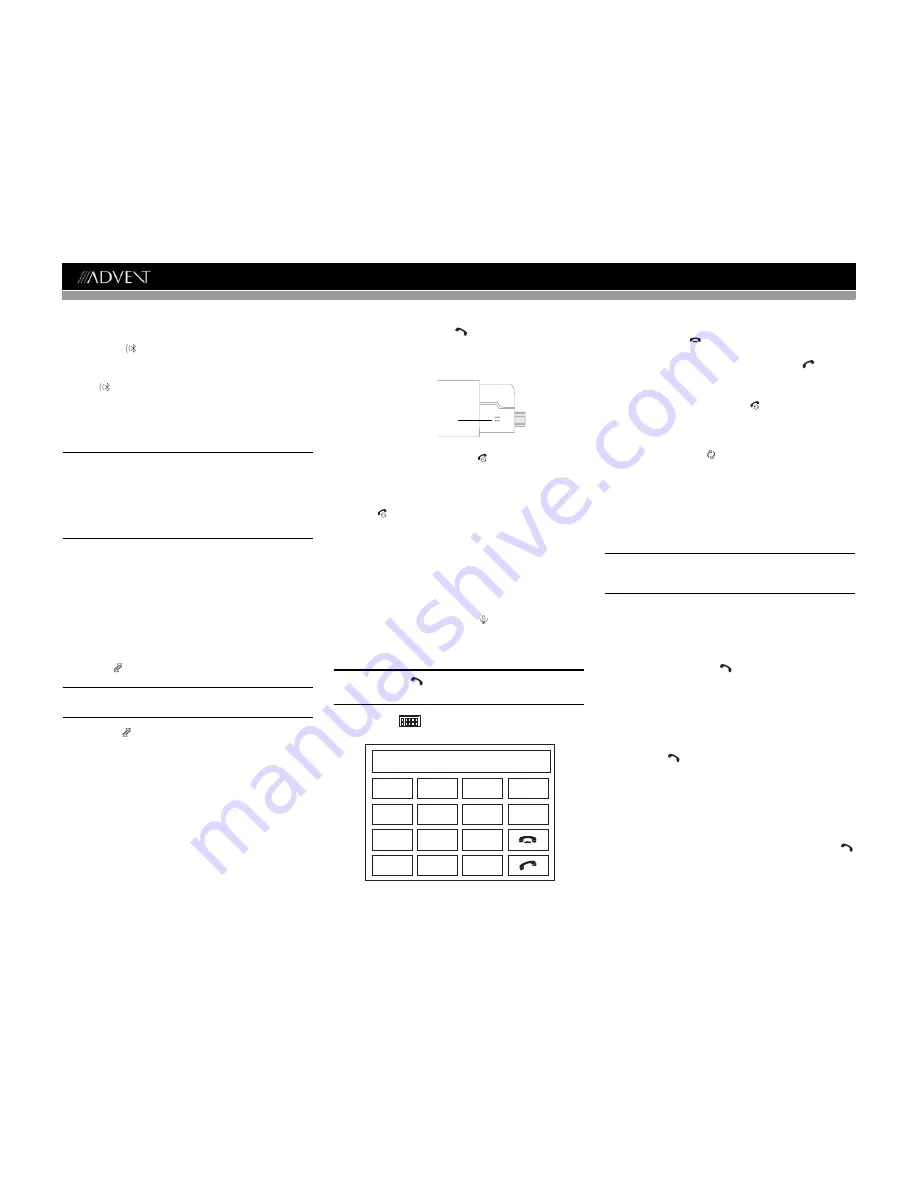
Touch the
button to open the direct dial screen.
2.
Use the 0-9, *, and # buttons to input the phone number.
•
Touch the
CLEAR
button to clear the last digit.
•
Touch the
button to clear the entire number and
start over.
3.
After entering the phone number, press the
button to
dial the call. The direct dial screen will close once your
call is connected.
To end the conversation, press the
button.
Call Transfer
While talking, to transfer audio from the head unit back to the
mobile phone, touch the
button (7). The TFT will display
“Transfer”. You can only transfer a call after it has been
answered.
Menu List
The menu list appears on the left side of the screen and can
be accessed from other modes by touching the
MENU
button
on the right side of the screen.
NOTE: Not all phones allow access to missed, received
or dialed calls and some will not allow uploading of your
phone’s address book.
Missed Calls
The Missed Calls list retrieves the list of Missed numbers
from your phone. The last missed number is the first number
on the list. Touch the Missed Calls menu option to view the
list. To make a call from the Missed Calls list, touch the
number and then touch the
button. The TFT will display
“Cannot get missed record” when the feature is not available.
Dialed Calls
The Dialed Calls list retrieves the list of dialed numbers from
your phone. The last dialed number is the first number on the
list. Touch the Dialed Calls menu option to view the list. To
make a call from the Dialed Calls list, touch the number and
then touch the
button. The TFT will display “Cannot get
dialed record” when the feature is not available.
Received Calls
Use the Received Calls list to view the last 10 received
numbers stored on your phone. To access the Received list,
touch the Received Calls menu option. The last received
number is the first number on the list. To make a call from the
Received Calls list, touch the number and then touch the
button. The TFT will display “Cannot get received record”
when the feature is not available.
MICROPHONE
Exit
Clear
1
2
3
4
5
6
7
8
9
0
#
*


