Advantech UN0148B33B2404-T Скачать руководство пользователя страница 4

UNO-148 User Manual

iv

Declaration of Conformity

CE

This product has passed the CE test for environmental specifications when shielded

cables are used for external wiring. We recommend the use of shielded cables. This

type  of  cable  is  available  from Advantech.  Please  contact  your  local  supplier  for

ordering information.
Test  conditions  for  passing  also  include  the  equipment  being  operated  within  an

industrial enclosure. In order to protect the product from damage caused by electro

-

static  discharge  (ESD)  and  EMI  leakage,  we  strongly  recommend  the  use  of  CE-

compliant industrial enclosure products.

FCC Class A

This equipment has been tested and found to comply with the limits for a Class A dig

-

ital device, pursuant to part 15 of the FCC Rules. These limits are designed to pro

-

vide  reasonable  protection  against  harmful  interference  when  the  equipment  is

operated  in  a commercial  environment. This equipment  generates,  uses,  and  can

radiate radio frequency energy and, if not installed and used in accordance with the

instruction manual, may cause harmful interference to radio communications. Opera

-

tion of this equipment in a residential area is likely to cause harmful interference. In

this event, users are required to correct the interference at their own expense.
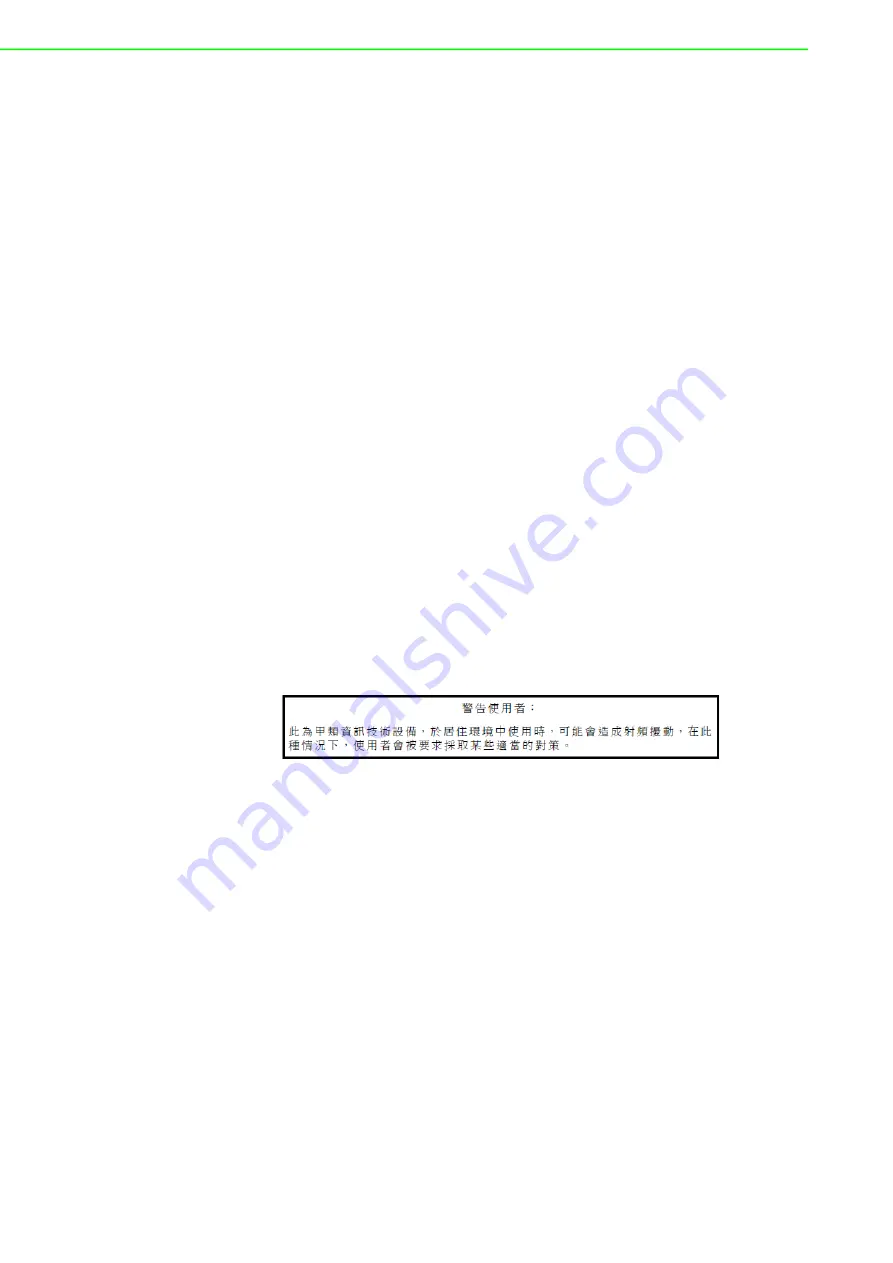
甲類資訊技術設備

甲類設備為其他符合甲類設備限制值之資訊技術設備,而非符合乙類資訊技術設備的
限制值;雖然不可限制此類設備之行銷,但使用場所必須被限制,不得進行居住的環
境中,且應於其機器本體及使用說明書中含有下列警語:

Technical Support and Assistance

1.

Visit the Advantech website at www.advantech.com/support to obtain the latest 

product information.

2.

Contact your distributor, sales representative, or Advantech's customer service 

center for technical support if you need additional assistance. Please have the 

following information ready before calling:

Product name and serial number

Description of your peripheral attachments

Description of your software (operating system, version, application software, 

etc.)

A complete description of the problem

The exact wording of any error messages

Содержание UN0148B33B2404-T

Страница 1: ...Manual UNO 148 Intel Tiger Lake UP3 Processor Automation Computer with 3 x LAN 4 x COM 3 x USB 3 2 Gen2 1 x USB 2 0 2 x DP 1 4 8DI 8DO 1 x mPCIe 1 x M 2 B M Key 1 x M 2 E Key 1 x Nano SIM Slot and TPM...

Страница 2: ...their respective owners Support For more information on this and other Advantech products please visit our website at http www advantech com For technical support services please visit our support web...

Страница 3: ...abuse accident or improper installation Advantech assumes no liability under the terms of this warranty as a consequence of such events Because of Advantech s high quality control standards and rigoro...

Страница 4: ...mful interference when the equipment is operated in a commercial environment This equipment generates uses and can radiate radio frequency energy and if not installed and used in accordance with the i...

Страница 5: ...quipment to a power outlet 9 Position the power cord away from high traffic areas Do not place anything over the power cord 10 All cautions and warnings on the equipment should be noted 11 If the equi...

Страница 6: ...ilisez seulement un chiffon humide N utilisez pas de d tergent liquide ou pulv ris pour le nettoyage 4 Gardez cet quipement l abri de l humidit 5 Placez cet quipement sur une surface fiable pendant l...

Страница 7: ...ce nominale est de 10 Vdc 7 7 A en cas de besoin contactez Advant ech pour plus d informations 16 Pour une utilisation dans des environnements non polluant et l int rieur 17 C est appareil ne doit pas...

Страница 8: ...UNO 148 User Manual viii 15 40 C 40 F 60 C 140 F 16 17 IEC 704 1 1982 70 18 19 IEC 704 1 20 CCC...

Страница 9: ...Connectors on Board 11 2 2 External I O Connector 12 2 2 1 UNO 148 Base Unit 12 Figure 2 3 Front Panel of UNO 148 12 Figure 2 4 Top View of UNO 148 12 2 2 2 UNO 148 Base Unit with UNO 148 IS2EA Expans...

Страница 10: ...or and HDD SSD Storage Extension Kit UNO 148 IS2EA 38 3 7 2 iDoor Extension Kit UNO 148 ID1EA 42 3 7 3 PCIe Expansionx4 UNO 148 P11EA 46 3 8 Remote Power Reset Settings 50 Table 3 1 Remote Power On Re...

Страница 11: ...xi UNO 148 User Manual Table A 8 Expansion Board to Board Connector Pin Assignments 63 A 11 TPM 2 0 BIOS Setting 64 A 12 CPU Turbo Mode BIOS Setting 66...

Страница 12: ...UNO 148 User Manual xii...

Страница 13: ...Chapter 1 1 Overview This chapter overviews specifica tions for UNO 148 Introduction Safety Precautions Accessories Hardware Specifications Dimensions...

Страница 14: ...not connect the chassis while the system power is on A sud den rush of power can damage sensitive electronic components Only experienced electronics personnel should open the chassis Warning Toujours...

Страница 15: ...in block for DIO 1 x 2 PIN Plug in for Power 1 x Earth Ground cable Quick Start Guide Warranty card If anything is missing or damaged contact your distributor or sales representative immediately 1 4 H...

Страница 16: ...col and 802 1AS implementation LED Indicators 1x Power Green S0 Orange S3 or S5 1x RUN Green Programmable PLED 1x BTR RED RTC Battery Low Communication M 2 slot for B key and E key Storage 1 x M 2 M k...

Страница 17: ...0 10 30 VDC Logic 1 0 3 VDC Input Voltage Dry Contact Logic 0 Shorted to GND Logic 1 Open Digital Output Output Voltage 5 30 VDC Output Capability Sink 500mA max channel Displays 2 x DP 1 4 up to 768...

Страница 18: ...A Ports 1 x iDoor Dimensions W x D x H 35 x 140 x 200 mm Weight 0 4 kg Part number UNO 148 IS2EA Description 2nd stack extension kit to support 1 x iDoor and 1 x 2 5 SSD HDD storage on UNO 148 IS2EA P...

Страница 19: ...User Manual Chapter 1 Overview 1 5 Dimensions 45 x 140 x 200 mm W x D x H mm Figure 1 1 UNO 148 Dimension 80 x 140 x 200 mm W x D x H mm Figure 1 2 UNO 148 Dimension With UNO 148 IS2EA Optional Exten...

Страница 20: ...UNO 148 User Manual 8 80 x 140 x 200 mm W x D x H mm Figure 1 3 UNO 148 Dimensions With UNO 148 ID1EA Optional Extension Kit Figure 1 4 UNO 148 Dimensions With UNO 148 ID1EA Optional Extension Kit...

Страница 21: ...lity This chapter details setup instruc tions for UNO 148 s hardware functions It includes connecting peripherals and indicators Introduction External I O Connector Internal I O Connector LED Indicato...

Страница 22: ...e following diagram demonstrates the location of UNO 148 s motherboard s key components and internal external connectors Figure 2 1 Diagram of Connector Locations on UNO 148 Top Side Figure 2 2 Key Co...

Страница 23: ...AN Connector CN7 USB 3 0 2 0 Connector CN8 USB 3 0 x2 Connector SW1 Reset Button Power Button D55 LED Indicator CN9 8DI 8DO Terminal Connector CN10 COM Port Terminal Connector RS232 422 485 CN11 COM P...

Страница 24: ...UNO 148 User Manual 12 2 2 External I O Connector 2 2 1 UNO 148 Base Unit Figure 2 3 Front Panel of UNO 148 Figure 2 4 Top View of UNO 148...

Страница 25: ...NO 148 User Manual Chapter 2 Hardware Functionality 2 2 2 UNO 148 Base Unit with UNO 148 IS2EA Expansion Unit 1 x iDoor and 1 x 2 5 SSD HDD Figure 2 5 Front Panel of UNO 148 Figure 2 6 Top View of UNO...

Страница 26: ...UNO 148 User Manual 14 2 2 3 UNO 148 Base Unit with UNO 148 ID1EA Expansion Unit iDoor x 1 Figure 2 7 Front Panel of UNO 148 Figure 2 8 Top View of UNO 148...

Страница 27: ...15 UNO 148 User Manual Chapter 2 Hardware Functionality 2 2 4 UNO 148 Base Unit with UNO 148 P11EA Expansion Unit 1x PCIe expansionx4 Figure 2 9 Front Panel of UNO 148 Figure 2 10 Top View of UNO 148...

Страница 28: ...controller chip The Ethernet port is a standard RJ 45 jack Additionally LED indicators are provided on the front of the device to indicate the system s Link off green orange and Active green status 2...

Страница 29: ...RS 232 Mode Settings can be adjusted via an on board switch SW1 Table 2 2 COM Connector Pin Assignments Pin COM1 Mode Signal Name Pin COM2 Mode Signal Name 1 RS232 CTS 2 RS232 CTS RS422 T RS422 T RS48...

Страница 30: ...GPIO Use SW3 to set Wet Contact and Dry Contact for Digital input Dry Configure to Setting 1 Default Wet Configure to Setting 3 Digital Input Input Channels 8 Input Voltage Wet Contact Configure SW3...

Страница 31: ...mA max channel Opto Isolator Response 50 s Isolated Digital Input Each of the 8 x isolated digital input channels accept voltages from 0 to 30 V The fol lowing figure shows how to connect an external...

Страница 32: ...nt will sink from the external voltage source The following figure shows how to connect an external output load to the isolated outputs on UNO 148 Figure 2 13 Isolated DO Connection Diagram 2 3 Intern...

Страница 33: ...USB Connector CN12 Riser Connector SW2 COM Port RS232 422 485 settings r SW8 AT ATX Remote setting MINI1 MiniPCIe Connector SW1 COM Port RS232 422 485 settings CN14 M 2 B key for 2242 3042 3052 Conne...

Страница 34: ...n install the iDoor easily with optional extension kit 2 3 3 Nano SIM Slot There s one Nano SIM Slot for supporting LTE function labeled CN14 1 on board In addition to install SIM card on CN14 1 users...

Страница 35: ...product offers two antenna mounting holes covered by pre cut holes for users to install an antenna kit for LTE or wireless functions Figure 2 16 Diagram of Maximum OD Value for Antenna Hole Note Plea...

Страница 36: ...UNO 148 User Manual 24...

Страница 37: ...ains how to Ini tialize the UNO 148 Chassis Grounding Connecting Power Storage Installation Optional Din Rail Installation Wireless Module Installation Optional Expansion Module Installation Optional...

Страница 38: ...48 provides good EMI protection and a stable grounding base There is an easy to connect chassis grounding point Figure 3 1 Chassis Grounding Connection Earth terminal shall be used 16 AWG minimum size...

Страница 39: ...negative wires into the V and V contacts on the termi nal block connector 2 Tighten the wire clamps screws to prevent the DC wires from coming loose Take the following guidelines into consideration be...

Страница 40: ...3 3 Storage Installation Optional UNO 148 supports the installation of one M 2 2280 NVMe SSD The installation is demonstrated in the following steps 3 3 1 Installing a M 2 2280 NVMe 1 Remove 2 screws...

Страница 41: ...29 UNO 148 User Manual Chapter 3 Initial Setup 2 Remove the provided screws from the board 3 Insert the NVMe Card on the location CN15 Secure it with the provided screws from Step 2...

Страница 42: ...30 3 3 2 Installing M 2 3042 Module 1 Loosen the provided screws from the board No need to remove the screw 2 Using the 3042 bracket from the accessory bag and Insert the in the gap where the screw is...

Страница 43: ...er Manual Chapter 3 Initial Setup 3 Move the 3042 bracket to the center of M 2 center and tighten the screws 4 Remove the provided screws from the 3042 bracket first Insert the M 2 3042 card and tight...

Страница 44: ...UNO 148 User Manual 32 3 3 3 Installing M 2 3052 Module 1 Remove the provided screws from the board 2 Insert the M 2 3052 to the location CN14 and tighten the screw...

Страница 45: ...33 UNO 148 User Manual Chapter 3 Initial Setup 3 4 Installing M 2 2230 Module 1 Remove the provided screws from the board...

Страница 46: ...UNO 148 User Manual 34 2 Insert the M 2 2230 to the location CN13 and tighten the screw...

Страница 47: ...35 UNO 148 User Manual Chapter 3 Initial Setup 3 4 1 Installing mPCIE 1 Remove the provided screws from the board 2 Insert the mPCIE to the location MINI1 and tighten the screw...

Страница 48: ...UNO 148 User Manual 36 3 5 Din Rail Installation 1 Install UNO 148 on the rail and secure it to the rail 2 Pull down the Release Latch for disassembly using a screwdriver Buckle inward...

Страница 49: ...the steps below for installation 1 Remove 2 screws from back cover of UNO 2 Remove the plug of antenna pre cut hole s on the top panel for antenna instal lation 3 Install the SMA connector of Antenna...

Страница 50: ...8 IS2EA You can additionally install 2nd stack iDoor and external swappable 2 5 HDD SSD Storage extension kit PN UNO 148 IS2EA on UNO 148 to expand its functionality The accessory list for iDoor exten...

Страница 51: ...s below for extension kit Installation 1 Remove M3 x4L x 2 screws from back cover of UNO 148 2 Remove 2 x M3 x6L pcs the screw from the extension Kit 3 Detach the iDoor dummy cover from the iDoor exte...

Страница 52: ...UNO 148 User Manual 40 5 Attach the 2nd bracket UNO 148 IS2EA with 6 x M3x4L pcs screws to the Base Unit UNO 148...

Страница 53: ...h the 2 x M2x4L pcs screw from the accessory bag of iDoor exten sion kit 7 Detach the HDD SSD bracket from 2nd stack extension kit then fix the 2 5 HDD SSD to the HDD bracket with the 4 x M3x4L screws...

Страница 54: ...o place 3 7 2 iDoor Extension Kit UNO 148 ID1EA You can additionally install 2nd stack iDoor extension kit PN UNO 148 ID1EA on UNO 148 to expand its functionality The accessory list for iDoor extensio...

Страница 55: ...148 User Manual Chapter 3 Initial Setup Follow the steps below for extension kit Installation 1 Remove M3 x4L x 2 screws from back cover of UNO 148 2 Detach the iDoor dummy cover from the iDoor extens...

Страница 56: ...UNO 148 User Manual 44 3 Attach the 2nd bracket UNO 148 ID1EA with 6 x M3x4L pcs screws to the Base Unit UNO 148...

Страница 57: ...Initial Setup 4 Connect the mPCIe connector of iDoor module onto the board of the UNO 148 and fix it with the 2 x M3x4L pcs screw from the accessory bag of iDoor exten sion kit 5 Return the back cove...

Страница 58: ...sionx4 UNO 148 P11EA You can additionally install 2nd stack expansionx4 kit PN UNO 148 P11EA on UNO 148 to expand its functionality The accessory list for iDoor extension kit PN UNO 148 P11EA 8x M3x4L...

Страница 59: ...47 UNO 148 User Manual Chapter 3 Initial Setup Follow the steps below for extension kit Installation 1 Remove M3 x4L x 2 screws from back cover of UNO 148...

Страница 60: ...UNO 148 User Manual 48 2 Attach the 2nd bracket UNO 148 P11EA with 6 x M3x4L pcs screws to the Base Unit UNO 148...

Страница 61: ...49 UNO 148 User Manual Chapter 3 Initial Setup 3 Remove the PCIe cover and PCIe bracket from 2nd extension kit UNO 148 P11EA with 3 x M3x4L pcs screw 4 Install the PCIe card and tighten the screw...

Страница 62: ...herboard The default setting is for DI6 DI7 function ality If you want to configure UNO 148 for remote control functions configure SW8 Bit 2 to on then DI6 can be used for remote power settings and DI...

Страница 63: ...program uses a number of menus for making changes and turning special features on or off Press the ESC key upon the first boot up to enter the BIOS setup screen after then press the Del key during the...

Страница 64: ...UNO 148 User Manual 52...

Страница 65: ...Appendix A A System Settings Pin Assignment...

Страница 66: ...he transmit pair and in MDIX configuration MDI 0 is used for the receive pair 2 MDI0 3 MDI1 In BASE T Media Dependent Interface 1 2500BASE T In MDI configuration MDI 1 cor responds to BI_DB and in MDI...

Страница 67: ...ription 1 VBUS Power 2 D USB2 0 differential pair 3 D 4 GND Ground for power return Table A 4 USB 3 0 Connector Pin Assignments Pin Signal Name Description 1 VBUS Power 2 D USB2 0 differential pair 3...

Страница 68: ...layPort Adaptor Cable Pin Assignments Pin Signal Name 1 ML_Lane 0 p 2 GND 3 ML_Lane 0 n 4 ML_Lane 1 p 5 GND 6 ML_Lane 1 n 7 ML_Lane 2 p 8 GND 9 ML_Lane2 2 10 ML_Lane 3 p 11 GND 12 ML_Lane 3 n 13 CONFI...

Страница 69: ...anical notch B 17 Mechanical notch B 18 Mechanical notch B 19 Mechanical notch B 20 NC 21 NC 22 NC 23 WAKE_ON_WAN 24 NC 25 NC 26 M2_LTE_W2_DISABLE_N 27 GND 28 NC 29 USB_Z_SSRX1 30 M2_SIM1_RESET 31 USB...

Страница 70: ...NC 9 GND 10 NC 11 CLK_PCIE_mPCIe1 12 NC 13 CLK_PCIE_mPCIe1 14 NC 15 GND 16 NC 17 NC 18 GND 19 NC 20 WIFI_DISABLE 21 NC 22 MINI_PLTRST 23 PCIE_mPCIe_RX4 24 V3 3_MINI 25 PCIE_mPCIe_RX4 26 GND 27 GND 28...

Страница 71: ...A 7 1 COM1 COM2 TS232 422 485 Setting SW1 A 7 2 COM3 COM4 RS232 422 485 Setting SW2 SW1 Default Description settings This switch is used to select RS232 422 485 mode setting Default RS232 mode SW1 De...

Страница 72: ...de Bit 6 7 9 10 ON Bit 1 2 3 4 5 8 OFF COM3 RS232 Mode Bit 1 ON Bit 2 3 4 5 6 7 8 9 10 OFF RS485 Mode Bit 2 4 5 ON Bit 1 3 6 7 8 9 10 OFF RS422 Mode Bit 1 2 4 5 ON Bit 3 6 7 8 9 10 OFF COM4 RS232 Mode...

Страница 73: ...to Setting 1 Default BIOS2 Configure to Setting 3 SW1 Termination Resistor Setting Description This switch is used to select Termination Resistor 120 ohm for long distance transmission or device match...

Страница 74: ...A 9 AT ATX Setting SW8 SW8 can be used for AT ATX setting The default setting is AT mode See the follow ing table for switch configuration SW8 Default Description Instruction SW8 AT Mode Default Bit 1...

Страница 75: ...MB_CLK A6 GND B6 SMB_DAT A7 GND B7 GND A8 GND B8 V5 A9 USB B9 V5 A10 USB B10 V5 A11 GND B11 V5 A12 GND B12 PCIeX4_EN A13 CLK B13 GND A14 CLK B14 RX0 A15 GND B15 RX0 A16 TX0 B16 GND A17 TX0 B17 SLP_S3...

Страница 76: ...s support TPM2 0 functionality This can be enabled or dis abled in the BIOS menu by following the instructions provided below 1 Power on the UNO 148 system and press Delete to enter the BIOS configura...

Страница 77: ...ser Manual Appendix A System Settings Pin Assignment 3 Then select the Security Device Support item 4 Choose enable disable to enable or disable the TPM2 0 function The default setting is to disable t...

Страница 78: ...UNO 148 systems support CPU Turbo mode This can be enabled or disabled in the BIOS menu by following the instructions 1 Power on the UNO 148 system and press Delete to enter the BIOS configura tion m...

Страница 79: ...r Manual Appendix A System Settings Pin Assignment 3 Then select the CPU Power Management Control item 4 Choose enable disable to enable or disable the CPU Turbo mode The default setting is to disable...

Страница 80: ...e subject to change without notice No part of this publication may be reproduced in any form or by any means such as electronically by photocopying recording or otherwise without prior written permiss...

Отзывы: