eWorx SE500 Series Switches
:
42
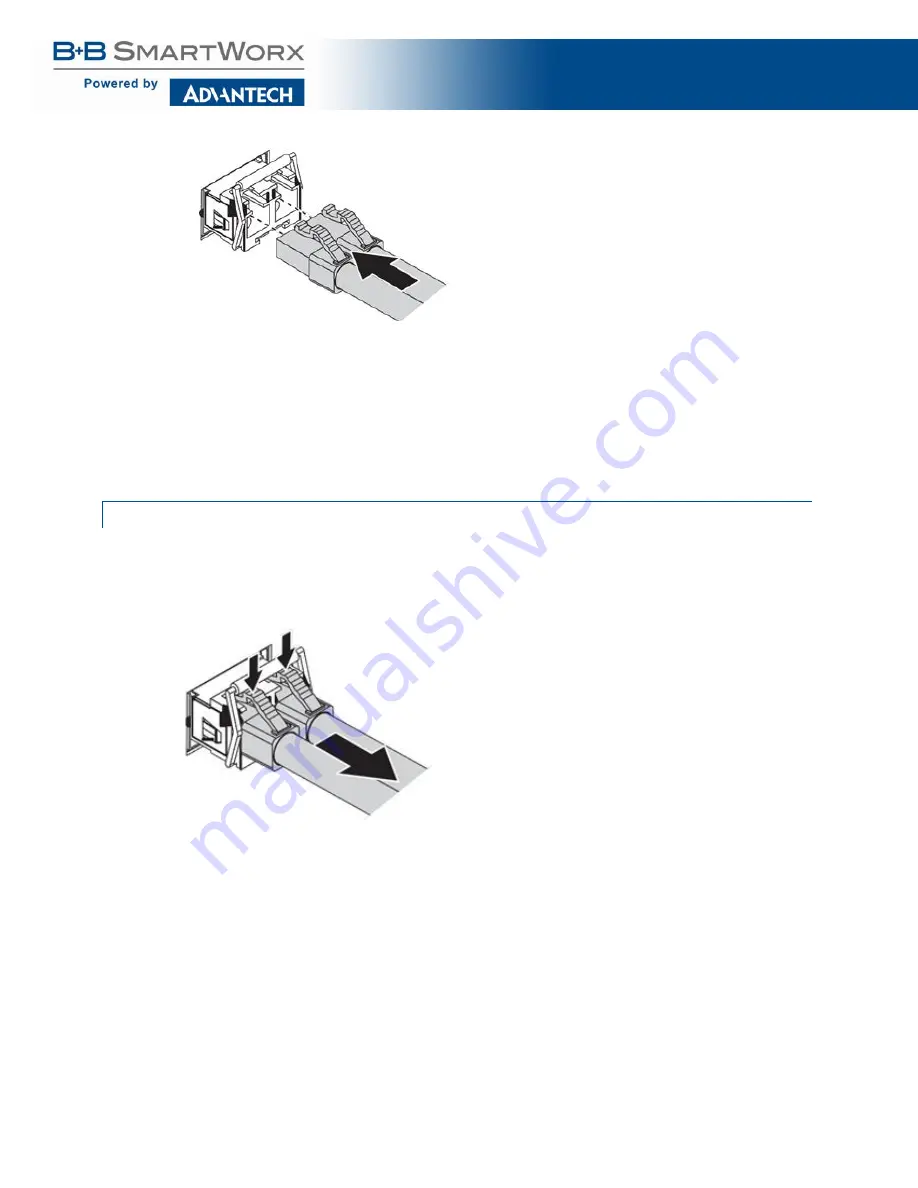
Figure 14: Attaching a Fiber Optic Cable to a Transceiver
8.
Repeat the previous procedures to install any additional SFP transceivers in the switch.
The fiber port is now set up.
2.4.2 REMOVING SFP MODULES
To disconnect an LC connector, use the following guidelines:
1.
Press down and hold the locking clips on the upper side of the optic cable.
2.
Pull the optic cable out to release it from the transceiver.
Figure 15: Removing a Fiber Optic Cable to a Transceiver
3.
Hold the handle on the transceiver and pull the transceiver out of the slot.
Содержание eWorx SE500
Страница 1: ...eWorx SE500 Series Switches User Manual ...
Страница 28: ...eWorx SE500 Series Switches 28 System LED Panel Figure 2 System LED Panel ...
Страница 70: ...eWorx SE500 Series Switches 70 Figure 38 System DHCP Client Option 82 ...
Страница 90: ...eWorx SE500 Series Switches 90 Figure 49 L2 Switching 802 1Q VLAN Port to VLAN ...
Страница 96: ...eWorx SE500 Series Switches 96 Figure 52 L2 Switching GARP GARP Settings ...
Страница 128: ...eWorx SE500 Series Switches 128 Figure 81 Security Storm Control Port Settings ...
Страница 139: ...eWorx SE500 Series Switches 139 Figure 90 Security 802 1x 802 1x Settings ...
Страница 150: ...eWorx SE500 Series Switches 150 Figure 98 QoS General DSCP Mapping ...
Страница 152: ...eWorx SE500 Series Switches 152 Figure 99 QoS General IP Precedence Mapping ...
Страница 159: ...eWorx SE500 Series Switches 159 Figure 106 Management LLDP LLDP System Settings ...
Страница 172: ...eWorx SE500 Series Switches 172 Figure 116 Management Power Over Ethernet PoE Port Settings ...
Страница 188: ...eWorx SE500 Series Switches 188 Figure 128 Management RMON Rmon Alarm ...
Страница 192: ...eWorx SE500 Series Switches 192 Figure 131 Diagnostics Ping Test ...
Страница 205: ...eWorx SE500 Series Switches 205 Figure 140 Tools Upgrade Manager ...


