background image

37

Chapter 4  

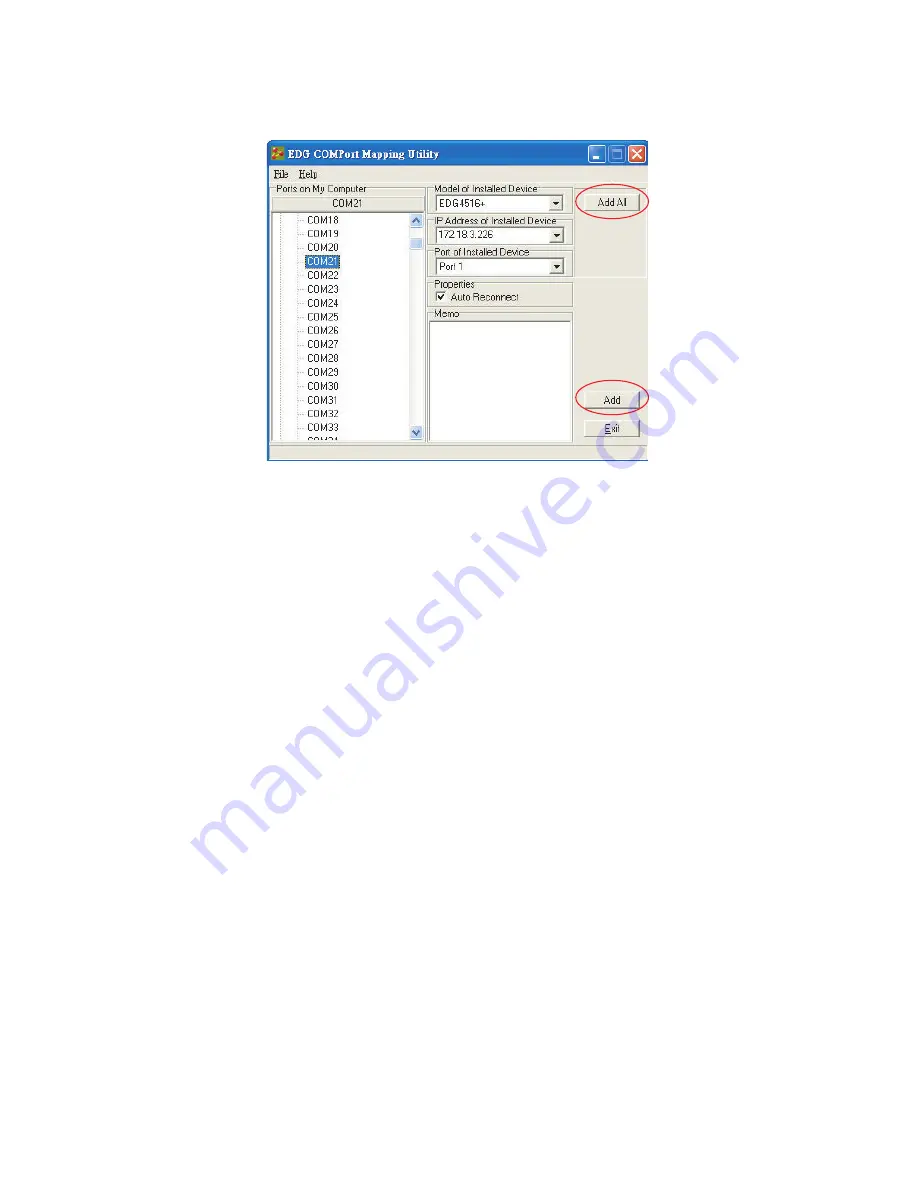
2. Click the ADD button to assign a COM port to an EDG device.

Module of Installed Device

You can choose between all connected EDG devices. In this example,  
"EDG-4516+" was chosen.

IP Address of Installed Device

Enter the IP address you assigned in chapter 3.4.

Port of Installed Device

Choose the port where you want to setup: 8 ports for  EDG-4508(R)+ and 
16 ports for  EDG-4516(R)+.

Properties (Auto Reconnect Function)

Sometimes, the system may crash because the EDG device is interrupted 
or powered-off by accident. In such a situation, the host PC need to 
reconnect to the EDG device automatically.
EDG devices provide an "Auto-reconnect" function for this purpose. If 
the EDG device loses the connection to its host, the driver will automati-
cally try to re-establish the connection. When the connection is working 
again, the host PC's commands will be automatically received by the 
EDG Series again. Reconfiguration is not necessary, so this function 
enhances the reliability of the system.

Содержание EDG-4508+

Страница 1: ...22 485 Data Gateway EDG 4508R 8 Port Ethernet to RS 232 422 485 Data Gateway with Rear Wiring EDG 4516 16 Port Ethernet to RS 232 422 485 Data Gateway EDG 4516R 16 Port Ethernet to RS 232 422 485 Data Gateway with Rear Wiring User Manual ...

Страница 2: ...third parties which may result from its use Acknowledgments IBM and PC are trademarks of International Business Machines Corpora tion MS DOS and Windows are trademarks of Microsoft Corporation Intel and Pentium are trademarks of Intel Corporation All other product names or trademarks are properties of their respective owners CE Notification The EDG 4508 R and EDG 4516 R developed by Advantech Co L...

Страница 3: ...placement materials service time and freight Please consult your dealer for more details If you think you have a defective product follow these steps 1 Collect all the information about the problem encountered For example CPU speed Advantech products used other hardware and software used etc Note anything abnormal and list any onscreen messages you get when the problem occurs 2 Call your dealer an...

Страница 4: ...site at www advantech com support where you can find the latest information about the product Step 2 Contact your distributor sales representative or Advantech s customer service center for technical support if you need addi tional assistance Please have the following information ready before you call Product name and serial number Description of your peripheral attachments Description of your sof...

Страница 5: ... Panel 11 2 2 1 Rack Mounting 12 Figure 2 8 Rack Mounting 12 2 2 2 Network Connection 13 Figure 2 9 Ethernet Connector of EDG 4508 4516 13 Figure 2 10 Ethernet Connector of EDG 4508R 4516R 13 2 2 3 Power Supply Connection 14 Figure 2 11 Power Switch and Connector with Fuse 14 2 2 4 Serial Port Connection 14 Figure 2 12 8 Ports RS 232 422 485 Serial Connector for EDG 4508 14 Figure 2 13 16 Ports RS...

Страница 6: ...ccess Web Page 46 5 3 Network Configuration 47 5 4 Port Configuration 48 5 5 DI O Event Configuration 49 5 6 Reset Configuration 50 Chapter 6 Console Configuration 52 6 1 Overview 52 6 2 Hyper Terminal Connection 52 6 3 Command List 54 Chapter 7 Event and DI O Monitoring 62 7 1 Overview 62 7 2 Event and DI O Monitoring 62 7 2 1 Polling Monitoring 62 7 2 2 Event Monitoring 63 7 2 3 DI Value Inverse...

Страница 7: ...2 CHAPTER 1 Overview ...

Страница 8: ...ly upgrades users existing device to the Internet world EDG 4508 R and EDG 4516 R provide 8 and 16 serial ports respec tively that can be easily configured To increase the reliability of sys tems EDG 4508 R and EDG 4516 R provide two significant functions Auto reconnection and IP access control Support for transmission speeds up to 230 kbps RS 485 meeting today s demand for high speed data exchang...

Страница 9: ... none even odd space mark Max Windows Virtual Port 255 OS Windows 98 NT 2000 XP Power requirements 90 V AC 260 V AC 47 63 Hz optional dual power supply for redundant use Operating temperature 0 55 C 32 131 F Surge protection 15 000 V ESD Signals Full Modem control signals Doesn t support RAS service 1 4 Packing Checklist EDG 4508 or EDG 4516 or EDG 4508R or EDG 4516R x 1 CD ROM for driver and util...

Страница 10: ...EDG 4508 R 4516 R User Manual 4 ...

Страница 11: ...2 CHAPTER 2 Getting Started ...

Страница 12: ...16 R Install Configuration Utility to PC Search all EDG Series in Configuration Utility Complete all settings and IP addresses on PC Test connection by Ping IP address from PC Set up Serial port by Port Mapping Utility Connect cable s to serial port s Test serial port Program Installation Complete No No No No No No No Troubleshooting ...

Страница 13: ...remote serial devices and equipment over LAN or WAN Since EDG 4508 R and EDG 4516 R are connected with the TCP IP protocol you will have to know fundamental facts about Ethernet net working to get the server setup correctly To allow for easier configuration we provide several system configura tion methods such as Configuration Utility Web Configuration and Con sole mode Configuration More details ...

Страница 14: ...EDG 4508 R 4516 R User Manual 8 2 2 Connecting Hardware Figure 2 2 EDG 4508 4516 Front Panels Figure 2 3 EDG 4508R 4516R Front Panels ...

Страница 15: ...9 Chapter2 Figure 2 4 EDG 4508 4516 LED Indicators and Connectors Figure 2 5 EDG 4508R 4516R LED Indicators ...

Страница 16: ...e F Type Console connector for Console Configuration Use f Ethernet RJ 45 Ethernet Connector g Traffic Ethernet ON Ethernet data being received transmitted OFF No data being received transmitted h 10M ON 10 Mbps speed OFF Invalid 10 Mbps network link i 100M ON 100 Mbps speed OFF Invalid 100 Mbps network link j Tx Port N N 1 8 16 ON Serial port data being transmitted OFF No data being transmitted R...

Страница 17: ...11 Chapter2 Figure 2 6 EDG 4508 4516 Rear Panel Figure 2 7 EDG 4508R 4516R Rear Panel Power Switch Connector DI O PIN Connector Fuse Storage ...

Страница 18: ...EDG 4508 R 4516 R User Manual 12 2 2 1 Rack Mounting Figure 2 8 Rack Mounting ...

Страница 19: ...13 Chapter2 2 2 2 Network Connection Figure 2 9 Ethernet Connector of EDG 4508 4516 Figure 2 10 Ethernet Connector of EDG 4508R 4516R ...

Страница 20: ... Power Switch and Connector with Fuse 2 2 4 Serial Port Connection Figure 2 12 8 Ports RS 232 422 485 Serial Connector for EDG 4508 Figure 2 13 16 Ports RS 232 422 485 Serial Connector for EDG 4516 Figure 2 14 RS 232 485 422 Serial Connectors for EDG 4508R 4516R Fuse Storage ...

Страница 21: ...6 16 port RS 232 422 485 to Ethernet Data Gateway with Front Wiring EDG 4516R 16 port RS 232 422 485 to Ethernet Data Gateway with Rear Wiring Communication Cable RJ48 to DB9 30cm 1701090300 30 cm RJ48 to DB9 M Type RS 232 422 485 Cable Communication Cable RJ48 to DB9 100cm 1703091001 100 cm RJ48 to DB9 M Type RS 232 422 485 Cable Terminal Connector 1654909900 Terminal Connector for Test Usage ...

Страница 22: ...installed The following are the required steps for installing EDG 4508 R and EDG 4516 R 1 Insert the Advantech industrial communication CD ROM into the drive e g D on the host PC Change the host computer s default drive from C to D 2 Use your Windows Explorer or the Windows Run command to execute the Setup program the path for the Setup program on the CD ROM should be D EDG 4508 R _4516 R COMPortU...

Страница 23: ...17 Chapter2 4 Carefully read the Software License Agreement and press Next to continue 5 The Setup program will specify a default installation path C Program Files Advantech EDG COMPort Utility ...

Страница 24: ...ep you may select a specific program folder or just use the default setting and press Next If a new destination path is necessary just click the Browse button to change the path After you have specified the installation path click the Next button ...

Страница 25: ...19 Chapter2 7 After setup has copied all program files to your computer click the Finish button to finish the installation ...

Страница 26: ...EDG 4508 R 4516 R User Manual 20 ...

Страница 27: ...2 CHAPTER 3 Configuration ...

Страница 28: ... your device s by simply executing the configuration utility program from the Start Menu as follows Start Menu All Program Advantech EDG COMPort This EDG configuration utility will automatically search all the EDG devices on the network and show them on the left side of the utility From here you can easily configure various parameters for TCP IP configura tion In this example the system finds the ...

Страница 29: ...M 00D0C968E17F after expanding the tree structure Note When you run the EDG configuration utility for the first time the default device name is MAC ID In this case the device name ADAM 00D0C968E17F means the device MAC ID is 00 D0 C9 68 E1 7F You can change the default device name in System Tag of Device Properties Note Please reserve TCP port 5202 in your network Configuration will use this port ...

Страница 30: ...fic device for you 1 Select Designated and click Locate 2 The Status LED will remain steady for 8 minutes 3 If you choose another device and click on Locate the Status LED of the previous choice will return to the heart beat monitoring mode 2 All Devices To locate all devices for the system 1 Select All Devices and click Locate 2 All Status LED devices will remain steady for 8 minutes 3 8 minutes ...

Страница 31: ...efault device name based on your application Please note that names are restricted to 128 characters and it is usually best to choose a name you can remember Device Description This field records the function application and other information for each EDG device in more detail for easy management and maintenance You can describe in your own words Firmware Version In this field the configuration ut...

Страница 32: ...l detect the current transmission mode half duplex or full duplex on the network segment and set the transmission mode for the device accordingly TCP IP Option IP address Subnet Mask Default Gateway The IP address identifies your EDG device on the global network Each EDG device has the same default IP address 10 0 0 1 Obtain a specific IP address from your network administrator and then configure ...

Страница 33: ... in the Port Setting Option Name Show Port Name 8 Ports for EDG 4508 R 16 Ports for EDG 4516 R Description Show individual description for each port You can change the description for your connected module to identify the connection from EDG Configuration Utility Port Setting Option Port Configuration Option ...

Страница 34: ...on You can modify port configuration in this Configuration Option such as Type Parity Flow Control Data Bits Stop Bits Baud Rate and Host Idle Timeout Type Serial Port Type You can change the connection type for your module to RS 232 RS 422 or RS 485 ...

Страница 35: ...arity check type of your connected module The fol lowing types are provided None Odd Even Mark Space Flow Control Flow Control Type You can choose the flow control type of your connected module The fol lowing types are available None Xon Xoff RTS CTS DTR DSR ...

Страница 36: ...516 R User Manual 30 Data Bits Data Bits Type You can choose the number of Data Bits of your connected module to be 5 6 7 or 8 Stop Bits Stop Bits Type You can choose 1 1 5 or 2 Stop Bits for your connected module ...

Страница 37: ...19 200 38 400 57 600 115 200 230 400 Set All Port The Set All Port function helps you set all serial ports at one time All you need is to set one port and click the Set All Port button The other ports will then follow the first port that you have set up This is faster than setting up 8 ports EDG 4508 R or 16 ports EDG 4516 R with the same settings ...

Страница 38: ...alled host from affecting the connected device Auto Reconnection An auto reconnection function is provided by the host Under certain cir cumstances such as Ethernet connection failure device power down or other device issues the auto reconnection function will try to reconnect the assigned device Note Host Idle Timeout and Auto Reconnection Function Detail d i g i t a l Host Provide Auto Reconnect...

Страница 39: ...r current host computer can access this EDG Device If you use Dynamic IP Assignment by the DHCP Server we suggest that this function is not enabled Allow any IP to access If you enable this function any IP address can access your device and there is no access restriction Specified IP can access EDG device You can assign a specific IP address that have have authority to access the EDG device Assign...

Страница 40: ...EDG 4508 R 4516 R User Manual 34 ...

Страница 41: ...2 CHAPTER 4 Port Mapping Utility ...

Страница 42: ...ts on one Windows 98 NT 2000 ME XP platform The utility displays three types of ports used ports unused ports and EDG ports Please follow the Virtual COM port setting steps 4 2 Virtual COM Port Settings 1 Click at Unused Ports to expand the unused port lists and select the port that you want to configure Click to expand the list Unused Ports List ...

Страница 43: ...ies Auto Reconnect Function Sometimes the system may crash because the EDG device is interrupted or powered off by accident In such a situation the host PC need to reconnect to the EDG device automatically EDG devices provide an Auto reconnect function for this purpose If the EDG device loses the connection to its host the driver will automati cally try to re establish the connection When the conn...

Страница 44: ...ollow current settings by clicking the Add All button This is more convenient than adding ports individually For this example we have selected COM21 and made all necessary settings for Port 1 of EDG 4516 After clicking on the Add All button the COM Port Mapping Utility will assign the COM21 COM36 mapping to Port 1 Port 16 COM21 is mapping to Port 1 of EDG 4516 COM22 is mapping to Port 2 of EDG 451...

Страница 45: ... You can check the virtual COM port setting by clicking on the EDG device s ports In this case COM11 is assigned to Port 1 of EDG 4516 Note If you assigned a different COM port to the same EDG series module port the following dialog box will remind you ...

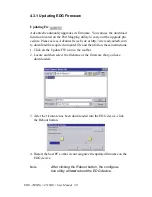
Страница 46: ...advantech com to download the required computer file and then follow these instructions 1 Click on the Update FW icon in the toolbar 2 Locate and then select the filename of the firmware that you have downloaded 3 After the firmware has been downloaded into the EDG device click the Reboot button 4 Restart the host PC so that it can recognize the updated firmware on the EDG device Note After clicki...

Страница 47: ...ou will need to connect each port to a Loopback tester Refer to the following chart for specifications of this Loopback tester The Loopback test only applies to RS 232 mode It is divided in two parts Signal test and Communication Parameters test 1 Click on the Test button in the Port Mapping utility A message will confirm that the loopback connector have already been con nected with the EDG COM po...

Страница 48: ...rts DTR DSR Checks the DTR and DSR signals between two ports DTR DCD Checks the DTR and DCD signals between two ports Communication Parameters Test Baud rate From 50 bps to 230 kbps Data bits 5 6 7 8 Stop bits 1 1 5 2 Parity odd even none space mark 2 Click the OK button to return to the port mapping window All the ports in the EDG Series are tested ok ...

Страница 49: ...hanges are made please press the button to confirm your modifications Exit If you want to quit the utility please click on the button If any changes are made in the COM Port Mapping setting the system reboot requirement will show up Please reboot your system to make sure your changes will work ...

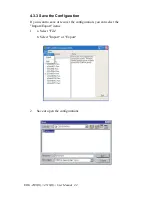
Страница 50: ...516 R User Manual 44 4 3 3 Save the Configuration If you want to save or recover the configuration you can select the Import Export items 1 a Select File b Select Import or Export 2 Save or open the configurations ...

Страница 51: ...2 CHAPTER 5 Web Based Configuration ...

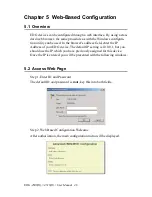
Страница 52: ... s address field enter the IP Address of your EDG device The default IP setting is 10 0 0 1 but you should use the IP which you have previously assigned for this device Once the IP is entered you will be presented with the following windows 5 2 Access Web Page Step 1 Enter ID and Password The default ID and password is root key this into both fields Step 2 Web Based Configuration Welcome After aut...

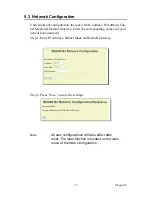
Страница 53: ...Mask and Default Gateway Enter the corresponding values for your network environment Step 1 Enter IP Address Subnet Mask and Default Gateway Step 2 Press Save to store the settings Note All new configurations will take effect after reset The reset function is located on the main menu of the Web Configuration ...

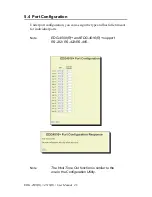
Страница 54: ...figuration Under port configuration you can as sign the type and host idle timeout for individual ports Note EDG 4508 R and EDG 4516 R support RS 232 RS 422 RS 485 Note The Host Time Out function is similar to the one in the Configuration Utility ...

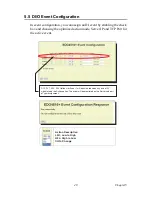
Страница 55: ...d choosing the optimized action mode Server IP and TCP Port for the active event DI 0 DI 1 DI 2 DI 3 Options for Event 1 will be activated when any one of DI signal meets the Action option The event will be monitored on the Server and port of your assignment Action Description L2H Low to High H2L High to Low CHG Change ...

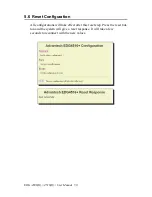
Страница 56: ...ser Manual 50 5 6 Reset Configuration All configurations will take effect after this reset step Press the reset but ton and the system will give a reset response It will take a few seconds to reconnect with the new values ...

Страница 57: ...2 CHAPTER 6 Console Configuration ...

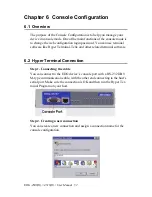
Страница 58: ...software like Hyper Terminal Telix and other related terminal software 6 2 Hyper Terminal Connection Step 1 Connecting the cable You can connect to the EDG device s console port with a RS 232 DB9 M type communication cable with the other end connecting to the host s serial port Make sure the connection is OK and then run the Hyper Ter minal Program on your host Step 2 Creating a new connection You...

Страница 59: ...configuration works ok Step 4 COM Port Setting To connect the EDG series for console configuration the port setting should match the EDG series default setting Console Configuration Default Setting Baud Rate 57600 Data Bits 8 Parity None Stop Bits 1 Flow Control None ...

Страница 60: ...rsion Current version of firmware is 1 11 1 11 Command Function version Displays the current firmware version log Displays the log file date Displays or sets the date time Displays or sets the time net Displays the net configuration port Displays the status of port s event Displays the configuration of event s ping Sends ICMP ECHO_REQUEST packets to network hosts exit Terminates shell session web ...

Страница 61: ... displays the date date Current date is 05 09 2003 Usage date mm dd yy dse Function sets the date date 06 09 03 date Current date is 06 09 2003 time displays or sets the time Usage time Function displays the configuration time Current time is 17 17 30 Usage time hh mm ss Function sets the time time 17 17 50 time Current time is 17 17 55 ...

Страница 62: ... 255 0 Usage net set ip d d d d gw d d d d netmask d d d d Function sets the configuration of net net set ip 172 18 3 227 gw 0 0 0 0 netmask 255 255 255 0 net Current net is ip 172 18 3 227 gw 0 0 0 0 netmask 255 255 255 0 USAGE net save FUNCTION saves the configuration of net to system Note You should use the net save command to activate the changes ...

Страница 63: ...e 232 idleto 30 idle The Port11 is type 232 idleto 30 idle The Port12 is type 232 idleto 30 idle The Port13 is type 232 idleto 30 idle The Port14 is type 422 idleto 30 idle The Port15 is type 422 idleto 30 idle The Port16 is type 422 idleto 30 idle USAGE port nn all type 232 422 485 FUNCTION sets the type of port s port 3 type 485 port 3 The Port03 is type 485 idleto 30 idle USAGE port nn all idle...

Страница 64: ... 3 58 502 The Event2 is disable The Event3 is disable The Event4 is disable The inverse of DI value is off USAGE event diinv 0 1 FUNCTION sets the inverse of DI value on off event diinv 1 event all The Event1 is iomap f action CHG server 172 18 3 58 502 The Event2 is disable The Event3 is disable The Event4 is disable The inverse of DI value is on event diinv 0 event all The Event1 is iomap f acti...

Страница 65: ...mp_seq 2 ttl 64 time 1 ms 32 bytes from 172 18 3 226 icmp_seq 3 ttl 64 time 1 ms exit USAGE exit FUNCTION Terminates shell session exit Bye web USAGE web password FUNCTION sets the web password web password 1234 web save USAGE web save FUNCTION saves the configuration of web to system web save reboot USAGE reboot FUNCTION reboots the system reboot EDG 4516 Firmware Version 1 11 Build 118 05 09 200...

Страница 66: ...EDG 4508 R 4516 R User Manual 60 ...

Страница 67: ...2 CHAPTER 7 Event and DI O Monitoring ...

Страница 68: ...Follow these steps to test the DI DO event s 7 2 Event and DI O Monitoring 7 2 1 Polling Monitoring The following screen will appear once the EVENT Tester Program is executed To start monitoring the Polling enter the IP Address and press start The Status will change to Monitoring if you enter the correct IP of your device Enter IP Address of EDG Series Start with Idle Status ...

Страница 69: ... assigned before Please follow these steps Step 1 Assign IP and TCP Port for monitoring Setting Event monitoring from Web Event Configuration Step 2 Assign TCP Port of Event Server and click on Start Event and DIO tester will change to Monitoring Mode Red indicator in normal mode means Inactive and Green indicator means Active Event Monitoring and no Event Active ...

Страница 70: ...timer and event description DI0 Active and Event Monitor Shows Green 7 2 3 DI Value Inverse Option Because of different wiring issues we have provided DI value inverse optional function to Inverse DI value You can select the correct functions to match the results Step 1 DI value inverse function Setting Event monitoring DI value Inverse Option ...

Страница 71: ...Step 2 After enabling DI value inverse function Green indicator means inactive and Red indicator means active Step 3 After DI value inverse is enabled follow the event configuration rule from the web configuration ...

Страница 72: ... dsp edgevtio dsw edgevtio ncb edgevtio opt edgevtio plg mbtcp h 2 Compiler the sample program 3 Run the sample program After compiler the program and run the program the system will change to Server mode to trigger any D I event and sent back to sys tem to active the D O event 4 You can modify the program and create your own event handling process 5 Sample files list and description as follow edg...

Страница 73: ...p file the extension file name dsp means Microsoft Developer Studio Project File Programmer can open the file as a tem plate to create their own programs edgevtio dsw File name of edgevtio means EDG Event I O extension name of dsw means it is a Microsoft Developer Studio Workspace file This file is necessary when you open a Developer Studio Project and we make a warning note in file to reminder yo...

Страница 74: ...gth The programming I O sample programs are for programmer s reference to make the event I O program for their own environment Program mers can open the file as a template file to make a new project of event define MODBUSTCPMAXMSGLENGTH 288 define MODBUSTCPMSGHDRLENGTH 6 typedef struct __MODBUSTCPMSG unsigned short wTransactionId unsigned short wProtocolId unsigned char byteMsgLenHigh unsigned cha...

Страница 75: ...2 CHAPTER 8 Troubleshooting ...

Страница 76: ...ure your network is 10 100 Mbps 3 If the above are completed it means the EDG Series is okay Next check to see if the EDG Series and the host are in the same local area network 4 Make sure your computer is properly connected to the network Configuration utility can find EDG Series but cannot access EDG Series For security purpose and to simplify operations users can give the access right to specif...

Страница 77: ...our IP address might have changed because of different network inter face connections and as a result you are no longer on the EDG Series Access Control list To resolve this issue 1 Confirm your IP address with the EDG Series 2 Ask the network administrator to set up the server configuration so that you are on the EDG Series Access Control list ...

Страница 78: ...EDG 4508 R 4516 R User Manual 72 ...

Страница 79: ...2 APPENDIX A ...

Страница 80: ...EDG 4508 R 4516 R User Manual 74 Appendix A A 1 RS 232 Pin Assignment A 2 RJ 48 Cable PIN Assignment 1 2 3 4 5 6 7 8 9 1 2 3 4 5 6 7 8 9 10 ...

Страница 81: ...75 AppendixA RS 422 RS 485 Pin No Description 1 Tx 4 Tx 5 GND 7 Rx 9 Rx Pin No Description 1 DATA 4 DATA 5 GND ...

Страница 82: ...EDG 4508 R 4516 R User Manual 76 ...

Отзывы: