Quick Start Guide, 61700416F1-13C, September 2012
1
4
Copyright © 2012 ADTRAN, Inc. All Rights Reserved.
N
ET
V
ANTA
160/161 W
IRELESS
A
CCESS
P
OINT
P/N 1700416F1, 1700417F1
H
ARDWARE
Make sure the following items were included in the
shipment:
•
NetVanta 160 or NetVanta 161 Wireless Access
Point (AP)
•
One plastic mounting bracket/vertical table top
stand, four drywall anchors, four screws
•
Eight adhesive rubber feet
•
One metal ceiling bracket, one metal slider, two
screws
A
NTENNAS
The NetVanta 160 has a high-performance internal
antenna (no external antenna is required). The
NetVanta 161 has six external reverse subminiature
version A (SMA) connectors for wireless
communications.There are three connectors for each
band which are marked
2.4G 1
through
3
or
5G 1
through
3
on the chassis. The antennas can be
ordered from ADTRAN in a set of six (three 2.4 GHz
and three 5 GHz, P/N 1700939F1).
M
OUNTING THE
AP
TO
D
RYWALL OR
E
LECTRICAL
B
OX
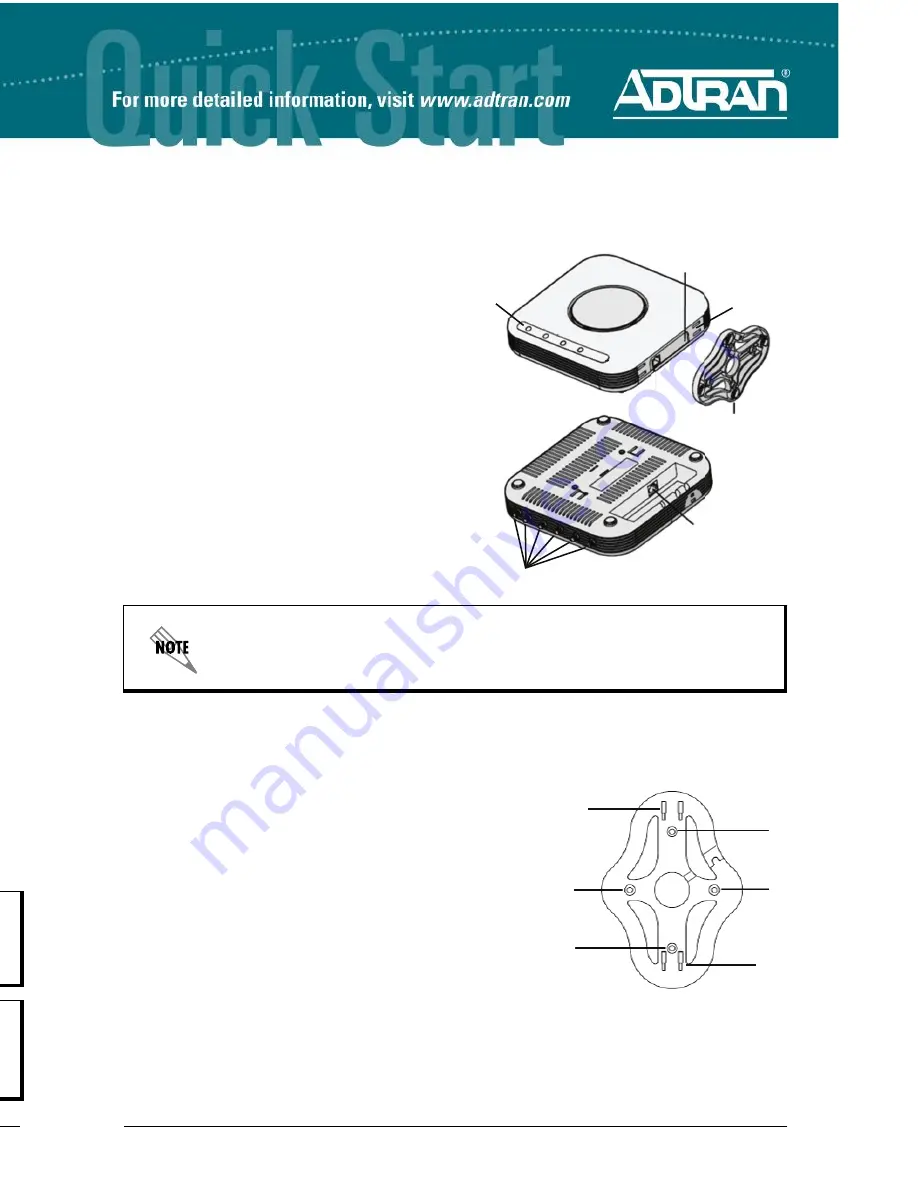
NetVanta APs should be positioned for maximum throughput and range between other APs and
wireless client devices. Follow these instructions to mount the NetVanta 160/161 AP on drywall or an
electrical box. To mount the AP to drywall or an electrical box:
1. For the NetVanta 161 only: Install the antennas (sold
separately) onto an appropriate antenna ports on the AP. The
antenna ports are labeled
2.4G 1
through
3
or
5G 1
through
3
.
2. Using the thumb screws only, carefully thread the antenna
onto the appropriate connector until it is secure.Repeat Steps
1 and 2 with the each antenna.
3. Mounting to drywall: Install the four supplied drywall anchors
into the wall or ceiling in the
A
and
B
positions, using the
holes in the plastic mounting bracket as a template.
4. Insert the four supplied screws through the plastic mounting
bracket (in the
A
and
B
positions) into the drywall anchors
and tighten.
5. Mounting to a U.S. electrical box: Insert two of the four
supplied screws through the plastic mounting bracket (in the
B
positions) into the electrical box and tighten.
6. Engaging the slots on the back of the AP with the hooks, slide the AP onto the plastic mounting
bracket until it clicks.
Make a note of the 12-character media access control (MAC) address and serial
number listed on the back of the NetVanta 160/161 before mounting the AP to a wall or
other surface. This information will be required during configuration.
Antenna Connectors
(NetVanta 161 only)
Plastic Mounting Bracket/
Vertical Table Top
Stand
Vertical Stand
Slots
Reset Switch
LEDs
Ethernet
LAN Port
A
A
B
B
Hook
Hook
A
CCESSING THE
C
ONFIGURATION
W
IZARD
The Web-based graphical user interface (GUI) for your NetVanta AC contains a configuration wizard
that leads the user through the basic configuration of the dynamically discovered access points. Refer to
the quick start guide shipped with your NetVanta AC for instructions on accessing the GUI and
configuring the unit’s IP address.
From the initial GUI screen, expand the
Data
tab on the left side of the menu. Select
AC/AP Discovery
under the
Wireless
menu. Select the
Wizard
button next to the desired discovered access point.
C
ONFIGURING THE
A
PPLICATION
More detailed documentation for configuring the NetVanta AP is provided in the
NetVanta 160 Series
Wireless Hardware Installation Guide
and the
NetVanta 160 Wireless Configuration Guide
. For more
detail on configuring the NetVanta controlling system, refer to the
AOS Command Reference Guide
,
configuration guides, and technical support notes. Documentation is available online at
https://
supportforums.adtran.com
.
R
ESET
S
WITCH
Your NetVanta 160/161 AP can be reset by inserting a small pointed object into the hole in the side of
the unit labeled
RESET
. Press the
RESET
switch once to reboot the unit.
Resetting the AP will cause the AP to lose its configuration until the AP discovers an
AC configured to control it.
Do not hold the
RESET
button depressed longer than 4 seconds unless advised to do
so by ADTRAN Technical Support. Doing so changes the operating mode of the AP
causing it to be unable to interoperate with a NetVanta AC until recovery steps are
taken.
Wizard


