


3)
Set the correct input and output devices.
a)
Click the “Start” menu then to “Control Panel.”
b)
Select “Hardware and Sound” then click “Sound.”
In
WinXP, select “Sounds, Speech, and Audio Devices” followed
by “Sounds and Audio Devices.” In Win2K, open “Sounds and
Multimedia.”
c) Vista
users:
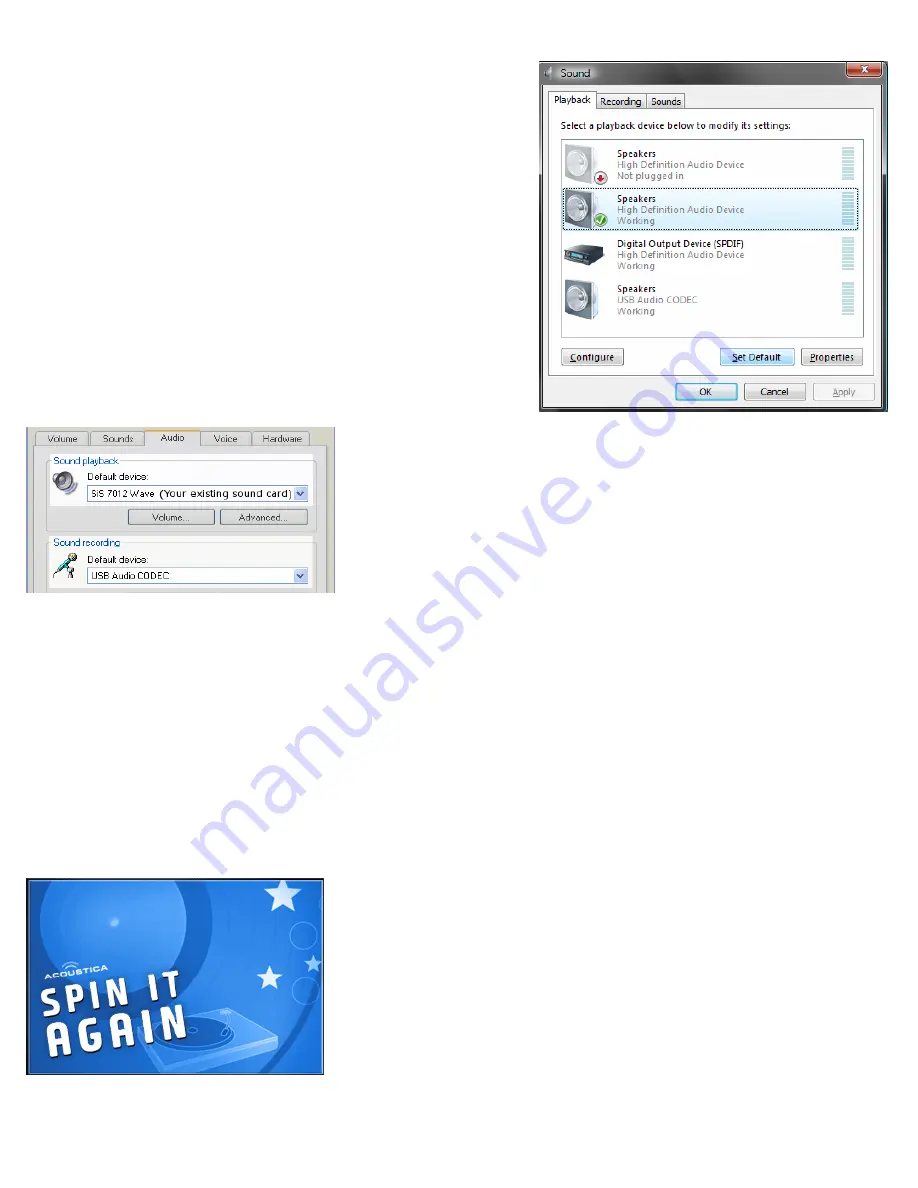
i)
On the “Playback” tab, select “Speakers” for
your system’s native sound chip (
NOT
the USB
Audio CODEC).
ii)
On the “Recording” tab, select “Microphone” for
the USB Audio CODEC.
iii)
Click OK.
d) WinXP/2K
users:
i)
Go to the “Audio” Tab.
ii)
Under the first region, “
Sound playback,”
set it to
your system’s native sound chip.
iii)
Under the second region, “
Sound recording
,” the
default device should be set to
USB Audio CODEC
or
USB Audio Device
.
iv)
Click OK.
Warning: If you set the default playback device to USB Audio, you will not be able to hear any sound from your
PC speakers as long as the USB unit is connected. This setting is essential to monitoring your recordings as
they are being made.
Section 2 – Software Installation
1)
Insert the Instant Music CD into your CD/DVD drive.
2)
If the CD does not autoplay, open “Computer” and double-click
the drive in which you inserted the disc.
3)
Click on the “Spin It Again 2.1” button to begin software
installation.
4)
Run through the installation routine. For the vast majority of
users, it is sufficient to use all of the default options, including
the installation target location, and just selecting “Next” at
each step.
5)
Once you’ve finished the installation, you’re ready to begin
recording.


