background image

Adobe


Photoshop Elements 2.0 

ST. PATRICK’S DAY PROJECT

Photoshop Elements 2.0: St. Patrick’s Day  Project

6

12.


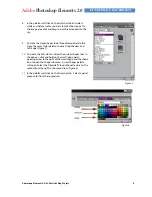
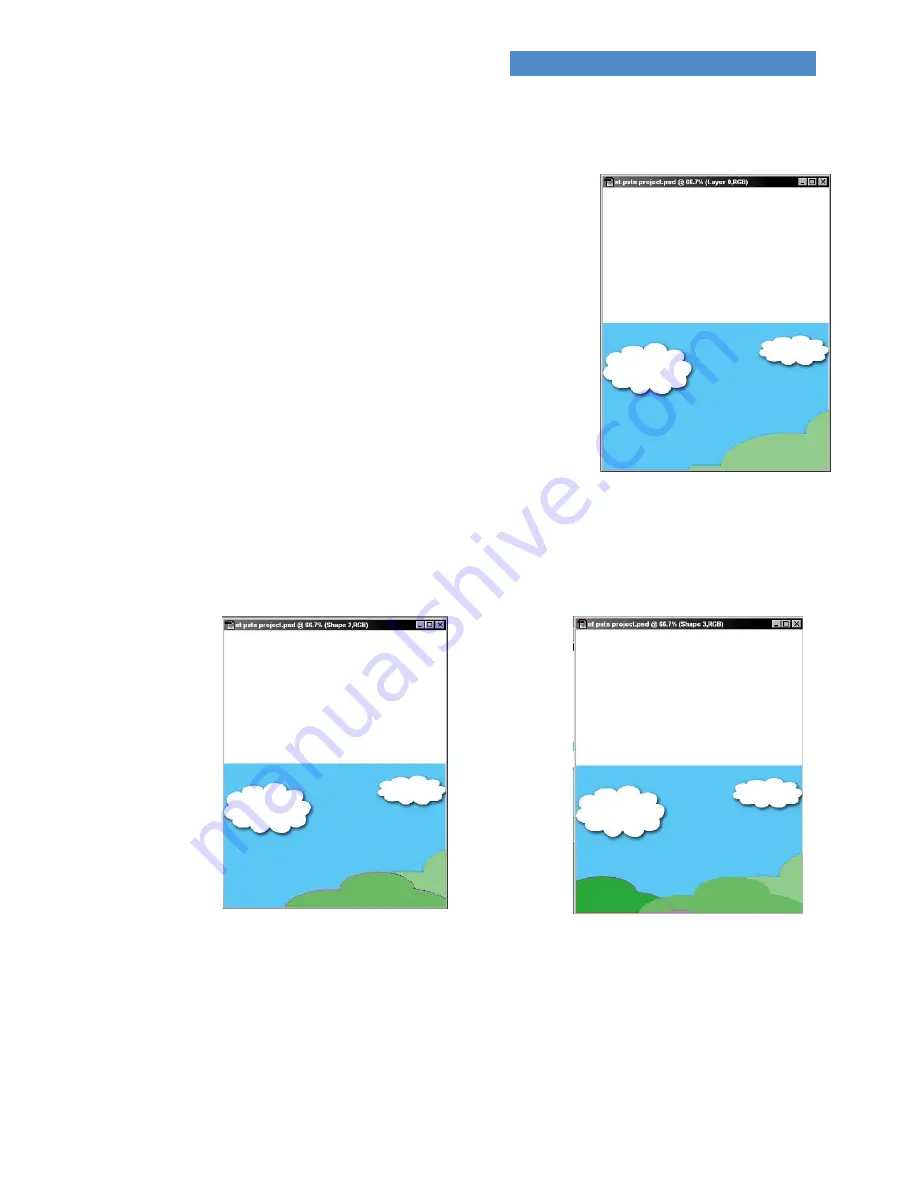
To automatically paint hills, click the left bottom of the image area
and drag horizontally across the screen to the right, ending up
outside the image area.  You will see a rolling green hill appear
(Figure 9).

13.


In the palette well, click on the Swatches tab.  Select a medium
green color.

14.


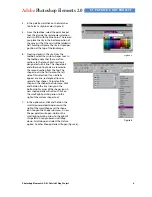
To automatically paint a second hill, click again at the bottom  to
the right of the first hill. Drag horizontally across the screen to the
right, ending up outside the image area.  You will see another
lighter green hill appear (Figure 10).

15.


In the palette well, click on the Swatches tab.  Select a deep green
color.

16.


To automatically paint a third hill, repeat step 10. You will see a
dark green hill appear. Create a series of progressively darker hills.
Working from left to right and then back again to cover the middle
of the canvas. You can resize and reposition each hill by selecting
the move tool at the top right corner of the toolbox. Then click and
drag on the colored area to reposition it. Notice that the higher the
hills, the more the 3D effects will show (Figure 11).

Figure 9

Figure 11

Figure 10

Содержание PHOTOSHOP ELEMENTS 2.0 - LESSONS FOR EDUCATORS (ST. PATRICK S DAY PROJECT)

Страница 1: ...Adobe Education Adobe Photoshop Elements 2 0 Lessons for Educators St Patrick s Day Project...

Страница 2: ...greeting card All areas of the landscape will be created directly in Photoshop Elements Photoshop Elements features will be used to create the illusion of 3D paper cutouts from all the landscape eleme...

Страница 3: ...Create a new work folder on your desktop Name this folder with a unique name that you will recognize Always keep all image files for a single project in their own unique work folder In Photoshop Elem...

Страница 4: ...e the dialog box for your folder Open the folder name your master file a short easy to remember name and click on Save Make sure that the name in the title bar is the name of your work folder 2 Creati...

Страница 5: ...line The shape tools and other painting tools are located in the second section from the top The shapes tool is the first tool on the left side of this selection It can initially appear as a line rec...

Страница 6: ...o this From the Layer Styles palette choose Drop Shadow and Soft Edge Figure 7 10 To create the hills do this Select the custom shapes tool In the options click and hold on the small downward pointing...

Страница 7: ...izontally across the screen to the right ending up outside the image area You will see another lighter green hill appear Figure 10 15 In the palette well click on the Swatches tab Select a deep green...

Страница 8: ...ight most hill layer to activate it In the Layer palette click the Layer Styles tab Click and hold on the small down pointing arrow in the top left corner to see the submenu Click on Drop Shadows Sele...

Страница 9: ...t shape on the image area and use the corner and center boxes as well as the arrow keys on the keyboard to resize and reposition the tower Repeat step 21 to make enough towers for the castle Figure 16...

Страница 10: ...f tops to the proper position on the towers From the toolbox select the move tool In the Layers palette click on the new roof layer then move to that shape on the image area and use the corner and cen...

Страница 11: ...ng from behind the hill Figure 19 28 Creating a 3D effect In the Layers palette click on the Tower layer on the Tower that is supposed to be the closest to the front of the castle In the Layers palett...

Страница 12: ...cloud it means that the type layer is stacked behind another layer To move the type to the top layer click and drag the type layer to the top of the Layers palette Don t forget to make the type 3D li...

Отзывы: