background image

101

Sveglia digitale CK 2010

Italiano

Messa in funzione

ATTENZIONE a eventuali danni al prodotto


Utilizzare solo l'alimentatore fornito.

In caso di mancanza di corrente è necessaria una 

batteria del tipo CR2032, 3 V, cje permette di salvare le 

impostazioni effettuate (ad es. orari sveglia) per più ore. Al 

momento della fornitura, la batteria di riserva è già inserita 

e per protezione da scarica precoce è inserita una strscia 

isolante.

1. Con un cacciavite a stella sottile, allentare la vite di 

fissaggio del coperchio del vano batterie sul lato 

inferiore.

2. Rimuovere il coperchio del vano batterie.
3. Estrarre la striscia isolante.
4. Reinstallare il coperchio del vano batterie e inserire la 

vite di fissaggio.

5. Inserire, nella presa di collegamento 

9V 2A

 della 

sveglia, la spina dell'alimentatore fornito.

6. Inserire la spina dell'alimentatore in una presa la cui 

tensione corrisponda a quella indicata nella scheda dei 

“Dati tecnici”.

Содержание CK 2010

Страница 1: ...martphones Réveil numérique avec fonction de recharge par induction pour smartphones Sveglia digitale con funzione di ricarica a induzione per smartphone Budzik cyfrowy z funkcją indukcyjnego ładowania smartfonów Deutsch English Español Français Italiano Polski Bedienungsanleitung CK 2010 Operating instructions Instrucciones de operación Mode d emploi Istruzioni per l uso Instrukcja obsługi ...

Страница 2: ... außergewöhnlichen Design vereint Mit diesem Wecker haben Sie die Uhrzeit stets präzise im Blick Die langjährige Erfahrung der Marke ADE stellt eine technisch hohen Standard und bewährte Qualität sicher Wir wünschen Ihnen jederzeit ein entspanntes Timing Ihr ADE Team Lieferumfang Digitaler Wecker Netzadapter Stützbatterie bereits eingelegt Bedienungsanleitung IM_Web_CK2010_202106_V2 ...

Страница 3: ...llgemeines 4 Sicherheit 5 Bestimmungsgemäßer Gebrauch 9 Auf einen Blick 10 Inbetriebnahme 14 Uhrzeit einstellen 15 Wecken 16 Smartphone aufladen 18 Sonstige Funktionen 18 Reinigen 20 Störung Abhilfe 20 Technische Daten 21 Garantie 21 Konformitätserklärung 22 Entsorgen 22 ...

Страница 4: ... geben Sie auch diese Anleitung mit Die Nichtbeachtung dieser Bedienungsanlei tung kann zu Verletzungen oder Schäden am Artikel führen Zeichenerklärung Dieses Symbol in Verbindung mit dem Wort GEFAHR warnt vor schweren Verletzungen Dieses Symbol in Verbindung mit dem Wort WARNUNG warnt vor Verletzungen mittleren und leichten Grades Dieses Symbol in Verbindung mit dem Wort HINWEIS warnt vor Sachsch...

Страница 5: ...hbar auf Wurde eine Batterie verschluckt oder ist auf andere Art in den Körper gelangt muss sofort ärztliche Hilfe in Anspruch genommen werden Anderenfalls kann es innerhalb von 2 Stunden zu schweren inneren Ver ätzungen kommen die zum Tode führen können Gerät und Netzadapter sind von Kindern jünger als 8 Jahren fernzuhalten Reinigung und Benutzerwartung dürfen nicht von Kindern vorgenommen werden...

Страница 6: ...echni schen Daten entspricht Achten Sie darauf dass die Steckdose gut zugänglich ist damit Sie im Bedarfsfall schnell den Netzadapter stecker ziehen können Benutzen Sie das Gerät nicht wenn das Gerät selbst oder Teile beschädigt sind wenn Netzadapterkabel oder Netzadapterstecker beschädigt sind wenn das Gerät heruntergefallen ist Wickeln Sie das Netzadapterkabel vor jedem Gebrauch vollständig ab A...

Страница 7: ...en Mitteln reaktiviert auseinander genommen ins Feuer geworfen oder kurzgeschlossen werden Vermeiden Sie den Kontakt der Batterieflüssigkeit mit Haut Augen und Schleimhäuten Bei Kontakt müssen Sie die betroffenen Stellen sofort mit reichlich klarem Wasser spülen und umgehend einen Arzt aufsuchen VORSICHT Sachschäden Schützen Sie das Gerät vor starken Stößen Erschütte rungen direkter Sonneneinstrah...

Страница 8: ...lien bestehen und mit den unterschiedlichsten Pflegemitteln behandelt werden kann es nicht völlig ausgeschlossen werden dass manche dieser Stoffe Bestandteile enthalten die die Gerätefüße angreifen und aufweichen Legen Sie ggf eine rutschfeste Unter lage unter das Gerät Verwenden Sie keinesfalls harte kratzende oder scheuernde Reinigungsmittel o ä um den Wecker zu reinigen Hierbei könnten die Ober...

Страница 9: ...stimmungsgemäßer Gebrauch Der digitale Wecker ist ausschließlich für den Privatge brauch in trockenen Innenräumen konzipiert Er verfügt zusätzlich über eine Induktionsschnitt stelle Qi Standard mit der Smartphones aufgeladen werden können ...

Страница 10: ...10 Digitaler Wecker CK 2010 Auf einen Blick 1 Ansicht von vorne und hinten Seitenansichten 2 3 4 6 7 5 ...

Страница 11: ...schlussbuchse 9V 2A für Netzadapter 4 Taste Temperatur für ca 5 Sekunden einblenden Uhrzeit einstellen 5 Taste Weckzeit einstellen Weckfunktion aktivieren und deaktivieren 6 Taste Alarme ein und ausschalten Werte erhöhen 7 Taste Display Anzeige bestimmen Werte verringern ...

Страница 12: ...12 Digitaler Wecker CK 2010 Ansicht von oben und unten 8 9 11 10 12 ...

Страница 13: ... 8 Schnittstelle zum Aufladen des Smartphones 9 Taste Weckwiederholfunktion SNOOZE 10 Ladekontrollleuchte 11 Taste Display Helligkeit einstellen 12 Batteriefach für CR2032 3 V Ohne Abbildung Batterie CR2032 bereits eingelegt Netzadapter ...

Страница 14: ...utz vor vorzeitiger Entladung mit einem Iso Strei fen versehen 1 Drehen Sie die Befestigungsschraube des Batterie fachdeckels auf der Unterseite mit einem feinen Kreuz schlitz Schraubendreher los 2 Nehmen Sie den Batteriefachdeckel ab 3 Ziehen Sie den Iso Streifen heraus 4 Setzen Sie den Batteriefachdeckel wieder auf und sichern Sie ihn mit der Befestigungsschraube 5 Stecken Sie den Stecker des mi...

Страница 15: ...rückt bis im Display 24 Hr oder 12 Hr blinkt 2 Wählen Sie mit den Tasten das gewünschte Zeit format aus Wenn Sie das 12 Stunden Zeitformat wählen werden Vormittagsstunden im Display mit A und Nachmit tagsstunden mit P gekennzeichnet 3 Drücken Sie die Taste um die Auswahl zu bestätigen 4 Gehen Sie weiter vor wie vorstehend beschrieben um folgende Einstellungen nacheinander vorzunehmen Stunden einst...

Страница 16: ...enanzeige blinkt 3 Stellen Sie mit den Tasten die gewünschte Weck stunde ein Die Minutenanzeige blinkt 4 Stellen Sie mit den Tasten die gewünschte Weck minute ein 5 Gehen Sie jetzt vor wie beschrieben um ggf die zweite Weckzeit einzustellen oder drücken Sie wiederholt bis im Display wieder die normale Uhrzeit angezeigt wird Um später die eingestellten Weckzeiten zu kont rollieren drücken Sie einfa...

Страница 17: ... wird der Alarm erneut ausgelöst Weckwiederholung Snooze Funktion Drücken Sie wenn das Wecksignal ertönt Im Display blinken Weckzeit und das Symbol oder Nach ca 8 Minuten schaltet sich das Gerät wieder ein und weckt Sie erneut Dieser Vorgang kann mehrfach wieder holt werden Weckfunktion aus und wieder einschalten Drücken Sie wiederholt die Taste um die entspre chenden Weckzeiten ein und wieder aus...

Страница 18: ...tet grün Smartphone ist voll aufgeladen wird aktuell nur von wenigen Modellen unterstützt Die Temperaturanzeige steht während des Lade betriebs nicht zur Verfügung da durch den Lade betrieb zusätzliche Wärme erzeugt wird Nach dem Aufladen dauert es 20 30 Minuten bis die Temperatur wieder angezeigt wird Sonstige Funktionen Display Helligkeit einstellen Tippen Sie wiederholt auf um die gewünschte Di...

Страница 19: ... kurz drücken um die Tempe ratur für 5 Sekunden angezeigt zu bekommen Stützbatterie wechseln 1 Öffnen Sie mit einem feinen Kreuzschlitz Schrauben dreher das Batteriefach auf der Unterseite 2 Nehmen Sie den Batteriefachdeckel ab und entneh men Sie die alte Batterie 3 Schieben Sie die neue Batterie unter die beiden Halte nasen und drücken Sie sie dann mit etwas Kraft nach unten so dass die Batterie ...

Страница 20: ...g Abhilfe Störung Mögliche Ursache Keine Funktion Stromversorgung herge stellt Die Temperaturangabe im Display erscheint zu hoch Prüfen Sie ob das Gerät direkter Sonnenstrahlung ausgesetzt ist Sie wurden nicht ge weckt Haben Sie die richtige Weckzeit aktiviert Das Display ist schwarz Tippen Sie wiederholt auf um die Display Hellig keit zu erhöhen Das Smartphone wird nicht geladen Prüfen Sie ob Ihr...

Страница 21: ... 22143 Hamburg Germany Unsere Produkte werden ständig weiterentwickelt und verbessert Aus diesem Grund sind Design und technische Änderungen jederzeit möglich Garantie Sehr geehrte Kundin sehr geehrter Kunde die Firma Waagen Schmitt GmbH garantiert für 2 Jahre ab Kaufdatum die kostenfreie Behebung von Mängeln auf grund von Material oder Fabrikationsfehlern durch Repa ratur oder Austausch Bitte geb...

Страница 22: ...4 30 EU 2014 35 EU und 2011 65 EU entspricht Die Erklärung verliert ihre Gültigkeit falls an dem Gerät eine nicht mit uns abgestimmte Änderung vorgenommen wurde Hamburg Juli 2021 Waagen Schmitt GmbH Entsorgen Verpackung entsorgen Entsorgen Sie die Verpackung sortenrein Geben Sie Pappe und Karton zum Altpapier Folien in die Wertstoff Sammlung ...

Страница 23: ...der Wiederverwertung zugeführt und die Belastung der Umwelt vermieden Geben Sie das Altgerät an einer Sammelstelle für Elekt roschrott oder einem Wertstoffhof ab Wenden Sie sich für nähere Auskünfte an Ihr örtliches Entsorgungsunternehmen oder Ihre kommunale Verwaltung Batterien und Akkus gehören nicht in den Hausmüll Alle Batterien und Akkus müssen bei einer Sammelstelle der Gemeinde des Stadttei...

Страница 24: ...ctions with an exceptional design With this alarm clock you always have a precise time in view The wealth of experience of the ADE brand ensures a high technical standard and proven quality We wish you easy timing at any time Your ADE Team Scope of delivery Digital alarm clock Mains adaptor Backup battery pre installed Operating Manual ...

Страница 25: ... of delivery 24 General information 26 Safety 27 Intended use 30 Overview 31 Start up 35 Setting the time 36 Alarm 37 Charging your smartphone 39 Other functions 39 Cleaning 41 Fault Remedy 41 Technical data 42 Warranty 42 Declaration of Conformity 43 Disposal 43 ...

Страница 26: ...ct on to someone else pass on this operating manual as well Failure to observe this operating manual may result in injuries or damage to your product Explanation of symbols This symbol combined with the word DANGER warns of serious injuries This symbol combined with the word WARNING warns of moderate and mild injuries This symbol combined with the word NOTE warns of material damage This symbol ind...

Страница 27: ...esult in severe internal burns that could cause death The device and network adapter must be kept out of reach of children under 8 years of age Cleaning and user maintenance must not be carried out by children unless they are 8 years of age or older and are being supervised Children must not play with the device Keep wrapping and packaging material away from children There is a choking hazard Also...

Страница 28: ...e has fallen down Unwind the network adapter cable completely before each use Make sure the network adapter cable does not become damaged by sharp edges or hot objects Pull the network adapter plug out of the power socket before cleaning the alarm clock if during operation there appears to be interfer ence during a storm Always pull by the network adapter plug not by the cable Do not make any modi...

Страница 29: ...t dirt and excessive moisture Do not place the device on hot surfaces and in the immediate vicinity of electrical equipment and sensitive items Remove the battery from the device when it is flat or when you will not be using the device for a long time You will thus avoid damage that may result from leakage of battery acid Do not expose the battery to extreme conditions for example by storing it on...

Страница 30: ...e device Never use hard scratching or abrasive cleaning agents or similar to clean the alarm clock Note on wireless charging Currently the Qi Standard a standard for wireless charging of smartphones is not supported by all manufacturers and all models Please refer to the user manual of your smartphone Further information on this topic can also be found on the Internet Intended use The digital alar...

Страница 31: ...31 CK 2010 digital alarm clock Overview Front and rear view 1 2 3 Side view 4 6 7 5 English ...

Страница 32: ...on socket 9V 2A for mains adaptor 4 Button Display temperature for approx 5 seconds Setting the time 5 Button Setting the alarm time Enable and disable alarm function 6 button Switching alarms on and off increases values 7 button Determine display indication reduces values ...

Страница 33: ...33 CK 2010 digital alarm clock Top and bottom view 8 9 11 10 12 English ...

Страница 34: ...8 Interface for charging a smartphone 9 Button Alarm repeat function SNOOZE 10 Charging control light 11 Button Setting display brightness 12 Battery compartment for CR2032 3 V Not depicted CR2032 battery pre installed Mains adaptor ...

Страница 35: ...rotect against premature discharge 1 Unscrew the fastening screw of the battery compartment cover on the underside with a fine Phillips screwdriver 2 Remove the battery compartment cover 3 Pull out the iso strip 4 Replace the battery compartment cover and secure it in place using the fastening screw 5 Insert the plug of the supplied mains adaptor into the 9V 2A connection socket of the alarm clock...

Страница 36: ...e faster 1 Press and hold the button until 24 Hr or 12 Hr flashes on the display 2 Use the buttons to select the desired time format If you choose the 12 hour time format morning hours will be marked with A and afternoon hours with P on the display 3 Press the button to confirm the selection 4 Proceed as described above to make the following settings one after the other Set hours Set minutes Tempe...

Страница 37: ...to set the desired alarm hour The minute indicator flashes 4 Use the buttons to set the desired alarm minute 5 Now proceed as described to set the second alarm time if necessary or press repeatedly until the normal time is displayed again on the display To control the set alarm times later simply press the button repeatedly Waking up You will be woken up by the increasing alarm sound at the set ti...

Страница 38: ...when the alarm sounds The alarm time and the or symbol flash on the display After approx 8 minutes the device will turn on again and wake you up again This procedure can be repeated multiple times Switching the alarm function off and on again Press the button repeatedly to switch the matching alarm times on and off again Note the display As soon as and or are displayed the matching alarm function ...

Страница 39: ...martphone is loading Lights green Smartphone is fully charged currently supported by only a few models The temperature display is not available during charging as charging can generate additional heat After charging 20 30 minutes are required for the temperature to be displayed again Other functions Setting display brightness Tap repeatedly to set the desired display brightness English ...

Страница 40: ...y later you can press briefly to display the temperature for 5 seconds Replacing the backup battery 1 Open the battery compartment on the underside using a fine Phillips screwdriver 2 Remove the battery compartment cover and remove the old battery 3 Slide the new battery under the two retaining tabs and then push them down with a little force so that the battery is firmly under the retaining tab a...

Страница 41: ... Fault Possible cause No function Connected to power The temperature indication in the display appears too high Check whether the device is exposed to direct sunlight The alarm did not sound to wake you up Did you activate the correct alarm time The display is black Tap repeatedly in order to set the desired display brightness The smartphone does not charge Check whether your smartphone supports t...

Страница 42: ...er Höltigbaum 15 22143 Hamburg Germany Our products are constantly being developed and improved For this reason design and technical modifications are possible at any time Warranty Dear Valued Customer Waagen Schmitt GmbH warrants for 2 years from the purchase date the cost free rectification of defects in material and workmanship through repair or exchange In the event of a warranty claim please ...

Страница 43: ...tives 2014 30 EU 2014 35 EU and 2011 65 EU The declaration will lose its validity if any modification is made to the device without our consent Hamburg July 2020 Waagen Schmitt GmbH Disposal Disposing of the packaging Dispose of the packaging with similar materials Dispose of cardboard with waste paper and of films with recyclable materials English ...

Страница 44: ... recycled and the burden on the environment avoided Bring the old device to a collection point for electronic waste or to a recycling depot For more information contact your local waste disposal firm or your local administrative body Standard and rechargeable batteries should not be disposed of along with household waste All batteries and rechargeable batteries must be brought to a local or distri...

Страница 45: ...45 CK 2010 digital alarm clock English ...

Страница 46: ... diseño extraordinario Con este despertador siempre tendrá a la vista la hora exacta La larga experiencia de la marca ADE le asegura unos elevados estándares técnicos y es garantía de calidad Le deseamos una planificación de tiempo relajada El equipo de ADE Material suministrado Despertador digital Adaptador de red Batería de respaldo ya insertada Manual de instrucciones ...

Страница 47: ...rmación general 48 Seguridad 49 Uso adecuado 52 De un vistazo 53 Puesta en funcionamiento 57 Ajustar la hora 58 Despertador 59 Cargar el smartphone 61 Otras funciones 61 Limpieza 63 Problema Solución 63 Datos técnicos 64 Garantía 65 Declaración de conformidad 65 Eliminación 65 ...

Страница 48: ...páñelo también de estas instrucciones Si no se tienen en cuenta las recomendaciones de este manual de instrucciones pueden producirse lesiones o daños en el artículo Explicación de símbolos Este símbolo unido a la palabra PELIGRO advierte de heridas graves Este símbolo unido a la palabra ADVERTENCIA advierte de heridas de grado medio o leve Este símbolo unido a la palabra INDICACIÓN advierte de da...

Страница 49: ...es quemaduras químicas internas que podrían provocar la muerte El aparato y el adaptador de red deben mantenerse alejados de los niños menores de 8 años La limpieza y el mantenimiento por parte del usuario no deben ser realizados por niños salvo que sean mayores de 8 años y estén supervisados Los niños no deben jugar con el aparato Mantenga los plásticos y el material de embalaje fuera del alcance...

Страница 50: ...ed están dañados si se ha caído el aparato Desenrolle totalmente el cable del adaptador de red antes de utilizarlo Al hacerlo preste atención a que el cable no resulte dañado por bordes afilados u objetos calientes Desenchufe el adaptador de red antes de limpiar el despertador si claramente se produce un fallo durante su fun cionamiento en caso de tormenta Tire siempre del enchufe del adaptador de...

Страница 51: ...dir al médico sin pérdida de tiempo ATENCIÓN Daños materiales Proteja el aparato de fuertes golpes sacudidas luz solar directa así como de la suciedad y de la humedad excesiva No coloque el aparato sobre superficies calientes o en las inmediaciones de equipos eléctricos y objetos sensibles Extraiga la pila del aparato si esta se ha gastado o si no va a utilizar el aparato durante mucho tiempo De e...

Страница 52: ...aso necesario coloque una base antideslizante bajo el aparato No utilice nunca productos de limpieza duros ásperos o abrasivos para limpiar el despertador Podría arañar las superficies Advertencia sobre la función de carga inalámbrica En la actualidad el estándar Qi un estándar para la carga inalámbrica de los smartphones no es compatible con todos los fabricantes ni con todos los modelos Tenga en...

Страница 53: ...53 Despertador digital CK 2010 Español De un vistazo Vista frontal y trasera 1 2 3 Vista lateral 4 6 7 5 ...

Страница 54: ... 2A para el adaptador de red 4 Botón Muestra la temperatura durante aprox 5 segundos Ajustar la hora 5 Botón Ajustar hora de alarma Activar o desactivar la función de alarma 6 Tecla Encender y apagar la alarma aumentar los valores 7 Botón Configurar la pantalla disminuir los valores ...

Страница 55: ...55 Despertador digital CK 2010 Español Vista superior e inferior 8 9 11 10 12 ...

Страница 56: ... para cargar el smartphone 9 Botón Función de repetición de la alarma SNOOZE 10 Luz de control de carga 11 Botón Ajustar el brillo de la pantalla 12 Compartimento de la pila para CR2032 3 V Sin imagen Pila CR2032 ya insertada Adaptador de red ...

Страница 57: ... la pila de reserva ya está colocada y está provista de una tira Iso para evitar la descarga antes de tiempo 1 Desenrosque el tornillo de fijación de la tapa del compartimento de la pila en la parte inferior con un destornillador de estrella fino 2 Quite la tapa del compartimento de las pilas 3 Saque la banda Iso 4 Vuelva a colocar la tapa del compartimento de las pilas y asegúrela con el tornillo...

Страница 58: ...nado hasta que 24 Hr o 12 Hr parpadee en la pantalla 2 Seleccione con los botones el formato de hora deseado Si selecciona el formato de hora de 12 horas las horas de la mañana se marcan con A y las de la tarde con P en la pantalla 3 Presione el botón para confirmar la selección 4 Proceda como se ha descrito anteriormente para realizar los siguientes ajustes en secuencia Ajuste de la hora Ajuste d...

Страница 59: ...indicador de la hora parpadea 3 Ajuste con los botones la hora del despertador deseada El indicador de los minutos parpadea 4 Ajuste con los botones los minutos del despertador deseados 5 Proceda tal y como se describe para ajustar la segunda hora de la alarma si es necesario o pulse repetidamente hasta que la pantalla vuelva a mostrar la hora normal Para comprobar las horas de alarma ajustadas má...

Страница 60: ...larma sonará nuevamente Repetición de la alarma función Snooze Presione cuando la señal de alarma suene La pantalla muestra la hora de la alarma y el símbolo o Pasados aprox 8 minutos el aparato se encenderá de nuevo y le despertará Este proceso puede repetirse varias veces Desactivar y volver a activar la función despertador Presione el botón repetidamente para activar y desactivar las horas de a...

Страница 61: ... aparato como se muestra Se ilumina en rojo El smartphone se está cargando Se ilumina en verde El smartphone está completamente cargado actualmente solo es compatible con pocos modelos El indicador de temperatura no está disponible ya que se genera calor adicional durante la carga Después de la carga tardará entre 20 y 30 minutos hasta que la temperatura se muestre de nuevo Otras funciones ...

Страница 62: ...e Seleccione la pantalla pulsando repetidamente el botón dP 1 La hora se muestra permanentemente dP 2 La hora y la temperatura se muestran de forma alterna en la pantalla Si más tarde se muestra la hora de forma permanente puede pulsar brevemente para que se muestre la temperatura durante 5 segundos Cambiar la pila de reserva 1 Abra el compartimente de las pilas de la parte posterior con un destor...

Страница 63: ... con el destornillador de estrella Limpieza 1 Desconecte el aparato de la corriente 2 Limpie la carcasa con un paño limpio ligeramente humedecido 3 Seque totalmente el aparato antes de volver a conectarlo a la red Problema Solución Problema Causa posible Sin función Hay corriente Los datos de temperatura en la pantalla aparentan ser muy altos Compruebe si el aparato está expuesto directamente a la...

Страница 64: ...0 60 Hz máx 0 8 A Salida 9 V 2 A Pilas CR2032 3 V Salida de carga máx 10 W Rango de temperaturas De 9 hasta 39 C de 16 hasta 102 F Dimensiones 142 x 95 x 60 mm Distribuidor Waagen Schmitt GmbH Neuer Höltigbaum 15 22143 Hamburgo Alemania Nuestros productos se están desarrollando y mejorando continuamente Por este motivo cabe la posibilidad de que en cualquier momento pudiera haber cambios en el dis...

Страница 65: ...e compra explicando el motivo de la reclamación Declaración de conformidad Por la presente la empresa Waagen Schmitt GmbH declara que el despertador digital CK 2010 cumple con las directivas 2014 30 UE 2014 35 UE y 2011 65 UE La declaración perderá su validez en caso de se haya realizado una modificación en el aparato sin haber sido previamente aprobada por nuestra parte Hamburgo julio de 2021 Waa...

Страница 66: ...el aparato y así evitar un daño al medio ambiente Deposite el aparato antiguo en un punto de recogida de restos electrónicos o desechos reciclables Para más información diríjase a su empresa de recogida de residuos o administración local Las pilas y baterías no son residuos domésticos Todas las pilas y baterías deben depositarse en los puntos de recogida del ayuntamiento del distrito o en los come...

Страница 67: ...67 Despertador digital CK 2010 Español ...

Страница 68: ...intelligentes à un design exceptionnel Ce réveil vous permettra d être toujours à l heure Les années d expérience de la marque ADE garantissent une haute technicité et une qualité éprouvée Nous vous souhaitons d agréables moments en toute ponctualité L équipe ADE Contenu de l emballage Réveil numérique Adaptateur secteur Pile de secours déjà insérée Mode d emploi ...

Страница 69: ...ralités 70 Sécurité 71 Utilisation conforme 74 Vue d ensemble 75 Mise en marche initiale 79 Régler l heure 80 Réveil 81 Charge du smartphone 83 Autres fonctions 83 Nettoyage 85 Problèmes solutions 85 Caractéristiques techniques 87 Garantie 87 Déclaration de conformité 88 Mise au rebut 88 ...

Страница 70: ...e personne transmettez lui également ce mode d emploi Le non respect de ce mode d emploi peut entraîner des blessures ou endommager l article Légende Ce symbole associé au mot DANGER prévient de blessures graves Ce symbole associé au mot ATTENTION prévient de blessures moyennes et légères Ce symbole associé au mot AVERTISSEMENT prévient de dommages matériels Ce symbole désigne des informations sup...

Страница 71: ...et entraîner en moins de 2 heures de graves brûlures caustiques internes potentiellement mortelles L appareil et son adaptateur secteur doivent être tenus hors de la portée des enfants de moins de 8 ans Le nettoyage et l entretien ne doivent pas être réalisés par des enfants à moins qu ils aient 8 ans révolus et soient sous surveillance Il est interdit aux enfants de jouer avec cet appareil Tenez ...

Страница 72: ...ateur secteur ou sa fiche sont endommagés l appareil a reçu un choc chute Avant toute utilisation déroulez entièrement le câble de l adaptateur secteur Ce faisant veillez à ce que le câble de l adaptateur ne soit pas endommagé par des bords tranchants ou des objets brûlants Débranchez la fiche de l adaptateur secteur de la prise avant de nettoyer le réveil si un dysfonctionnent évident survient pe...

Страница 73: ...TENTION Risque de dommages matériels Protégez l appareil des chocs violents des vibrations de la lumière directe du soleil ainsi que de la saleté et d une forte humidité Ne placez pas l appareil sur des surfaces chaudes ou à proximité immédiate d appareils électriques et d objets sensibles Retirez la pile de l appareil lorsque celle ci est usée ou lorsque vous n utiliserez pas l appareil pour une ...

Страница 74: ...pante sous l appareil N utilisez en aucun cas des produits ménagers agressifs rugueux abrasifs ou similaires pour nettoyer le réveil Cela pourrait rayer les surfaces À propos de la fonction de charge sans fil À l état actuel de la technologie la norme Qi norme relative à la recharge sans fil des smartphones n est pas prise en compte par tous les fabricants et dans tous les modèles Respectez le mod...

Страница 75: ...75 Réveil numérique CK 2010 Vue d ensemble Vue de face et arrière 1 2 3 Vues latérales 4 6 7 5 Français ...

Страница 76: ...l adaptateur secteur 4 Touche afficher la température pendant environ 5 secondes régler l heure 5 Touche régler l heure de réveil activer désactiver la fonction réveil 6 Touche activer désactiver l alarme augmenter la valeur 7 Touche définir l affichage à l écran réduire la valeur ...

Страница 77: ...77 Réveil numérique CK 2010 Vue de dessus et de dessous 8 9 11 10 12 Français ...

Страница 78: ...our la charge du smartphone 9 Touche Fonction de répétition de l alarme SNOOZE 10 Témoin lumineux de charge 11 Touche régler la luminosité de l écran 12 Compartiment pour pile CR2032 3 V Non illustré Pile CR2032 déjà insérée Adaptateur secteur ...

Страница 79: ... livraison et est pourvue d une bande isolante empêchant sa décharge prématurée 1 Desserrez la vis de fixation du couvercle du compartiment à pile situé sur le dessous à l aide d un petit tournevis cruciforme 2 Retirez le couvercle du compartiment à pile 3 Retirez la bande isolante 4 Replacez le couvercle du compartiment à pile et revissez le 5 Insérez la fiche de l adaptateur secteur fourni dans ...

Страница 80: ...tenez la enfoncée jusqu à ce que 24 Hr ou 12 Hr clignote à l écran 2 Sélectionnez le format horaire de votre choix à l aide des touches Si vous sélectionnez le format 12 heures les heures du matin sont marquées d un A et celles de l après midi d un P à l écran 3 Appuyez sur la touche pour confirmer la sélection 4 Procédez selon la description ci dessus pour effectuer successivement les réglages su...

Страница 81: ...ymbole de l heure de réveil correspondante clignote encore L affichage de l heure clignote 3 Utilisez les touches pour régler l heure de réveil souhaitée L affichage des minutes clignote 4 Utilisez les touches pour régler les minutes de réveil souhaitées 5 Suivez les explications ci dessus pour régler la deuxième heure de réveil si nécessaire ou appuyez plusieurs fois sur la touche jusqu à ce que ...

Страница 82: ...tiquement au bout de 2 minutes La sonnerie se déclenchera de nouveau au bout de 24 heures Répétition fonction Snooze Appuyez sur lorsque l alarme se déclenche L heure du réveil et le symbole ou clignotent à l écran Au bout de 8 minutes environ l appareil se rallume et le réveil se déclenche à nouveau Ce processus peut être répété plusieurs fois Désactivation et réactivation de la fonction réveil A...

Страница 83: ...reil comme illustré ci dessus Voyant rouge charge du smartphone en cours Voyant vert charge du smartphone complète seuls quelques modèles sont actuellement pris en charge L affichage de la température n est pas disponible pendant la charge du fait d une production de chaleur supplémentaire Après la charge la température s affiche à nouveau au bout de 20 à 30 minutes Autres fonctions Français ...

Страница 84: ...ur la touche dP 1 L heure s affiche en permanence dP 2 L heure et la température alternent à l écran Si l heure s affiche ensuite en permanence vous pouvez appuyer brièvement sur pour que la température s affiche pendant 5 secondes Changer la pile de secours 1 Ouvrez le compartiment à pile sur de dessous de l appareil à l aide d un tournevis cruciforme fin 2 Enlevez le couvercle et retirez l ancie...

Страница 85: ...ant de le rebrancher Problèmes solutions Dysfonctionnement Cause possible L appareil ne fonctionne pas L appareil est il branché sur le secteur La température affichée semble trop élevée Assurez vous que l appareil ne soit pas placé à la lumière directe du soleil L appareil ne vous a pas réveillé Avez vous activé la bonne heure de réveil L écran est noir Appuyez plusieurs fois sur pour augmenter l...

Страница 86: ...86 Réveil numérique CK 2010 ...

Страница 87: ...ppements et d améliorations continuels Pour cette raison des modifications de design et des modifications techniques peuvent survenir à tout moment Garantie Chère cliente cher client Waagen Schmitt GmbH garantit la prise en charge gratuite par des réparations ou par un échange de tout dysfonctionnement résultant d un défaut matériel ou de fabrication pendant 2 ans à compter de la date d achat Dans...

Страница 88: ...30 UE 2014 35 UE et 2011 65 UE La déclaration perd sa validité si l appareil subit une modification sans notre accord Hambourg juillet 2021 Waagen Schmitt GmbH Mise au rebut Élimination de l emballage Éliminez les emballages de façon conforme Jetez le papier et le carton avec les papiers de récupération les plastiques dans les collecteurs de matières recyclables ...

Страница 89: ... l appareil pourront être recyclées avec un moindre impact sur l environnement Déposez l appareil usagé dans un point de collecte pour les déchets électroniques ou dans un centre de recyclage Pour plus d informations adressez vous à votre service de collecte local ou à votre municipalité Les piles et batteries ne doivent pas être éliminées avec les déchets ménagers Toutes les piles et batteries do...

Страница 90: ...esign fuori dal comune Con questa sveglia si ha costantemente sotto controllo l ora esatta La lunga esperienza della ADE garantisce standard tecnici elevati e qualità consolidata Auguriamo un tempismo rilassato in qualsiasi momento Il Suo team ADE Ambito della fornitura Sveglia digitale Alimentatore Batteria di riserva già inserita Istruzioni per l uso ...

Страница 91: ...ioni generali 92 Sicurezza 93 Destinazione d uso 96 Descrizione 97 Messa in funzione 101 Impostazione dell ora 102 Sveglia 103 Ricarica degli smartphone 105 Altre funzioni 105 Pulizia 107 Risoluzione dei problemi 107 Dati tecnici 108 Garanzia 108 Dichiarazione di conformità 110 Smaltimento 110 ...

Страница 92: ...ioni per l uso La mancata osservanza delle istruzioni per l uso può causare lesioni alle persone o danni al prodotto Descrizione dei simboli Questo simbolo accompagnato dalla parola PERICOLO mette in guardia contro il rischio di gravi lesioni Questo simbolo accompagnato dalla parola AVVERTENZA indica il rischio di lesioni di lieve o media entità Questo simbolo accompagnato dalla parola ATTENZIONE ...

Страница 93: ...are gravi ustioni interne entro 2 ore che possono provocare la morte Tenere l apparecchio e l adattatore di rete lontano da bambini al di sotto degli 8 anni I bambini possono eseguire le operazioni di pulizia e manutenzione solo se di età superiore agli 8 anni e sotto la supervisione di una persona adulta I bambini non devono giocare con il dispositivo Tenere le pellicole e il materiale d imballag...

Страница 94: ...giato se il dispositivo è caduto Svolgere completamente il cavo dell adattatore di corrente prima di ogni utilizzo Assicurarsi che il cavo dell adattatore di rete non venga danneggiato da spigoli vivi o oggetti caldi Scollegare la spina dell adattatore di rete dalla presa prima di pulire la sveglia se durante il funzionamento il dispositivo mostra di subire interferenze durante un temporale Tirare...

Страница 95: ...ediatamente un medico ATTENZIONE Rischio di danni alle cose Proteggere il dispositivo da urti violenti vibrazioni radiazioni solari dirette nonché sporco e livelli di umidità elevati Non posizionare il dispositivo su superfici calde né nelle immediate vicinanze di dispositivi elettrici e oggetti sensibili Rimuovere la batteria dal dispositivo quando è scarica o quando si prevede di non utilizzare ...

Страница 96: ...o mettere un tappetino antiscivolo sotto il dispositivo Non usare mai in nessun caso detergenti contenenti agenti forti graffianti o abrasivi per pulire la sveglia In caso contrario la superficie del dispositivo potrebbe essere graffiata Informazioni sulla ricarica wireless Ad oggi lo standard Qi uno standard per la ricarica wireless degli smartphone non è supportato da tutti i produttori né compa...

Страница 97: ...97 Sveglia digitale CK 2010 Italiano Descrizione Vista anteriore e posteriore 1 2 3 Viste laterali 4 6 7 5 ...

Страница 98: ... 4 Pulsante Visualizzazione temperatura per circa 5 secondi Impostazione dell ora 5 Pulsante Impostazione della sveglia Attivazione e disattivazione della sveglia 6 Pulsante Attivazione e disattivazione della sveglia Aumentare il valore 7 Pulsante Impostazione della visualizzazione sul display Ridurre il valore ...

Страница 99: ...99 Sveglia digitale CK 2010 Italiano Vista dall alto e dal basso 8 9 11 10 12 ...

Страница 100: ...carica degli smartphone 9 Pulsante Funzione di ripetizione della sveglia SNOOZE 10 Spia di controllo carica 11 Pulsante Regolazione della luminosità del display 12 Vano per batterie CR2032 3 V Senza illustrazione Batteria CR2032 già inserita Alimentatore ...

Страница 101: ...a e per protezione da scarica precoce è inserita una strscia isolante 1 Con un cacciavite a stella sottile allentare la vite di fissaggio del coperchio del vano batterie sul lato inferiore 2 Rimuovere il coperchio del vano batterie 3 Estrarre la striscia isolante 4 Reinstallare il coperchio del vano batterie e inserire la vite di fissaggio 5 Inserire nella presa di collegamento 9V 2A della sveglia...

Страница 102: ...e premuto il pulsante finché sul display non lampeggia 24 ore o 12 ore 2 Con i pulsanti selezionare il formato ora desiderato Se si seleziona il formato di 12 ore le ore del mattino saranno indicate sul display da una A mentre le ore pomeridiane da una P 3 Premere il pulsante per confermare la selezione 4 Procedere come illustrato sopra per modificare le seguenti impostazioni Impostazione delle or...

Страница 103: ...orario della sveglia corrispondente lampeggia ancora L indicatore dell ora lampeggia 3 Con i pulsanti impostare l ora desiderata per la sveglia L indicatore dei minuti lampeggia 4 Con i pulsanti impostare i minuti desiderati per la sveglia 5 Procedere quindi come descritto sopra per impostare eventualmente il secondo orario per la sveglia oppure premere ripetutamente finché sul display non viene d...

Страница 104: ...automaticamente dopo 2 minuti Suonerà nuovamente dopo 24 ore Ripetizione della sveglia funzione Snooze Premere quando viene emessa la suoneria della sveglia Sul display lampeggiano l orario della sveglia insieme al simbolo o Dopo circa 8 minuti il dispositivo si riaccende e la sveglia suona di nuovo Questa azione può essere ripetuta più volte Disattivazione e riattivazione della funzione sveglia P...

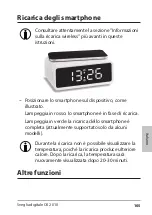
Страница 105: ... sul dispositivo come illustrato Lampeggia in rosso lo smartphone è in fase di ricarica Lampeggia in verde la ricarica dello smartphone è completa attualmente supportato solo da alcuni modelli Durante la ricarica non è possibile visualizzare la temperatura poiché la ricarica produce ulteriore calore Dopo la ricarica la temperatura sarà nuovamente visualizzata dopo 20 30 minuti Altre funzioni ...

Страница 106: ...pre l ora dP 2 L ora e la temperatura vengono visualizzate in modo alternato sul display Se successivamente viene visualizzata sempre l ora è possibile premere brevemente per mostrare per 5 secondi anche la temperatura Sostituzione dell batteria di riserva 1 Con un cacciavite a stella sottile aprire il vano batteria sul lato inferiore 2 Rimuovere il coperchio del vano batteria ed estrarre la batte...

Страница 107: ... Possibile causa Il dispositivo non funziona L apparecchio è collegato all alimentazione elettrica L indicazione di temperatura sul display sembra troppo alta Controllare che il dispositivo non sia esposto direttamente alla luce solare La sveglia non suona È stato attivato l orario di sveglia corretto Il display è nero Toccare ripetutamente per aumentare la luminosità del display La batteria dello...

Страница 108: ...igbaum 15 22143 Amburgo Germania I nostri prodotti sono costantemente sviluppati e perfezionati Pertanto modifiche tecniche e nel design sono possibili in qualsiasi momento Garanzia Gentile Cliente La ditta Waagen Schmitt GmbH garantisce la riparazione o la sostituzione gratuita dell unità per un periodo di 2 anni a partire dalla data di acquisto nel caso di difetti di materiale o fabbricazione de...

Страница 109: ...4 35 UE e 2011 65 UE La presente dichiarazione perde ogni sua validità qualora al dispositivo vengano apportate modifiche senza la nostra autorizzazione Amburgo luglio 2021 Waagen Schmitt GmbH Smaltimento Smaltimento dell imballaggio Smaltire l imballaggio nella raccolta differenziata Conferire il cartone nella raccolta della carta e la pellicola in quella del materiale riciclabile ...

Страница 110: ...apparecchio limitando l impatto sull ambiente Smaltire l apparecchio usato presso un centro di raccolta per rifiuti elettrici o un centro di riciclaggio Per ulteriori informazioni rivolgersi alla ditta di smaltimento locale o alla propria amministrazione comunale Le batterie e gli accumulatori non devono essere smaltiti con i rifiuti domestici Le batterie e gli accumulatori devono essere consegnat...

Страница 111: ...111 Sveglia digitale CK 2010 Italiano ...

Страница 112: ... funkcje z wyjątkową stylistyką Budzik umożliwia precyzyjne kontrolowanie czasu Wieloletnie doświadczenie marki ADE gwarantuje wysoki standard techniczny oraz sprawdzoną jakość Życzymy zawsze poczucia czasu bez pośpiechu Zespół ADE Zakres dostawy Cyfrowy budzik Zasilacz Bateria zapasowa już włożona Instrukcja obsługi ...

Страница 113: ... Bezpieczeństwo 115 Użycie zgodne z przeznaczeniem 118 W skrócie 119 Uruchomienie 123 Ustawienie godziny 124 Budzenie 125 Naładuj swój smartfon 127 Pozostałe funkcje 127 Czyszczenie 129 Usterka środek zaradczy 129 Dane techniczne 130 Gwarancja 130 Deklaracja zgodności 131 Utylizacja 131 ...

Страница 114: ...przekazać również tę instrukcję Nieprzestrzeganie instrukcji obsługi może spowodować obrażenia ciała lub uszkodzenie produktu Objaśnienie znaków Ten symbol w połączeniu ze słowem NIEBEZPIECZEŃSTWO ostrzega przed poważnymi obrażeniami ciała Ten symbol w połączeniu ze słowem OSTRZEŻENIE ostrzega przed obrażeniami ciała średniego i lekkiego stopnia Ten symbol w połączeniu ze słowem WSKAZÓWKA ostrzega...

Страница 115: ...ntaktować się z lekarzem W przeciwnym razie w ciągu 2 godzin może dojść do ciężkich obrażeń wewnętrznych które mogą prowadzić do śmierci Przechowywać urządzenie i zasilacz z dala od dzieci poniżej 8 roku życia Dzieci nie mogą czyścić ani serwisować urządzenia chyba że mają co najmniej 8 lat i są nadzorowane Dzieciom nie wolno bawić się urządzeniem Przechowywać folie i opakowanie z daleka od dzieci...

Страница 116: ...zasilacza sieciowego lub wtyczka są uszko dzone po upadku urządzenia Przed każdym użyciem należy całkowicie rozwinąć kabel zasilacza Upewnić się że kabel zasilacza nie został uszkodzony przez ostre krawędzie lub gorące przedmioty Wyjąć wtyczkę adaptera sieciowego z gniazdka zanim wyczyścisz budzik jeżeli podczas eksploatacji wystąpi widoczna usterka podczas burzy Zawsze ciągnąć za wtyczkę adaptera...

Страница 117: ...AGA Szkody materialne Chronić urządzenie przed silnymi wstrząsami wibracjami bezpośrednim nasłonecznieniem jak również brudem i silną wilgocią Nie należy umieszczać urządzenia na gorących powierzchniach lub w bezpośrednim sąsiedztwie urządzeń elektrycznych i wrażliwych przedmiotów Wyjąć baterię z urządzenia jeżeli są wyczerpane lub urządzenie nie będzie użytkowane przez dłuższy czas W ten sposób u...

Страница 118: ...zgową Do czyszczenia budzika nigdy nie używać twardych zarysowujących lub trących środków czyszczących itp Może dojść bowiem do zarysowań powierzchni Uwaga na temat funkcji ładowania bezprzewodowego W chwili obecnej standard Qi standard bezprzewodowego ładowania smartfonów nie jest obsługiwany przez wszystkich producentów i nie przez wszystkie modele Postępuj zgodnie z instrukcją obsługi swojego s...

Страница 119: ...119 Budzik cyfrowy CK 2010 W skrócie Widok z przodu i z tyłu 1 2 3 Widoki z boku 4 6 7 5 Polski ...

Страница 120: ... do zasilacza sieciowego 4 Przycisk Wyświetlanie temperatury przez ok 5 sekund Ustawienie godziny 5 Przycisk Ustawianie czasu budzenia Aktywacja i dezaktywacja funkcji budzenia 6 Przycisk Włączanie i wyłączanie alarmów zwiększenie wartości 7 Przycisk Ustalenie wyświetlania zmniejszenie wartości ...

Страница 121: ...121 Budzik cyfrowy CK 2010 Widok z góry i z dołu 8 9 11 10 12 Polski ...

Страница 122: ...js do ładowania smartfonu 9 Przycisk Funkcja powtarzania alarmów SNOOZE 10 Lampka kontrolna ładowania 11 Przycisk Ustawianie jasności wyświetlacza 12 Gniazdo baterii dla CR2032 3 V Bez Rysunku Bateria CR2032 już włożona Zasilacz sieciowy ...

Страница 123: ...ająca jest już włożona i ma pasek izolacyjny chroniący przed przedwczesnym rozładowaniem 1 Odkręć śrubę mocującą pokrywę gniazda baterii od spodu za pomocą drobnego śrubokręta krzyżakowego 2 Zdjąć pokrywę komory baterii 3 Wyciągnąć pasek izolacyjny 4 Proszę ponownie założyć pokrywkę baterii i dokręcić śrubę mocującą 5 Włożyć wtyczkę dostarczonego zasilacza sieciowego do gniazda przyłączeniowego 9V...

Страница 124: ...j i przytrzymaj przycisk dopóki na wyświetlaczu nie zacznie migać 24 godziny lub 12 godzin 2 Za pomocą przycisków wybierz żądany format czasu W przypadku wybrania formatu 12 godzinnego godzi ny poranne są oznaczone na wyświetlaczu literą A a popołudniowe literą P 3 Naciśnij przycisk aby potwierdzić wybór 4 Postępować w sposób opisany powyżej aby dokonać następujących ustawień w kolejności Ustawien...

Страница 125: ...ij i przytrzymaj przycisk gdy odpowiedni symbol czasu alarmu nadal miga Wyświetlacz godzin miga 3 Użyj przycisków aby ustawić żądaną godzinę alarmu Wyświetlacz minut miga 4 Użyj przycisków aby ustawić żądaną minutę alarmu 5 Teraz postępuj zgodnie z opisem aby w razie potrzeby ustawić drugi czas alarmu lub naciskaj wielokrotnie dopóki na wyświetlaczu nie pojawi się ponownie normalny czas Aby późnie...

Страница 126: ...utomatycznie po 2 minutach jeśli nie zostanie naciśnięty żaden przycisk Alarm rozlegnie się ponownie po 24 godzinach Powtarzanie budzenia funkcja Snooze Naciśnij gdy zabrzmi alarm Na wyświetlaczu pojawia się czas alarmu i symbol lub Po ok 8 minutach urządzenie włącza się ponownie i budzi Cię ponownie Proces ten można powtarzać wielokrotnie Wyłączanie i ponowne włączanie funkcji budzenia Naciśnij k...

Страница 127: ...urządzeniu w sposób pokazany na ilustracji Świeci na czerwono Smartfon się ładuje Świeci na zielono Smartfon jest w pełni naładowany obecnie obsługiwanych jest tylko kilka modeli Wyświetlacz temperatury nie jest dostępny podczas ładowania ponieważ podczas ładowania generowane jest dodatkowe ciepło Po naładowaniu trwa 20 30 minut zanim temperatura zostanie ponownie wyświetlona Pozostałe funkcje Pol...

Страница 128: ...dP 2 Czas i temperatura są wyświetlane na wyświetlaczu na przemian Jeśli czas jest później wyświetlany na stałe można nacisnąć krótko aby temperatura była wyświetlana przez 5 sekund Wymiana baterii podtrzymującej 1 Małym wkrętakiem krzyżowym należy otworzyć komorę baterii od spodu 2 Zdjąć pokrywę komory baterii i wyjąć starą baterię 3 Wsunąć nową baterię pod dwie wypustki utrzymujące i docisnąć je...

Страница 129: ...enie zanim zostanie ono ponownie podłączone do źródła zasilania Usterka środek zaradczy Usterka Możliwa przyczyna Urządzenie nie działa Czy podłączono zasilacz sieciowy Temperatura podana na wyświetlaczu wydaje się zbyt wysoka Sprawdzić czy urządzenie nie jest narażone na działanie bezpośredniego nasłonecznienia Nie obudziłeś się Czy aktywowano prawidłowy czas przebudzenia Wyświetlacz jest czarny ...

Страница 130: ...032 3 V Wyjście ładowania max 10 W Zakres temperatur 9 do 39 C 16 do 102 F Wymiary 142 x 95 x 60 mm Dystrybutor Waagen Schmitt GmbH Neuer Höltigbaum 15 22143 Hamburg Niemcy Nasze produkty są stale rozwijane i usprawniane Z tego powodu zawsze możliwe są zmiany w wyglądzie i zmiany techniczne Gwarancja Szanowni Państwo Firma Waagen Schmitt GmbH udziela 2 letniej gwarancji od daty zakupu na bezpłatne...

Страница 131: ...oświadcza że budzik cyfrowy CK 2010 jest zgodny z dyrektywami 2014 30 EU 2014 35 UE i 2011 65 EU Niniejsza deklaracja traci swoją ważność przy samowolnej zmianie wprowadzonej w urządzeniu bez uzgodnienia z producentem Hamburg lipiec 2021 Waagen Schmitt GmbH Utylizacja Utylizacja opakowania Opakowanie należy utylizować zgodnie z jego rodzajem Tektura i karton powinny trafić do pojemnika na papier f...

Страница 132: ...niu zostaną przekazane do recyklingu co zmniejszy zanieczyszczenie środowiska Zużyte urządzenie należy oddać do punktu zbiórki odpadów elektrycznych lub do punktu zbiórki surowców wtórnych Więcej informacji można uzyskać od lokalnego zakładu utylizacji lub administracji gminy Baterii i akumulatorów nie wolno wyrzucać razem z odpadami domowymi Wszystkie baterie i akumulatory należy oddawać do punkt...

Страница 133: ...133 Budzik cyfrowy CK 2010 Polski ...

Страница 134: ......

Отзывы: