background image

BetaBrite Prism Programming Manual (1196600101B)                      

March 15, 2007

 36

Advanced text messaging

International characters

International characters, like ü and é, can be included in messages. Also, the ! and 

SYMBOL keys can produce special characters.

NOTE:

International characters can’t be used with the small fonts (like [SS5]).

NOTE:

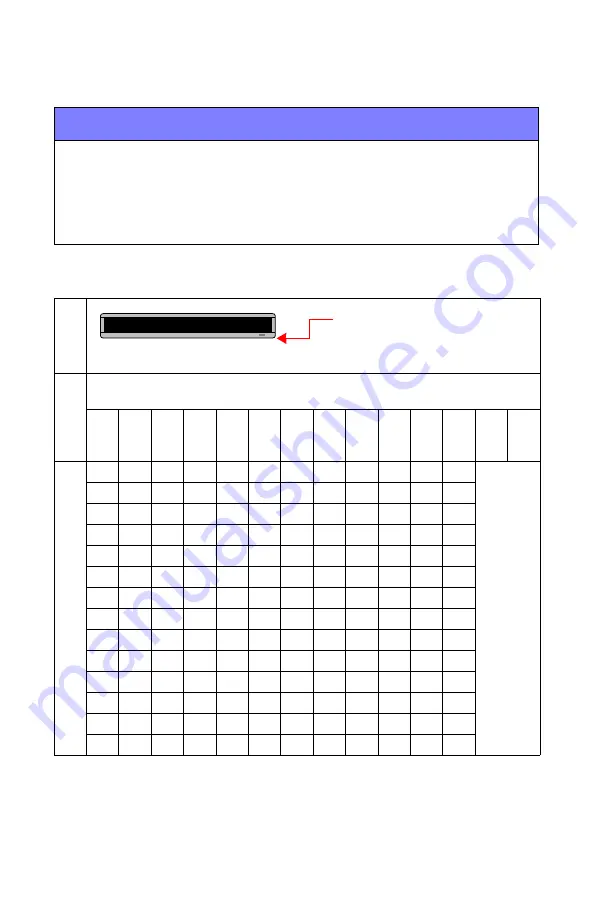
The following international characters can be used:

Base

 Charac

ters

(Hold down 

FCN

 and then press 

MODE

 on the Remote Control

to switch between uppercase and lowercase letters.)

A

B

C

D

E

I

N

O

S

U

Y

Z

!

SYMBOL

Inter

n

at

iona

l C

h

ar

acter

s

A

B

C

D

E

I

N

O

S

U

y

Z

Bot

h

 t

h

! a

n

d SYMBO

L k

eys c

an 

pr

oduce a 

var

iety

of specialized symbols.

Ä

ß

Ç

D

É

Í

Ñ

Ö

S

Ü

ÿ

Z

Å

C

d

Ê

i

n

Õ

ß

u

z

Æ

C

d

e

î

ñ

o

s

ü

z

Á

c

é

ï

ô

s

û

À

ç

ê

ì

ö

ß

ù

Ã

c

ë

í

ò

ú

a

c

è

ó

æ

õ

â

o

ä

á

à

å

A]

A

Type a Base Character, like 

A

.

Then press 

SELECT

 to choose an 

international character.

Содержание BETAbrite prism

Страница 1: ...Programming Manual English Version March 15 2007 1196600101B ...

Страница 2: ...BetaBrite Prism Programming Manual 1196600101B March 15 2007 2 Programming Manual This page intentionally left blank ...

Страница 3: ...ll rights reserved Adaptive Micro Systems 7840 North 86th Street Milwaukee WI 53224 USA 414 357 2020 414 357 2029 fax http www adaptivedisplays com Adaptive and Betabrite are registered trademarks of Adaptive Micro Systems All other brand and product names are trademarks or registered trademarks of their respective companies ...

Страница 4: ...13 Connect the power supply to the sign 13 Operating options for the BetaBrite Prism sign 14 Remote control 14 Personal computer 14 Using a remote control to operate the sign 15 Remote control layout 15 Using the remote control 16 Using a PC to operate your sign 17 Connect the sign to a PC 17 Installing the BetaBrite Prism sign Messaging software 17 Turning a sign on and off 18 What you will see w...

Страница 5: ...Advanced text messaging 30 Displaying the time and date 30 Applying modes to text and inserting graphics animations 32 Applying fonts to text 33 Applying color to text 34 Speeding up and slowing down messages 35 International characters 36 Graphics 37 Creating a movie marquee 37 Mixing text with graphics 41 Clearing a DOTS file 43 Appendix A Modes Graphics Fonts and Colors 44 Modes available 44 Sp...

Страница 6: ...States This device complies with Part 15 of the FCC rules Operation is subject to the following two conditions 1 This device may not cause harmful interference 2 This device must accept any interference received including interference that may cause undesired operation Canada This Class A digital apparatus meets all requirements of the Canadian Interference Causing Equipment Regulations Cet appare...

Страница 7: ...aBrite Prism sign B pn 1196100201 USB cable C pn 40351201 Power supply D pn 10729001 BetaBrite Prism sign remote control E pn 980903621 BetaBrite Prism sign remote control Spanish overlay F pn 1196600501 BetaBrite Prism sign messaging software G pn 1196000501 Chain mounting bracket H pn 68036004 Mounting brackets D A C B F E G H ...

Страница 8: ...ng Use only the supplied power supply Item C pictured above Use of any type of non standard BetaBrite Prism sign power supply may damage the sign and void warranty Use of a surge protector between the electrical outlet and the sign is highly recommended Message data can be lost or the sign could be damaged by an electrical surge Electrostatic discharge or carpet shocks can also cause data loss and...

Страница 9: ...es on center NOTE Use 8 pan head screws 2 per bracket for surface mounting 2 Insert the metal brackets on the back of the sign as shown 3 Attach the T brackets to the desired surface using 2 screws for each bracket 4 Attach the T brackets to the bracket on the sign using M 4 machine screws one for each bracket supplied 5 Adjust the angle of the sign by loosening the screw on the bracket and tiltin...

Страница 10: ...rill 2 holes in mounting surface 24 75 inches on center 2 Insert 8 pan head screws into the wall Leave enough space to slide the sign onto the screws 3 Position the sign s keyhole slots over the two screws in the wall Push the sign towards the wall and pull down until the sign is securely hung in place NOTE Sign is not locked into position Bumping sign may cause it to fall BetaBrite Prism sign Wal...

Страница 11: ...gn 3 Insert screws 11 64 min 3 16 max 8 pan head screws for plastic not provided through the drilled holes into the guide holes on the back of the sign NOTE Leave 3 8 to 1 2 of screw exposed to insert into guide holes No more than 1 2 of screw should be exposed to prevent damage to sign 4 Screw straight into guide the indicated guide holes NOTE Do not use machine screws Screws must be equipped to ...

Страница 12: ...hain brackets Use the chain brackets to mount the sign to the ceiling 1 Insert the metal chain brackets into the keyhole slots on the back of the sign 2 Hang the sign by slipping a chain not provided through the eye hole of the chain bracket Step 1 Step 2 Step 3 Insert chain bracket into keyhole slot on sign at an angle ...

Страница 13: ...Applying power to the sign Connect the power supply to the sign Plug the small end of the power cable into the sign and then the other end into the wall outlet NOTE The wall outlet must be near the equipment and must be easily accessible NOTE Do not mount the power supply BetaBrite Prism sign ...

Страница 14: ...to program your sign from up to thirty feet away No cables or special equipment is needed to operate the remote control Personal computer Personal computers can use the BetaBrite Prism sign Messaging software to create and send messages to the sign The BetaBrite Prism sign Messaging software is compatible with the following Windows operating systems Windows XP Windows 2000 NOTE The BetaBrite Prism...

Страница 15: ...special character or graphic These keys with red triangles are used in PROG DOTS to draw graphics Press SELECT to turn drawing on and Press RUN twice to exit programming mode Hold down FCN and then press PROGRAM to turn the sign off and on Point this end of the Remote Control at the front of your BetaBrite Prism sign 1 2 3 4 5 6 7 8 9 0 A B C D E F G H I J K L M N O P Q R S T U V W X Y Z SPACE RET...

Страница 16: ... and no more than 30 from the sign Make sure nothing reflective is in front of the sign Light from the signs display that is reflected back can interfere with the remote control If nearby fluorescent lights interfere with the remote control you may have to move either the lights or the sign Distance of sign to floor Distance to stand from the sign 10 feet 20 30 feet 15 feet 19 30 feet 20 feet 25 3...

Страница 17: ...onnected to one computer It can not be networked to more than one computer or to another BetaBrite sign Installing the BetaBrite Prism sign Messaging software 1 Insert the BetaBrite Prism sign Messaging software CD into CD ROM drive 2 Follow the installation wizard instructions on the screen Connect the larger end of the USB cable to the PC Connect the smaller end of the USB cable to the sign ...

Страница 18: ...en press PROGRAM to turn a sign off and on NOTE Messages that you have programmed into the sign will NOT be lost when you turn a sign off Messages are retained for up to 30 days if the sign is not powered What you will see when you turn your sign on The time and date of the sign The software or firmware version inside the sign The amount of memory inside the sign ADAPTIVE MICRO SYSTEMS BetaBrite P...

Страница 19: ... sign is turned off or loses power the date and time may both have to be reset For instructions on displaying the date and time see Displaying the time and date on page 30 NOTE Adaptive recommends using the BetaBrite Prism sign Messaging Software to set the time and date STEP PRESS VIEW 1 PROGRAM 2 BACK until SET TIME appears 3 ADV 4 D sets the day of the week H sets the hour M sets the minute NOT...

Страница 20: ... to normal operation NOTE Date and Time will not appear on the screen after you have returned to normal operation Clearing the sign s memory Clearing the sign s memory erases all messages and graphics that have been programmed into the sign Also the sign s password if any will be deleted STEP PRESS VIEW 1 PROGRAM 2 BACK until CLEAR MEMORY appears 3 ADV 4 Y to clear the sign s memory The sign will ...

Страница 21: ...you forget the password See Resetting a sign s password on page 22 STEP PRESS VIEW 1 PROGRAM 2 BACK until SET PASSWORD appears 3 ADV 4 Y to set a password 5 Type a 6 character password NOTE Only asterisks will appear on the sign as you type Retype the password when prompted NOTE If you typed the incorrect password the second time ERROR will appear and you will have to start over from step 1 PROG T...

Страница 22: ...t your password if you forget it You can also delete your password by clearing the signs memory See Clearing the sign s memory on page 20 STEP PRESS VIEW 1 PROGRAM 2 LLLLLL NOTE The L s will show up as asterisks 3 Enter a new password Adjusting the sign s sound control When programming the sign will beep when you press any remote control key You can turn this beeping off or on by holding down the ...

Страница 23: ...ault text is uppercase but you can create messages with lowercase text as well The following is an example of how to make upper and lowercase messages STEP PRESS VIEW 1 PROGRAM 2 ADV 3 THIS MESSAGE IS ALL UPPERCASE NOTE To erase letters hit the DELETE key 4 RUN Now that the first message is done we ll enter a second message which contains upper and lowercase characters 5 PROGRAM 6 SELECT 7 B NOTE ...

Страница 24: ...o set the order in which those messages appear The following is an example of how to display the previous two message in alphabetical order continued from above STEP PRESS VIEW 1 PROGRAM 2 RUN NOTE There may already be files listed in the run table Press APPEND once then DELETE to remove them If RUN appears go to Step 4 otherwise continue to Step 3 3 MODE until RUN appears 4 B B T B T B lowercase ...

Страница 25: ...s APPEND once then DELETE to clear the run table I f If RUN appears go to Step 9 otherwise continue to Step 8 8 MODE until RUN appears Continue pressing SELECT until RUN appears 9 B then A 10 RUN In Step 9 the letters BA appear this is the order in which the messages will appear on the sign In this instance message B will appear and then message A will appear lowercase letters This message has PRO...

Страница 26: ...ific times NOTE Make sure that your sign s internal clock has been accurately set See Setting the sign s date and time on page 19 STEP PRESS VIEW 1 PROGRAM 2 SELECT until B appears 3 TIME DATE ON ALWAYS is the default setting for a message A message set to ON ALWAYS will run continuously 4 PROGRAM 5 SELECT until A appears 6 TIME DATE 7 D until M F appears 8 H until 13 00 appears 9 M until 13 10 ap...

Страница 27: ...ages for your sign 27 STEP PRESS VIEW 10 SELECT Repeat Steps 7 8 and 9 to set the OFF time 2 30 or 14 30 in this example 11 RUN NOTE If TIME does not appear press MODE until it does 12 AB 13 RUN A OFF M F 0 00 TIME TIME AB This message has lowercase letters THIS MESSAGE IS ALL UPPERCASE ...

Страница 28: ... example assumes that there are two message in the sign STEP PRESS VIEW 1 PROGRAM 2 SELECT 3 ADV until the space after has appears 4 DELETE until has is erased 5 INSERT 6 Type is then SPACE 7 INSERT 8 ADV until the first few letters of lowercase appear 9 APPEND to go to the end of the message 10 RUN twice PROG TEXT A PROG TEXT B B This message has B AUT This message INSERT T This message INSERT is...

Страница 29: ...earing the sign s memory on page 20 However if you only want to delete selected messages then use this method NOTE This example assumes that there are two messages files A and B in the sign STEP PRESS VIEW 1 PROGRAM 2 SELECT until B appears 3 DELETE 4 Y to delete the file 5 RUN twice PROG TEXT A PROG TEXT B DEL TEXT B Y N PROG TEXT A ALL UPPERCASE THIS MESSAGE IS ...

Страница 30: ...ons Apply fonts Apply colors Change the speed of messages Use trailing modes NOTE These functions can be used together as needed to display a single message Displaying the time and date Time and date must be re programmed into the sign each time the sign is turned off and on You will need to have the time and date set before inserting it into a message To set the time and date see Setting the sign...

Страница 31: ...ce then SELECT until RL appears 9 FONT then SELECT until WD7 appears 10 TIME DATE to include the time in the message 11 MODE once then SELECT until RL appears 12 FONT once then SELECT until SS7 appears 13 TIME DATE once then SELECT to display the date 14 RUN twice A Rosco A RL A RL WD7 A 3 48 PM A RL A RL SS7 A AN 19 2006 Jan 19 2006 Rosco 3 26 ...

Страница 32: ...of available modes and graphics animations see Appendix A Modes Graphics Fonts and Colors on page 44 STEP PRESS VIEW 1 PROGRAM 2 ADV 3 MODE once then SELECT until FLS appears 4 Type THIS IS FLASH 5 MODE once then SELECT until SCR appears 6 Type THIS IS SCROLL 7 MODE once then SELECT until SPC z appears 8 Press RUN twice to run the message The message THIS IS FLASH should flash followed by the mess...

Страница 33: ...e Appendix A Modes Graphics Fonts and Colors on page 44 STEP PRESS VIEW 1 PROGRAM 2 ADV 3 MODE once then SELECT until HLD appears 4 FONT once then SELECT to select SRF a serif font 5 FCN and MODE as necessary type This is SRF NOTE The font displayed on the sign as you type is the font that will appear on the sign when the message runs 6 Press RUN twice to run the message NOTE More than one font ca...

Страница 34: ...hics Fonts and Colors on page 44 STEP PRESS VIEW 1 PROGRAM 2 ADV 3 MODE once then SELECT until HLD appears 4 COLOR once then SELECT until GRN appears NOTE To set shading color press COLOR again then MODE then SELECT until the desired color appears 5 Using FCN and MODE as necessary type This line is green RETURN to next line 6 COLOR once then SELECT until PUR appears 7 Using FCN and MODE as necessa...

Страница 35: ...special effects with messages Typically modes are used once at the beginning of a message However a mode can also be placed at the end of a message called a trailing mode to create a special effect NOTE The following can t be used as a trailing mode CONDENSED ROTATE SCROLL SLIDE SNOW and SPRAY STEP PRESS VIEW 1 PROGRAM 2 ADV 3 MODE once then SELECT until FLS flash appears 4 Type ATTENTION Press on...

Страница 36: ...ng international characters can be used Base Characters Hold down FCN and then press MODE on the Remote Control to switch between uppercase and lowercase letters A B C D E I N O S U Y Z SYMBOL International Characters A B C D E I N O S U y Z Both the and SYMBOL keys can produce a variety of specialized symbols Ä ß Ç D É Í Ñ Ö S Ü ÿ Z Å C d Ê i n Õ ß u z Æ C d e î ñ o s ü z Á c é ï ô s û À ç ê ì ö ...

Страница 37: ... DOTS graphic to display it on your sign the DOTS graphic must be placed in a text file even if you just want to display the graphic all by itself NOTE DOTS programming may not be available on all BetaBrite Prism sign models Creating a movie marquee STEP PRESS VIEW 1 PROGRAM 2 BACK NOTE The name of your first DOTS graphic is A The second will be named B and the third C and so on 3 ADV PROG TEXT A ...

Страница 38: ...ill cause the curser to grow NOTE Pressing COLOR will alternate the curser between 25 colors NOTE Pressing D or SELECT will toggle insert mode 5 E to draw a line across the entire bottom of the display 6 Complete DOTS graphic A by using 9 C and I keys 8 9 0 C D E H I J These keys move the DOTS cursor Keep pressing I until the cursor is here E 9 C I ...

Страница 39: ...re just smaller versions of graphic A In order to display a DOTS graphic it must be placed in a text message In the following steps we ll create a text message and add the three DOTS graphics that were just created 12 BACK until PROG TEXT A appears 13 SELECt until a question mark appears 14 A 15 MODE once then SELECT until FLS flash appears PROG DOTS A PROG DOTS PROG DOTS B DOTS Graphic B DOTS Gra...

Страница 40: ...ird DOTS graphic by pressing DOTS again Then press SELECT until the letter C appears Now we ll add the message Movie News after the three graphics 18 FONT once then SELECT until SRF appears 19 M 20 FONT again Then press SELECT until SS5 appears 21 Type ovie and then press SPACE 22 FONT once then SELECT until SRF appears again 23 Type the letter N A FLS SP5 A 5 DOT A DOT C A FLS SP5 DOT A A DOT A A...

Страница 41: ...ype ews 26 RUN twice to watch the marquee you created Mixing text with graphics This example will combine text and graphics This is what the sign will look like once the message is complete STEP PRESS VIEW 1 PROGRAM 2 BACK 3 ADV The blinking DOTS cursor keeps track of where you re drawing A IE SRF N SS5 A SRF N SS5 EWS PROG TEXT A PROG DOTS A ...

Страница 42: ...l there are 5 dots between the vertical line and the end of the sign If you don t reduce the graphic area the graphic would take up the entire area of the sign 5 Draw the following graphic using the keys indicated 6 RUN twice 7 BACK until PROG TEXT A appears 8 ADV 9 MODE then SELECT until ROT rotate appears 10 DOTS to insert your DOTS graphic I I H I J PROG DOTS PROG TEXT A A A ROT A ROT DOT A ...

Страница 43: ...nsert your DOTS graphic again 13 RUN twice to see the message displayed on your sign Clearing a DOTS file STEP PRESS VIEW 1 PROGRAM 2 BACK 3 SELECT 4 Type the letter of the graphic you want to delete In this case type A 5 Z 6 Y to delete the graphic Or N if you don t want to delete it 7 RUN four times to return to normal operation A T A Graphics A DOT A PROG TEXT A PROG DOTS A PROG DOTS ...

Страница 44: ...e letters in bracket are what will appear on the sign when selecting a particular mode For instructions on programming modes see Applying modes to text and inserting graphics animations on page 32 Modes available Use the MODE and SELECT keys to select one of the following Hold HLD Rotate ROT Automode AUT Compressed Rotate CRT Flash FLS Roll Up RL Roll Down RL Roll Left RL Roll Right RL Roll In RL ...

Страница 45: ...endix A Modes Graphics Fonts and Colors 45 Special modes available Special modes available Use the MODE and SELECT keys to select one of the following Twinkle SPC 0 Sparkle SPC 1 Snow SPC 2 Interlock SPC 3 Switch SPC 4 Cycle Colors SPC 5 Spray SPC 6 Starburst SPC 7 ...

Страница 46: ...x A Modes Graphics Fonts and Graphics available For a list of pre programmed graphics and animations refer to the Pre Programmed Graphics and Animations insert For instructions on programming graphics see Applying modes to text and inserting graphics animations on page 32 ...

Страница 47: ... Modes Graphics Fonts and Colors 47 Fonts available Fonts are selected using the FONT and SELECT keys An example of each font is shown in the table below For instructions on programming fonts see Applying fonts to text on page 33 FONTS VIEW SRF STF WDF SDF SS7 ST7 WD7 SDS ...

Страница 48: ...BetaBrite Prism Programming Manual 1196600101B March 15 2007 48 Appendix A Modes Graphics Fonts and FONTS VIEW SS5 ST5 WD5 WS5 ...

Страница 49: ... keys or just COLOR Each color code is shown below next to its corresponding color For instructions on programming colors see Applying color to text on page 34 COLOR VIEW RED LIGHT RED GREEN LIGHT GREEN AMBER BROWN ORANGE YELLOW RAINBOW 1 RAINBOW 2 MIXED COLORS A HLD RED A HLD LRD A HLD GRN A HLD LGN A HLD AMMB A HLD BRN A HLD ORG A HLD YEL A HLD RB1 A HLD RB2 A HLD MIX ...

Страница 50: ...s Graphics Fonts and COLOR VIEW AUTOCOLOR BLUE LIGHT BLUE AQUA LIGHT AQUA CYAN LIGHT CYAN MAGENTA PURPLE LIGHT PURPLE VIOLET LIGHT VIOLET REDISH WHITE A HLD ACL A HLD BLU A HLD LTB A HLD AQU A HLD LAQ A HLD CYN A HLD LCY A HLD MAG A HLD PUR A HLD LPU A HLD VIO A HLD LVI A HLD RDW ...

Страница 51: ...ch 15 2007 BetaBrite Prism Programming Manual 1196600101B Appendix A Modes Graphics Fonts and Colors 51 COLOR VIEW FULL WHITE BLUEISH WHITE WHITE GRAY PINK A HLD FUL A HLD BWH A HLD WHT A HLD GRY A HLD PNK ...

Страница 52: ...om the sign Incandescent lamps used in incandescent products are not covered by this warranty The purchase price of this product does not include from Adaptive Micro Systems LLC any on site support service or maintenance Local ordinances prohibiting the use of flashing signs may exist in some locations Compliance with local ordinances is the sole responsibility of the customer To obtain warranty c...

Страница 53: ...March 15 2007 BetaBrite Prism Programming Manual 1196600101B Warranty 53 RMA Form RMA Number Date of Purchase Company Name Contact Person Address Phone Number Work Fax Description of problem ...

Отзывы: