background image

Connecting the Server to the Network

The server has Dual-Gigabit Ethernet ports that can connect to 10BaseT, 100BaseTx, or 1000BaseT networks. A 

dual-port configuration offers added advantages, such as load balancing and failover. You may connect one or 

both of the ports. 

• 

If you connect only one port, you must use the primary port marked ‘1’ on the back of the server as shown in 

the 

Hardware Features 

Illustration.

• 

To take advantage of network bonding (load balancing or failover), both ports must be physically connected to 

the network; and (a) for load balancing, connected to the same switch on the same subnet; or (b) for failover, 

connected to different switches on the same subnet (in case one switch fails).  

Caution   

The speed/duplex setting on Snap Servers defaults to 

autonegotiate

. The networking switch or hub 

to which the server is connected must also be configured to autonegotiate; otherwise, network throughput or 

connectivity to the server may be seriously impacted.

Cabling the Server to the Network

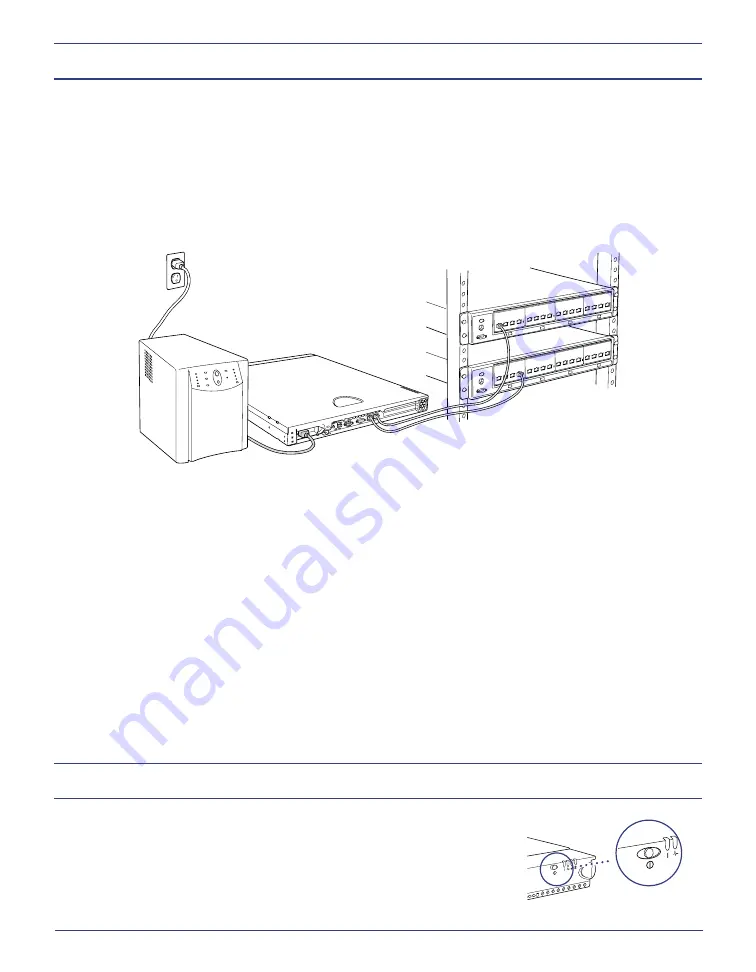
Use the provided Ethernet cables to connect the server to the network. When you connect the network cables to 

active ports, the network lights on the bezel (LAN 1 and LAN 2) are green.

Connecting the Power Cord

As a data security measure, Snap Appliance strongly recommends you connect the Snap Server to the power 

source via a UPS. 

Use the provided power cord to connect the server to


plug the server into a UPS or properly 

grounded electrical outlet.

Tip   

Snap Servers are designed to work with APC-brand, network-based UPS devices. You must configure the 

APC unit both in the Snap Server ’s Administration Tool and in the APC user interface. 

Powering On the Snap Server

To turn on the server, press the power button on the front of the server. The server 

takes a few minutes to initialize. A green LED indicates that the system is on.

Tip   

If connecting a Snap Disk 10 or Snap Disk 30SA expansion array, use the 

array’s quick start guide to install and connect the array before powering on the 

Snap Server.

Содержание 5325301580

Страница 1: ...Quick Start Guide and User CD Kurzanleitung und Benutzer CD Guía de iniciación rápida y CD del usuario Guide de mise en route rapide et CD de l utilisateur ...

Страница 2: ...ly You must install a Serial ATA card on each Snap Server 4500 whose capacity you want to expand by connecting with Snap Disk 10 expansion array The Serial ATA card has two ports allowing you to attach up to two expansion arrays The card is available from an authorized Snap Appliance reseller Tape Backup Device s and Cables To attach a tape device via a SCSI connection to the Snap Server you need ...

Страница 3: ...swappable disk drives four 18 Rack mount brackets ears 5 Disk drive status lights 12 Reset button white 19 Backup Software 6 Primary Ethernet port 13 Front bezel 20 Ethernet cables 7 Secondary Ethernet port 14 Power connector 21 Power cables Note The monitor USB keyboard and mouse connectors are not needed to administer the Snap Server These connectors are disabled Version 7 1 NetVault TM for Guar...

Страница 4: ...you have the following items necessary for rack installation Two left and right front rack mounting brackets Six rack ear screws to attach the brackets to the server Four rack mounting screws to attach the brackets to the rack posts One Phillips screwdriver 2 If mounting the L shaped brackets to the front of the server as shown in the illustration use the six screws provided If mounting to the mid...

Страница 5: ... throughput or connectivity to the server may be seriously impacted Cabling the Server to the Network Use the provided Ethernet cables to connect the server to the network When you connect the network cables to active ports the network lights on the bezel LAN 1 and LAN 2 are green Connecting the Power Cord As a data security measure Snap Appliance strongly recommends you connect the Snap Server to...

Страница 6: ...nitial Setup Wizard Click the administration link and in the login dialog box enter admin as the user name and admin as the password and then click OK Complete the setup procedure using the Initial Setup Wizard To Connect to a Snap Server Using Snap Server Manager Snap Server Manager SSM is a Java based platform independent multiserver administrative application that runs on all major platforms Ad...

Страница 7: ...8 338 SNAP For immediate response to a service inquiry you can submit a question to our technical support department using our Expert Knowledge Base System http www snapappliance com support Technischen Service Sie finden den technischen Service oder Kundendienst für Ihren Snap Server auf unserer Website Wenn Kunden sofortige Antworten auf eine Serviceanfrage wünschen können sie mit Hilfe unseres ...

Отзывы: