background image


© Adam Equipment Company 2020


Once in the setting menu, use the directional keys 

[1]

 and 

[6]

 to scroll through the 

menu until 

“L – Cal”

 appears on the display and press the 

[Tare]

 ↵

 key. 


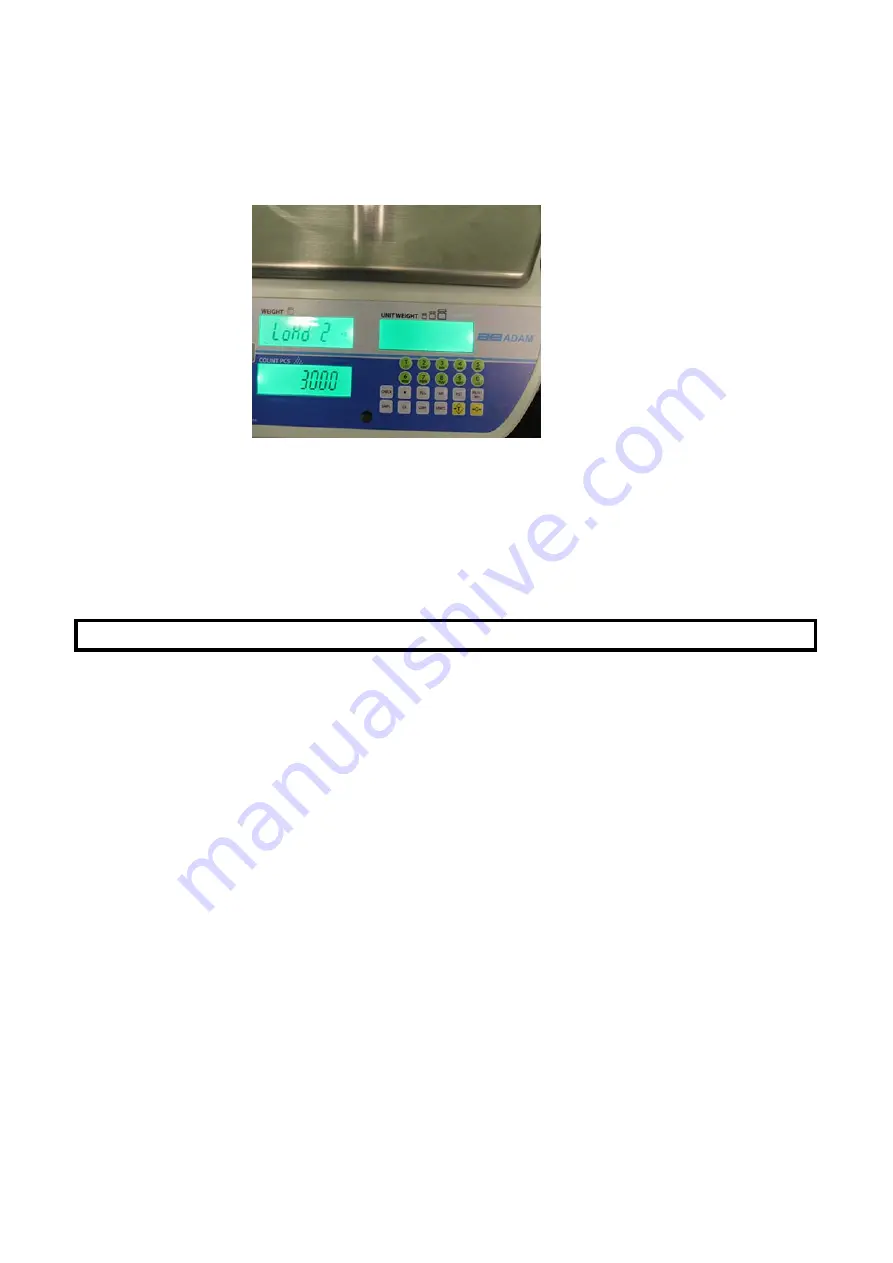
The 

“no load”

 option will appear on the display. Pressing the 

[Tare]

 ↵

 key again 

will take you to the load weight screen to set the calibration. 


On  this  screen  you  can  manually  add  a  weight  by  using  the  numeric  keys  and 
pressing tare to save or by placing a calibration weight onto the weighing pan and 
confirming the weight with the 

[Tare]

 ↵

 key. 


You  will  need  to  ensure  that  the  weight  value  displayed  matches  that  of  the 
calibration weight for reliable weighing results. 


9.0 Factory Parameters 

The factory parameters are used for setting the capacity and basic settings. 

To access the factory or dealer menu, switch off the scale and switch on again. Press the 

[Tare]

 ↵

 key during the initial self-test. 

The display will ask for a code number, 

“P_ _ _ _”.


Factory menu: Enter the number 

“1946”

 and press 

[Tare]

 ↵.


Dealer menu: Enter the number 

“1966”

 and press 

[Tare]

 ↵.


The  dealer  menu  will  allow  you  to  access  the  ADC  counting  display  and  User  calibration 
options. For user calibration, please follow the instructions outlined in the calibration section 
of the manual. 

The factory menu comprises of a wider variety of settings and options such as language, 
currency, decimal and linear calibration settings. 


Содержание CCT

Страница 1: ... Adam Equipment Company 2020 Adam Equipment Cruiser Count CCT SERIES Software rev V 1 00 above ...

Страница 2: ...dam Equipment Company 2020 Easy Reference Model name of the scale Serial number of the unit Software revision number Displayed when power is first turned on Date of Purchase Name of the supplier and place ...

Страница 3: ...ifications 8 3 0 Installation 9 3 1 Locating the scale 9 3 2 Installation of CCT scales 10 4 0 Internal Components 10 4 1Opening the scale 10 4 2 Scale components 11 5 0 Replacing the load cell 12 6 0 Replacing the display 13 7 0 Replacing the PCB 13 8 0 Calibration Linearity settings 14 9 0 Factory Parameters 15 9 1A D COUNT 16 9 2 Reset 16 9 3C Con 16 9 4Dot 16 9 5 M Tare 16 9 6 G1 and G2 17 9 7...

Страница 4: ... Adam Equipment Company 2020 9 11 Capacity 18 9 12 Count Unit 18 9 13 Dual 18 9 14 Linear calibration 18 10 0 SERVICE INFORMATION 19 WARRANTY INFORMATION 20 ...

Страница 5: ...ue to restrictions and laws that govern those regions The scales have stainless steel weighing platforms on an ABS base assembly All scales are supplied with a RS 232 bi directional interface and real time clock RTC The scales have sealed keypad with colour coded membrane switches and there are 3 large easy to read liquid crystal type displays LCD The LCD s are supplied with a backlight The scales...

Страница 6: ...PEATIBILITY LINEARITY Grams 4000 g 4000 g 1 g 2 g 3 g Pounds 8lb 8 lb 0 002 lb 0 004 lb 0 007 lb Model CCT 8M UNITS OF MEASURE MAXIMUM CAPACITY TARE RANGE READABILITY REPEATIBILITY LINEARITY Grams 8000 g 8000 g 2 g 4 g 6 g Pounds 16 lb 16 lb 0 004 lb 0 009 lb 0 013 lb Model CCT 20M UNITS OF MEASURE MAXIMUM CAPACITY TARE RANGE READABILITY REPEATIBILITY LINEARITY Kilograms 20 kg 20 kg 5 g 10 g 15 g ...

Страница 7: ...EADABILITY REPEATIBILITY LINEARITY Kilograms 16 kg 16 kg 0 1 g 0 2 g 0 6 g Pounds 35 lb 35 lb 0 0002 lb 0 0004 lb 0 00013 lb Model CCT 32UH UNITS OF MEASURE MAXIMUM CAPACITY TARE RANGE READABILITY REPEATIBILITY LINEARITY Kilograms 32 kg 32 kg 0 2 g 0 4 g 1 2 g Pounds 70 lb 70 lb 0 0044 lb 0 0009 lb 0 0026 lb Model CCT 48UH UNITS OF MEASURE MAXIMUM CAPACITY TARE RANGE READABILITY REPEATIBILITY LINE...

Страница 8: ...ays Balance Housing ABS Plastic Stainless Steel platform Pan Size 210 x 300mm 8 3 x 11 8 Overall Dimensions wxdxh 315 x 355 x 110mm 12 4 x 14 x 4 3 Net Weight 4 4 kg 9 7 lb Applications Counting Scales Functions Parts counting checkweighing accumulating memory pre set count with alarm Interface RS 232 bi directional interface English German French Spanish selectable text Date Time Real Time Clock ...

Страница 9: ...igid and not vibrate Avoid unstable power sources Do not use near large users of electricity such as welding equipment or large motors Do not place near vibrating machinery Avoid high humidity that might cause condensation Avoid direct contact with water Do not spray or immerse the scales in water Avoid air movement such as from fans or opening doors Do not place near open windows or air condition...

Страница 10: ...f the level and the scale is supported by all four feet Turn the power ON using the switch located on the right side of the base The scale will show the current software revision number in the Weight display window for example V1 06 Next a self test is performed At the end of the self test it will display 0 in all three displays if the zero condition has been achieved 4 0 Internal Components 4 1 O...

Страница 11: ...ication once opened 4 2 Scale components 1 PCB 2 Keypad 3 Display 4 Spirit level 5 Load cell metal frame upper supporter 6 Load cell 7 Load cell metal frame lower supporter 8 Power cable 9 Battery to Display cable 4 6 3 1 2 5 7 8 9 Battery Recharge board USB board RS232 board ...

Страница 12: ...he load cell in place Lift the metal frame to expose the load cell Detach load cell from the scale Once removed replace this with the new load cell Place the metal frame onto the new load cell carefully ensuring that the screw positions line up Screw in the 2 central screw points to hold the load cell in place then carefully screw in the 4 exterior screw points Once secure place the scale s exteri...

Страница 13: ...ay Lift the display from the 4 pegs located in the corners of the display Once detached attach the new display to the pegs then connect the previously detached wires to the new display unit Screw in to secure 7 0 Replacing the PCB To replace the PCB ensure that you have switched off the power then follow these steps Unscrew the plastic cover for the charging board and USB components located beneat...

Страница 14: ...ve replace the serial board After the main circuit board has been removed from the scale unscrew the singular screw fixing the serial board in place and lift out the serial board 8 0 Calibration Linearity settings Follow these steps to calibrate the scale Turn on the power and wait for the scale to configure Before configuration is completed hold down the Tare key to bring up the user information ...

Страница 15: ...hes that of the calibration weight for reliable weighing results 9 0 Factory Parameters The factory parameters are used for setting the capacity and basic settings To access the factory or dealer menu switch off the scale and switch on again Press the Tare key during the initial self test The display will ask for a code number P_ _ _ _ Factory menu Enter the number 1946 and press Tare Dealer menu ...

Страница 16: ...the Tare key to return to the PARAMETER menu 9 3 C Con This setting will allow the user to see how many times the machine has been calibrated Calibration control To enter this parameter press the Tare key when C Con is shown Use the numeric 1 or 6 keys to alternate between cont and Jumpr options and Tare to select Selecting the Jumpr option will lock the scale Note Trade approved machines require ...

Страница 17: ... present a smoother line graph when entering multiple weighing results whilst a small filter option may appear more erratic To enter this parameter press the Tare key when Filter is shown Use the numeric 1 or 6 keys to alternate between the options and press Tare to select 9 8 P Zero The Power Zero function can be used to set the zero limit when turning the scale on To enter this parameter press t...

Страница 18: ... the Tare key when Capa is shown Use the numeric 1 or 6 keys to alternate between the options and press Tare to select 9 12 Count Unit This parameter allows you to set the weighing counting unit To enter this parameter press the Tare key when C Unit is shown Use the numeric 1 or 6 keys to alternate between the options and press Tare to select 9 13 Dual The dual parameter concerns the scale s dual ...

Страница 19: ...methods B Details of the unit purchased This part of information should always be available for any future correspondence We suggest you to fill in this form as soon as the unit is received and keep a printout in your record for ready reference Model name of the scale CCT___ Serial number of the unit Software revision number Displayed when power is first turned on Date of Purchase Name of the supp...

Страница 20: ... packaging and with correct documentation for a claim to be processed All claims are at the sole discretion of Adam Equipment This warranty does not cover equipment where defects or poor performance is due to misuse accidental damage exposure to radioactive or corrosive materials negligence faulty installation unauthorised modifications or attempted repair or failure to observe the requirements an...

Страница 21: ...ironment This equipment generates uses and can radiate radio frequency energy and if not installed and used in accordance with the instruction manual may cause harmful interference to radio communications Operation of this equipment in a residential area is likely to cause harmful interference in which case the user will be required to correct the interference at his own expense CALIFORNIA PROPOSI...

Страница 22: ...0 4340 40300 0 Fax 49 0 4340 40300 20 e mail vertrieb aeadam de Adam Equipment S A Pty Ltd 7 Megawatt Road Spartan EXT 22 Kempton Park Johannesburg Republic of South Africa Phone 27 0 11 974 9745 Fax 27 0 11 392 2587 e mail sales adamequipment co za Adam Equipment S E ASIA PTY Ltd 270 Miguel Road Bibra Lake Perth WA 6163 Australia Phone 61 0 8 6461 6236 Fax 61 0 8 9456 4462 e mail sales adamequipm...

Страница 23: ......

Отзывы: