2 of 5
07-030
Set the Radio and the Clock (Models Without
Navigation System)
Set the radio and the clock after you install the No. 15
fuse by doing this:
1. Turn the ignition switch to ON (II), and turn on the
radio.
2. If not already done, enter the audio system anti-
theft code.
3. Enter a different AM or FM station on each radio
preset button. To enter a station, press and hold a
preset button until you hear a beep.
4. Press and hold the SOUND button on the audio
panel until the system beeps.
5. Press and hold the H button on the audio panel to
set the hour.
6. Press and hold the M button on the audio panel to
set the minutes.
7. When you are finished setting the time, press the
SOUND button again.
NOTE: The audio presets are retained when the
battery is disconnected.
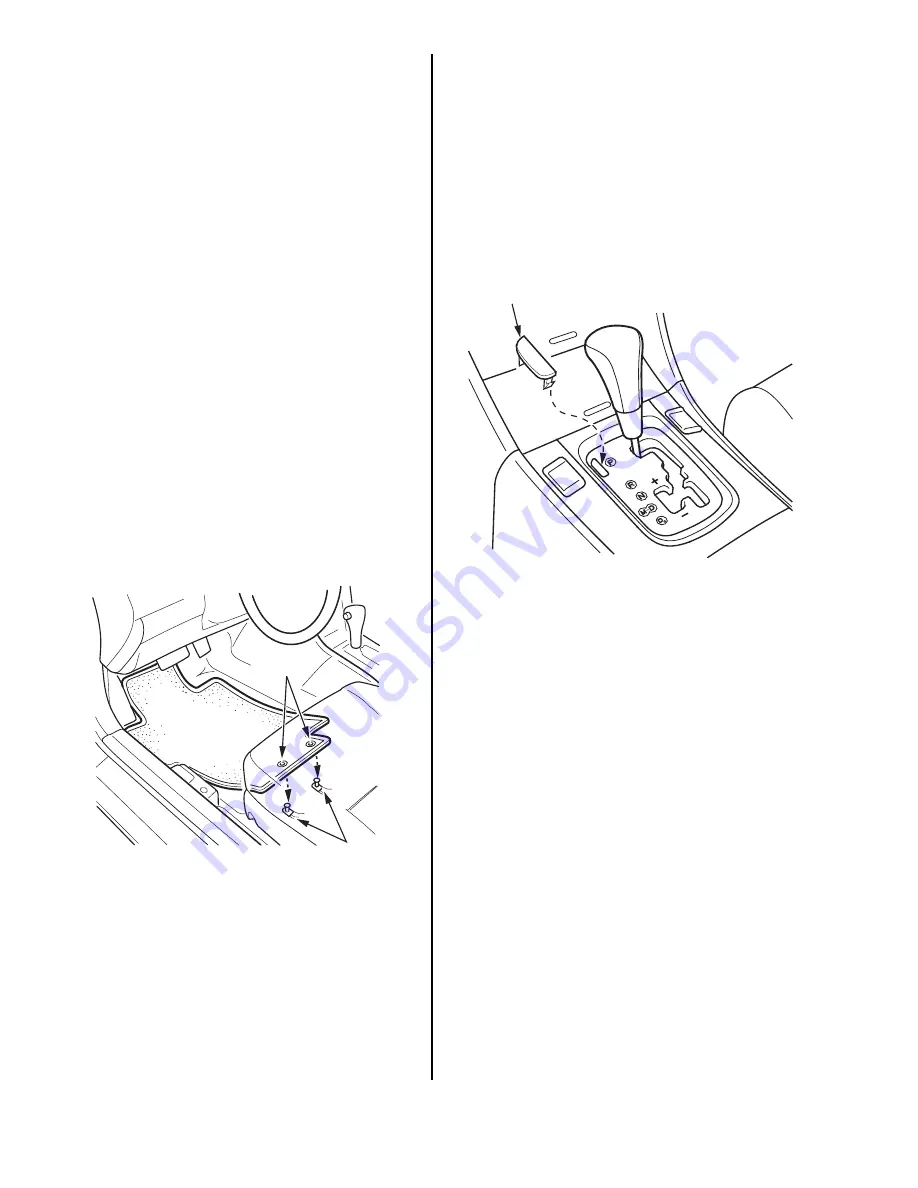
Install the Floor Mats
Floor mats are standard on all models; you’ll find them
in the trunk. Install them in the appropriate positions.
Place the driver’s floor mat eyelets over the hooks on
the floor.
Remove the Interior Protective Coverings
Each door sill has an inner and outer trim. Remove the
protective cover from both trim pieces on each door.
Also, remove the protective cover from each inner pillar
trim piece.
Peel Off the Switch and Button Film
The faces of most dash switches and buttons are
covered with a clear plastic film to protect them during
vehicle assembly. Peel the film off during the TQI. If
you don’t, sunlight and high interior temperatures will
eventually discolor the film and cause it to stick.
Install the Shift Lock Release Cover (A/T Models)
The shift lock release cover is in a small bag in the
owner’s manual kit. Remove the cover from the bag,
and install it into the shift lock release opening on the
left side of the shift lever.
Initialize the Driver’s Window Auto-Up/Down
Feature
To initialize the auto-up/down feature, do this:
1. Make sure the driver’s window is fully closed, then
push and hold the window switch until the window
opens all the way.
2. Pull back the window switch, and hold it until the
window is fully closed. Continue to hold the switch
for another 2 seconds.
3. Check the auto-up/down feature: When you firmly
push the window switch and then release it, the
window should open fully; when you firmly pull back
the switch and then release it, the window should
close fully. If the window doesn’t work this way,
repeat the initialization.
Initialize the driver’s window auto-up/down feature after
replacing any driver’s window parts or installing
accessory door visors.
NOTE: Initialization is not needed after you disconnect/
reconnect the battery.
DRIVER'S FLOOR MATS
EYELETS
HOOKS
SHIFT LOCK
RELEASE COVER


