background image

www.acti.com


Hardware Manual 


19


Accessing the Camera 

Configure the IP Addresses 

In order to be able to communicate with the camera from your PC, both the camera and the PC 

have to be within the same network segment. In most cases, it means that they both should 

have very similar IP addresses, where only the last number of the IP address is different from 

each  other.  There  are  2  different  approaches  to  IP  Address  management  in  Local  Area 

Networks 

– by DHCP Server or Manually. 


Using DHCP Server to Assign IP Addresses 

If you have connected the computer and the camera into the network that has a DHCP server 

running, then you do not need to configure the IP addresses at all 

– both the camera and the 

PC  would  request  a  unique  IP  address  from  DHCP  server  automatically.  In  such  case,  the 

camera will  immediately be ready for the  access from the  PC. The  user, however, might not 

know the IP address of the camera yet. It is necessary to know the IP address of the camera in 

other to be able to access it by using a Web browser. 


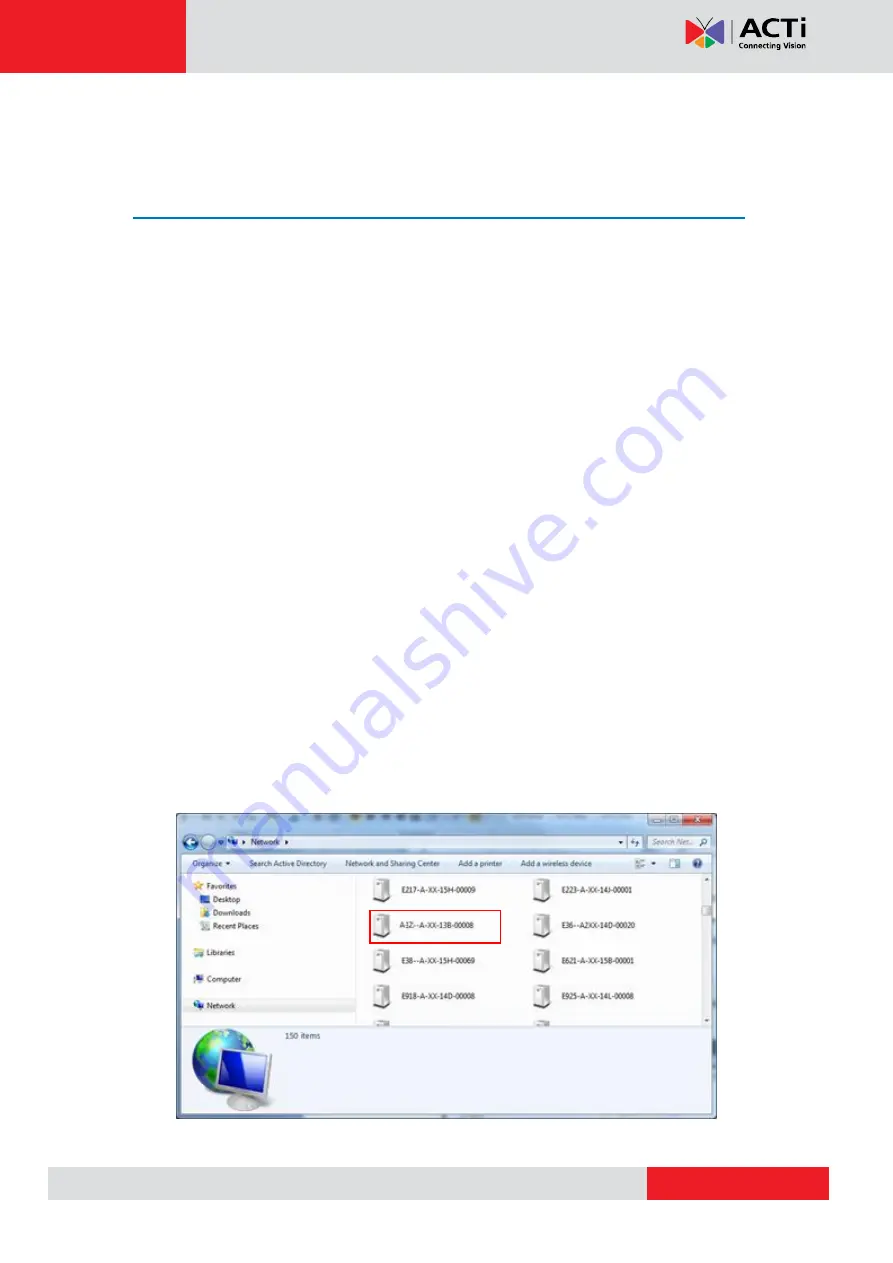
The quickest way to discover the cameras in the network

 is to use the simplest network 

search, built in the Windows system 

– just by pressing the “Network” icon, all the cameras of 

the local area network will be discovered by Windows thanks to the UPnP function support of 

our cameras. 


In the example below, we successfully found the camera model that we had just connected to 

the network. 


Содержание B419-P2

Страница 1: ...Zoom Bullet Camera Hardware Manual B419 P2 2021 01 26...

Страница 2: ...ble Gland 10 Step 3 Connect to Network 13 Step 4 Access the Camera Live View 13 Other Connections 14 Connecting a Power Adapter Optional 14 Connecting Digital Input Output Devices Optional 15 Connecti...

Страница 3: ...g or removing covers may expose you to dangerous voltage or other hazards Refer all servicing to qualified service personnel Trademarks ACTi and ACTi logo are registered trademarks of ACTi Corporation...

Страница 4: ...urning the equipment off and on the user is encouraged to try to correct the interference by one or more of the following measures Reorient or relocate the receiving antenna Increase the separation be...

Страница 5: ...pply immediately and refer servicing to qualified service personnel under the following conditions 1 When the power supply cord or plug is damaged 2 If liquid has been spilled or objects have fallen i...

Страница 6: ...www acti com Hardware Manual 6 Introduction Package Contents Camera Mounting Screw Kit Cable Gland with Washer Wrench Drill Template Quick Guide Warranty Card Drill Template Warranty Card...

Страница 7: ...d output device such as a microphone and speaker 4 DC 12V Power Connects to an external DC 12V power adapter 5 Reset Button Press and hold the reset button to restore the camera factory default settin...

Страница 8: ...d use the supplied screw tox 2 If the cable will pass through the surface drill the cable hole as indicated on the drill template If the cable will be routed along the surface route the cable through...

Страница 9: ...www acti com Hardware Manual 9 5 Adjust the camera angle and orientation Sample of Wall Installation Sample of Ceiling Installation 6 Tighten the screw to fix the tilt angle position or...

Страница 10: ...terproof tape to protect the other cable connection An optional Junction Box is available for purchase contact ACTi sales for details Using the Cable Gland This section describes how to waterproof the...

Страница 11: ...Hardware Manual 11 3 Insert the clamping nut into the Ethernet cable 4 Insert the sealing insert through the Ethernet cable 5 Insert the cable through the gland body 6 Push the sealing insert into th...

Страница 12: ...the camera connector 8 Attach the gland body to the camera connector 9 Attach the clamping nut to the gland body to complete the cable solution NOTE Make sure the clamping nut is tightly attached to...

Страница 13: ...er Ethernet PoE connection example below Network AC Power Source PoE Injector Switch Power Cable Ethernet Cable Ethernet Cable Data Power Ethernet Cable Data Camera Step 4 Access the Camera Live View...

Страница 14: ...these devices however is optional Connecting a Power Adapter Optional The camera can be powered by a Power over Ethernet PoE switch that is IEEE802 3af compliant In case of using a non PoE switch or...

Страница 15: ...pressed the alarm signal will be sent through the camera Other common DI device applications are emergency button smoke detector passive infrared sensor etc Digital Output DO devices are external devi...

Страница 16: ...DO devices make sure to use external power source to power them up Note the maximum voltage and current allowed on the table above After mapping the wires to the terminal block connect the terminal b...

Страница 17: ...Connect the wires of the audio input device to IN and G Ground G The camera does not provide power for external devices Use an external power source to supply power when using LINE IN microphones wit...

Страница 18: ...e the Memory Card 1 Using the bundled wrench loosen the two 2 screws to remove the cover 2 Push the microSD card into the memory card slot with the metal contacts facing the lens 3 Secure the two 2 sc...

Страница 19: ...server running then you do not need to configure the IP addresses at all both the camera and the PC would request a unique IP address from DHCP server automatically In such case the camera will immedi...

Страница 20: ...e tool that can not only discover the cameras but also list lots of valuable information such as IP and MAC addresses serial numbers firmware versions etc and allows quick configuration of multiple de...

Страница 21: ...work and it does not detect any DHCP services it will automatically assign itself a default IP 192 168 0 100 Whereas the default port number would be 80 In order to access that camera the IP address o...

Страница 22: ...P Utility With the procedure shown above all the cameras will have unique IP addresses starting from 192 168 0 101 In case there are 20 cameras selected the last one of the cameras would have the IP 1...

Страница 23: ...nality Internet Explorer Live Video Yes Live Video Area Resizable Yes PTZ Control Yes Capture the snapshot Yes Video overlay based configuration Motion Detection regions Privacy Mask regions Yes All t...

Страница 24: ...yping the following address into Web browser s address bar http 192 168 0 100 Upon successful connection to the camera the user interface called Web Configurator would appear together with the login p...

Страница 25: ...Copyright 2019 ACTi Corporation All Rights Reserved 7F No 1 Alley 20 Lane 407 Sec 2 Ti Ding Blvd Neihu District Taipei Taiwan 114 R O C TEL 886 2 2656 2588 FAX 886 2 2656 2599 Email sales acti com...

Отзывы: