background image


timeQplus BIOMETRIC

 Installation Guide


 20

3           

timeQplus BIOMETRIC

 Installation Guide

Attendance Rx Software

Pre-Installation Preparation Document

It is recommended that you take a few minutes to record the answers

to questions that the Attendance Rx Setup wizard will ask during installation.

By thinking about how you run your company and having these answers ready

BEFORE

 launching Attendance Rx you will insure a fast and smooth startup.

If you need to change these answers you will be able to do so in the

Administration module after Attendance Rx is completely installed and ready

to accept employee transactions.  Completing the following questionnaire prior

to installing Attendance Rx is highly recommended.

PAY PERIOD LENGTH:

 How often do you pay your employees?

Circle one

:     Weekly     Bi-Weekly     Semi-Monthly     Monthly

CURRENT PAY PERIOD START DATE:

This date should be either the current date or a date in the past.

Write date here

:

If

 you are using a Semi-Monthly pay period, you must also select the starting

date for the next Pay Period.

Write date here

:

CALCULATING OVERTIME:

Specify the number of hours worked after which overtime begins; can set both

daily and/or weekly; two levels are permissible.

Level 1

Level 2

Daily

Hours

Hours

Weekly

Hours

Hours

WEEKLY OVERTIME STARTS ON:

This field will only appear when a Semi-monthly or Monthly Pay Period option

is selected.  You must specify on which day your work week begins (for weekly

and bi-weekly cycles, the pay period and work week begin on the same day).

Circle one

:     Sun

Mon     Tue     Wed     Thu     Fri     Sat

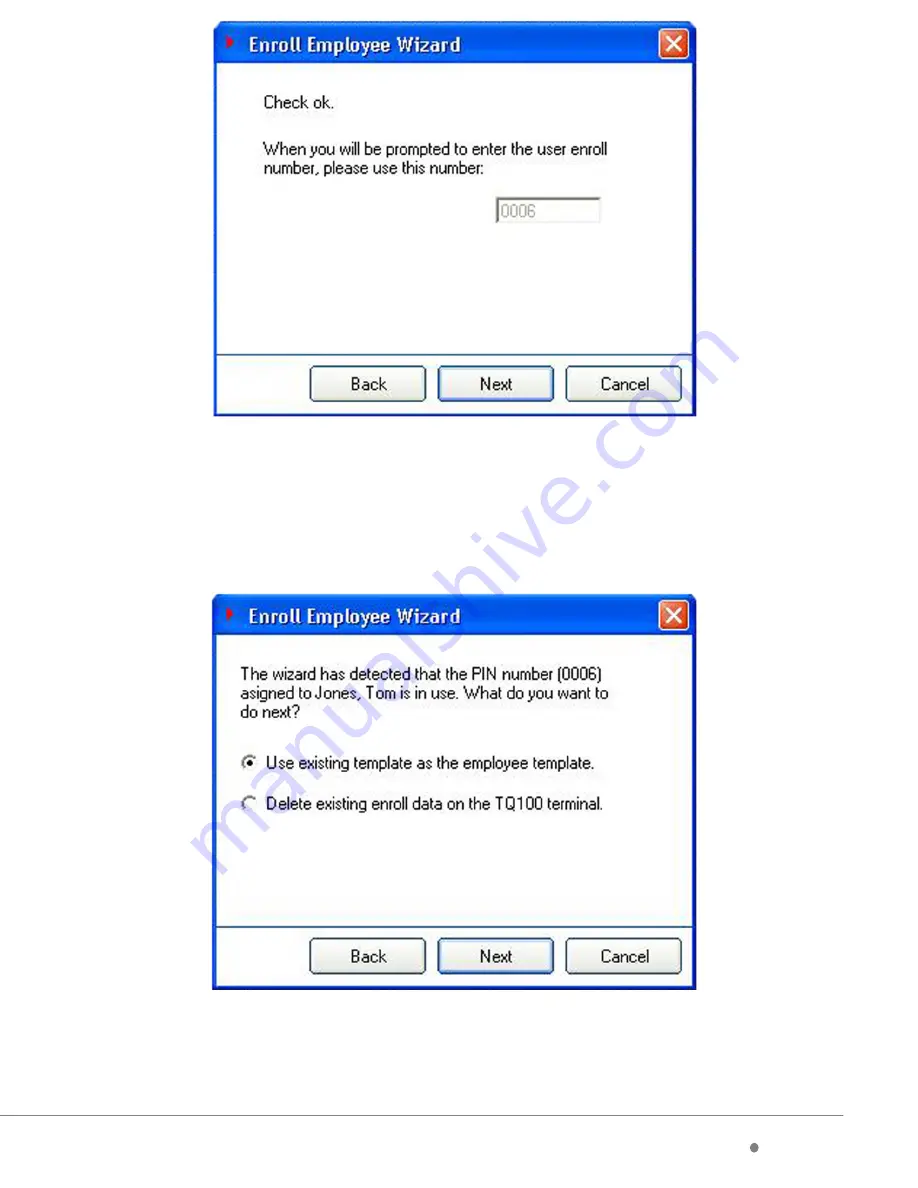
The system will attempt to match the PIN you used to enroll this employee’s

fingerprint at the terminal with the same PIN in the Attendance Rx database.

On the following screen, verify that the PIN identified by Attendance Rx is correct for

this employee. If yes, select the ‘Use existing template as the employee template’

option, then click ‘

Next

’.

A confirmation screen will appear [below]. Click ‘Finish’ to return to the Employee

screen and repeat the process to enroll all of your employees.

(Every 2 Weeks)

Содержание TimeQ+ Biometric

Страница 1: ...BIOMETRIC FINGERPRINT TECHNOLOGY Installation Guide gital ble s th s es ing ...

Страница 2: ...22 light t hat all IN ...

Страница 3: ...uidance and instructions for installing and configuring your new system Included in the timeQplus Biometric box you should find timeQplus BiometricTM software TQ100 Biometric Terminal Fingerprint Identification Unit FIU Optical Overlay NOTE This is taped to the front page of the Installation Guide Terminal Mounting Plate and screws Power Adapter 30 ft 9m RS232 Cable 6 ft 2m Ethernet CAT5 Cable Har...

Страница 4: ...20 ect for ate yee ...

Страница 5: ...he nearest selected interval Circle one in minutes 1 5 6 10 15 MAXIMUM TIME ON CLOCK The elapsed time after which the system assumes an employee missed an out punch Write value here Hours AUTOMATIC HOLIDAYS Enable automatic holiday payment and list the applicable holidays Circle one Yes No If Yes specify the number of calendar days that must elapse after hire before an employee becomes eligible fo...

Страница 6: ...18 ftware e must lick ...

Страница 7: ...art AM PM Stop AM PM If lunch is enabled for this shift then Lunch Rules Start AM PM Duration minutes End AM PM Auto After hours Automatically pay Holidays for this shift Circle one Yes No If Yes specify time to pay for each holiday Write value here hours min Note If more than three shifts copy this page to allow for recording of additional shift information Password You must set a password for th...

Страница 8: ...16 eded ...

Страница 9: ...tware on multiple computers you must install the timeQplus Biometric server first after which the client software can be installed on any number of client computers on the network After the install is complete you will be prompted to restart the computer Then the Setup Wizard will prompt you to enter the rules your Time and Attendance system will use to accurately track your employees time The Set...

Страница 10: ...14 r the to poll urrent during 15 ally ...

Страница 11: ...level if necessary Connect the power cord to the TQ100 and to the electrical outlet DO NOT connect the TQ100 terminal to the computer at this time Ethernet TQ100 Terminal Configuration From your Network Administrator obtain an IP address to be used for the terminal To use the Ethernet connection follow these instructions Press the Power On button Press Menu Using the Down scroll button highlight S...

Страница 12: ...12 OK al e the your n the O S O is hen K p 2 of C ...

Страница 13: ... be the same as the value you determined in the process you performed immediately above Scroll and highlight RS485 If you are configuring for RS232 this value should be set to NO If you are configuring for RS485 this value should be set to YES Press OK then press a scroll button to change it to YES or NO based on your configuration then press OK Scroll and highlight Ethernet If it reads NO no acti...

Страница 14: ...10 aped ts are d of as n utlet sed ne er if e to ...

Страница 15: ... terminal Update cycle Attendance Rx will update each terminal with changes to employee names employee In Out status and total hours worked for the current pay period You may adjust the time and frequency based on your specific needs NOTE 1 Because terminals are not available for punching In Out during a Polling or Update cycle select times that avoid being within 15 minutes of a shift START or ST...

Страница 16: ...8 nal e ion D in metric rver ta er ters art our y ...

Страница 17: ...the Comm Port tab to activate this type of communication if needed Enter the appropriate data to match the settings entered into the TQ100 during step 1 above The wizard will step you through completing the installation timeQplus Biometric setup is now complete ...

Страница 18: ...6 min No min s No tor ...

Страница 19: ...Q100 Terminal User Manual Chapter Five Fingerprint Registration Enrollment for details on enrolling on the TQ100 terminal After an employee is enrolled on the TQ100 terminal the employee s template must be linked to the employee using the Enroll Template function in the software Select the Employee you wish to Enroll and click the Enroll Template button Click Next to continue the fingerprint enrol...

Страница 20: ...4 e the ed ...

Страница 21: ... the same PIN in the Attendance Rx database On the following screen verify that the PIN identified by Attendance Rx is correct for this employee If yes select the Use existing template as the employee template option then click Next A confirmation screen will appear below Click Finish to return to the Employee screen and repeat the process to enroll all of your employees ...

Страница 22: ...2 ...

Страница 23: ...nt process as previously described Whenever an employee s has been assigned to a TQ100 terminal it is highly recommended that the Update Statuses button be clicked This will ensure that all employees names will be shown on the TQ100 display screen when punching IN OUT on the assigned TQ100 terminals s Congratulations Your employees are now ready to begin using your new timeQplus Biometric system ...

Страница 24: ......

Отзывы: