background image

Multiplex is a term used to describe the separation of the background music 

from the vocal track. By recording the background music on the left channel 

and the vocal track on the right, it is possible to mix the two to gain a vocal 

version of a song, or play just the background music and you would normally 

expect to hear on a karaoke track.

USING THE AVC (AUTO VOCAL CUT) CONTROL 

Sometimes, when singing karaoke it is easy to loose your place or become 

embarrassed. When playing the vocal track on a multiplex disc, it is possible 

to  replace  the  singers  voice  with  your  own  as  soon  as  you  start  singing 

into  the  microphone  by  using  the  AVC  control  (8,  page  4).  If  you  then 

subsequently stop singing, the singer on the recording will resume to pick 

up where you left off.

It is also possible to adjust the amount the singers voice is reduced so that 

it does not leave all of the singing to you..

Turning  the  AVC  control  clockwise  will  increase  the  amount  the  singers 

voice is reduced. Turning the AVC control completed anti-clockwise to the 

MIN position will turn this feature off resulting in the singers voice on the 

track being at full volume along side your own singing voice. 

The setting of this control is down to user preference and should be adjusted 

until the desired level is achieved.

USING THE AUDIO BUTTON

You can use the AUDIO button on the front panel (2, page 4) to manually 

select which channel of sound you wish to hear when playing a multiplex 

disc. You can select MONO L (Left channel only), MONO R (Right channel 

only - typical vocal channel) or STEREO (Both left and right channels).

UNDERSTANDING MULTIPLEX 

AVC

MIC 2

MIN

MAX

MIN

MAX

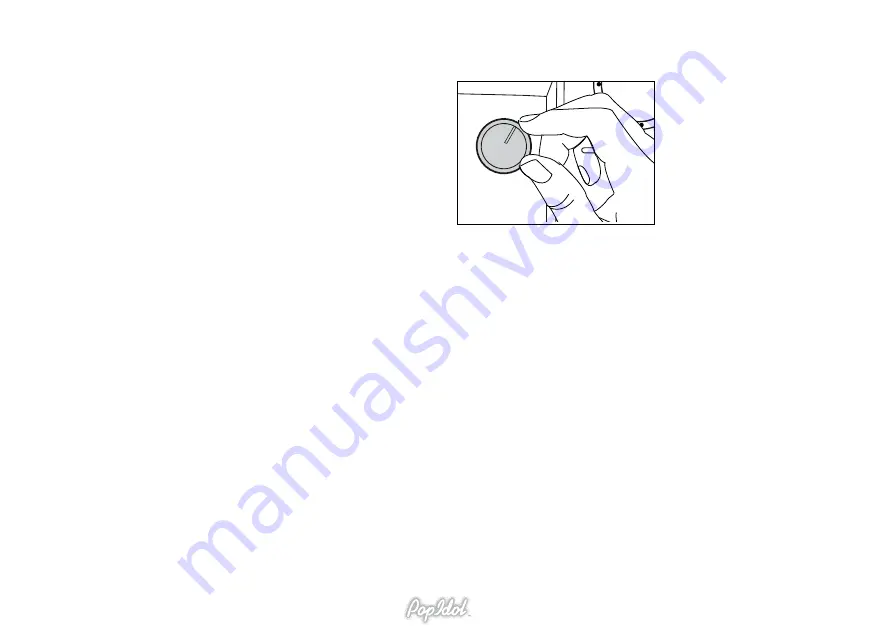
Turning  the  AVC  control  clockwise 

will increase the amount the singers 

voice is reduced when you sing into 

the microphone.

14

Содержание Pop Idol KS-3

Страница 1: ...unparalleled performance As with any new electrical product please be patient and allow at least 36 hours use before all components have acclimatized themselves with your surroundings and found their optimum working temperature CONTENTS 1 Introduction 2 Safety instructions 3 Disc handling and maintenance 4 Control locations Front panel 5 Connection locations Rear panel 6 Connecting to external equ...

Страница 2: ...g and that no objects filled with liquids such as vases shall be placed on the apparatus NOTE The KS 3 is not completely isolated from the mains power when the mains switch is turned off EXPLANATION OF SYMBOLS The lightning flash symbol with the arrowhead within an equilateral triangle is intended to alert the user to the presence of uninsulated dangerous voltage within the product s enclosure tha...

Страница 3: ... cloth Never use alcohol benzine thinners cleaning fluids or other chemicals Do not use compressed air to remove dust REGION CODING Since DVD movies are released at different times around the world all DVD discs are region coded and will only play in a DVD player of the same region If you try and play a different region disc an error message will be displayed on the TV screen The world is divided ...

Страница 4: ...HO Add echo to the microphone signal 7 LOUDSPEAKER Outputs sound from the KS 3 8 AVC Auto Voice Cut Set the level of AVC when playing a vocal track on multiplex CD G discs 9 MIC 2 Connect microphone 10 MUSIC VOLUME Adjust the volume of the CD G CD DVD playback 11 SKIP UP Press to skip to the next track chapter on a CD G CD DVD disc 12 STOP Stops CD G CD DVD playback 13 REPEAT Press to repeat 14 PL...

Страница 5: ...CONNECTION LOCATIONS REAR PANEL 1 AUX output to external AMP 2 Video output for television 5 ...

Страница 6: ...this is normally located on the front or side of your television If you do not have a VIDEO IN socket on your television it is possible to use a phono scart adapter and use an available scart socket on the rear of your television You will then need to select the AV channel on your television in order to view the lyrics CONNECTING TO AN EXTERNAL AMPLIFIER You can connect the KS 3 to an external amp...

Страница 7: ...hown V O L U M E TITLE SUBTITLE PROGRAM LANGUAGE ANGLE SEARCH MUTE OSD 1 2 3 4 5 6 7 8 9 0 10 SETUP MENU STOP ZOOM SLOW RESUME A B REPEAT L R RETURN RANDOM PAUSE STOP SELECT 1 2 3 4 5 6 7 8 9 10 11 12 13 14 15 16 17 18 19 20 21 22 23 24 25 26 27 28 29 30 7 ...

Страница 8: ...repeat one chapter track or all 15 L R Toggle between the vocal or instrumental channels when playing a CD G vocal track 16 RETURN Use to step back a stage in DVD menus 17 VOLUME Adjust the output volume of the KS 3 18 RANDOM Press to start a random track chapter playlist 19 NEXT Press to jump to the next track or chapter 20 PAUSE Use to directly access certain tracks chapters on a disc 21 PLAY Pr...

Страница 9: ...ble when playing this format of disc Using DVD karaoke discs DVD karaoke discs work in a similar way to CD G discs in that they display the lyrics on your television However the advantages of DVD include improved audio and video quality in addition to interactive menus When buying DVD karaoke discs look for the DVD Karaoke logo shown above USING THE MICROPHONE FEATURES Follow the instructions belo...

Страница 10: ... by following the below instructions 1 Adjust the microphone volume control on the front panel to a reasonable level 2 Switch the microphone on by moving the ON OFF switch located on the body of the microphone up to the ON position 3 Hold the microphone approximately 15 20 cm away from your mouth 4 Sing You may experience feedback when using the microphones This is a loud howling noise that emits ...

Страница 11: ... increase the depth of echo or anti clockwise to reduce down to MIN if no echo is required USING THE MICROPHONE CONTROLS Plug a microphone into either MIC1 or MIC2 sockets MIC 1 MIN MAX Use the MIC VOLUME knob to adjusts the microphone volume MIC VOLUME MIC 1 MIN MAX ECHO MIC 1 MIN MAX MIN MAX Use The ECHO knob to adjusts the depth of echo applied to both mic channels Take care not to turn the MIC...

Страница 12: ...s the disc is being read To load a disc first push the OPEN CLOSE button on top of the disc lid Place a disc into the disc drive with the label uppermost Then close the lid PROGRAM SKIP UP SKIP DN REPEAT PLAY PAUSE STOP To play pause a disc press the PLAY PAUSE button TO PLAY A CD CD G DVD To commence playing a CD press the PLAY PAUSE button 14 page 4 once This will start playing the disc from the...

Страница 13: ...gh the DVD CD track listing When searching a DVD CD for a track the total time of each track will be displayed on the LED display To advance to the next track press and release the SKIP UP button 11 page 4 once To advance the track again repeatedly press and release the SKIP UP button until the desired track is located To select a previous track press and release the SKIP DN button 3 page 4 contin...

Страница 14: ...ible to adjust the amount the singers voice is reduced so that it does not leave all of the singing to you Turning the AVC control clockwise will increase the amount the singers voice is reduced Turning the AVC control completed anti clockwise to the MIN position will turn this feature off resulting in the singers voice on the track being at full volume along side your own singing voice The settin...

Страница 15: ... will appear at the top and bottom of the screen III 16 9 Select this option when you have connected the system to a wide screen television KS 3 SETUP PASSWORD before you can make changes to the parental control level you must enter the default password The default password for the KS 3 is 0000 PARENTAL CONTROL LEVEL From this menu you can disable certain types of DVD disc from being played on the...

Страница 16: ...te electronics within this unit PROBLEM POSSIBLE SOLUTION No power when switched on Mains socket not switched on or faulty Plug not fully inserted into wall socket Mains fuse has blown inside plug Mains fuse has blown inside unit this will need to be replaced by a qualified service technician Power cord has become faulty this should be replaced immediately by a qualified service technician No Soun...

Страница 17: ...co uk email enquiries acousticsolutions co uk Through the process of continuous improvement Acoustic Solutions Limited reserves the right to change or alter specifications without prior notice E OE SPECIFICATIONS POWER SUPPLY AC 230V 50Hz POWER OUTPUT THD 10 4W RMS 15W peak music power output SPEAKER 4 inch speaker 8 ohm CD CD G DVD PLAYER 8 12cm disc compatible CD G DVD video output AVC Automatic...

Отзывы: