background image

EMP 370/371 Reference Manual 


User’s Manual 


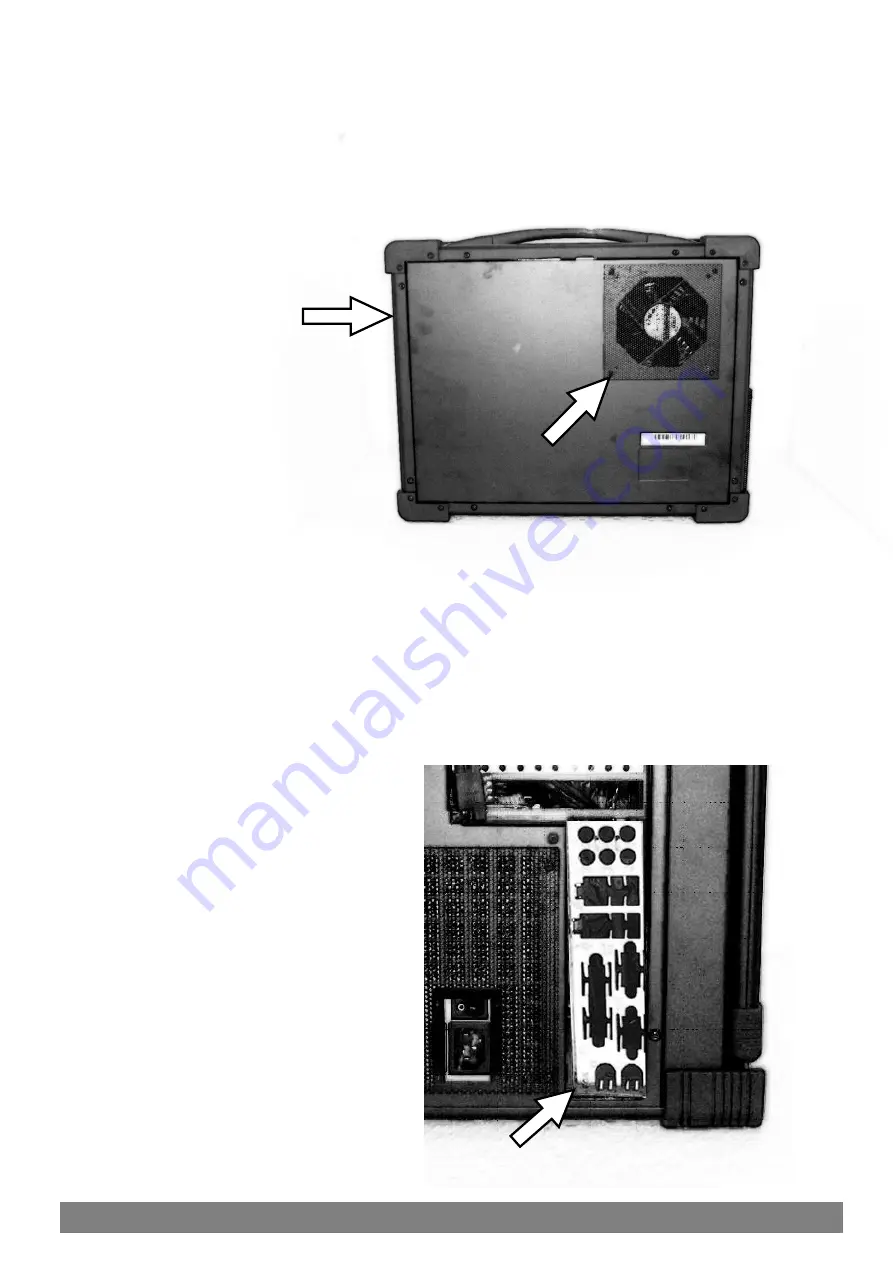
2.9  Two cooling fan are located on the chassis, one located on the rear and another on right side. 


2.10  Access the system board I/O panel on the bottom left side of the chassis.  The I/O panel is 

only available on the 370 model where ATX system board is used.   


Содержание EMP370

Страница 1: ...EMP 370 371 Reference Manual User s Manual 1 EMP370 371 User Reference Manual Revision 1 2 080717 ...

Страница 2: ...0mm Open Bay 3 5 Drive Bay 1x 5 25 Drive Bay 2x Slim DVD 1x Expansion Slot Available Slot 7x Slot 370 10x Slot 371 1x I O 370 Input Peripheral Keyboard 105 Key Cherry Switch Keyboard Pointing Device Integrated TouchPad Environmental Specification EMP 370 371 Environmental Specification Operating Temp 0 C 50 C Relative Humidity 20 80 non condensing Shock 10G operating all axes Vibration 1 25G 10 10...

Страница 3: ...is no hassle EMP enables you to be up and running in seconds without complicated setup Our all in one design has integrated keyboard mouse and display into a total package for your convenience LCD Display Information The EMP has built in high resolution LCD screens With our engineering advancement LCD can be tilted and retracted fully effortlessly The EMP370 371 is integrated with 17 high brightne...

Страница 4: ...ted on each side of the keyboard to release the locking mechanism and then pull out the keyboard 2 2 You have the option of leaving the keyboard attach to the chassis or they can be release independently from the chassis by pushing the two lever inward to release the lock 2 0 Operation Features of the EMP Lift Up ...

Страница 5: ... corner of the chassis Make sure the pin direction is correct when inserting Keyboard can be close back without disconnecting this plug 2 4 You can flip the 2 feet located underneath the chassis outward to help create an angle for the chassis for viewing comfort Locate the feet and flip outward until click 1 2 ...

Страница 6: ... the power cable outlet into the power supply unit in the main chassis on the left 370 model shown 371 model location is similar 2 6 Press the power button in the front right panel of the chassis to power up the unit Insert Power Cord Press Once to Power On ...

Страница 7: ...r light reset power and USB port 2 8 Access the expansion slot on the left side of the chassis The 370 version will have 7 slots available and the 371 model will have 10 slots available 371 model shown in illustration PWR LED HDD LED Reset Button LCD On Off Button Power Button USB Ports LCD OSD Button ...

Страница 8: ...Two cooling fan are located on the chassis one located on the rear and another on right side 2 10 Access the system board I O panel on the bottom left side of the chassis The I O panel is only available on the 370 model where ATX system board is used ...

Страница 9: ...t LCD OSD to match the display to your video board via the OSD button located on right side of the LCD panel Press the MENU button to bring the on screen menu out and then follow instructions Press the UP DOWN button to scroll through the menu and press the SELECT button to enter the selected item And UP DOWN button to adjust value as necessary 3 5 Drive Mounting OSD Buttons MENU SELECT UP DOWN 5 ...

Страница 10: ...e proceeding 3 1 Unscrew the back cover screw to release it from the chassis 3 2 Remove the 4 screws to remove the 2 stabilizer bars from the chassis to access into the internal chassis 3 0 Internal Hardware Access Unscrew 1 Unscrew Unscrew Unscrew Unscrew Unscrew Unscrew Unscrew Unscrew Unscrew Unscrew ...

Страница 11: ... 370 371 Reference Manual User s Manual 11 3 3 Remove the left side cover plate by unscrewing the 3 hex screws on the left side 3 4 Removing the left side cover door by lifting out Unscrew Unscrew Unscrew ...

Страница 12: ... s Manual 12 3 5 Remove the 4 screws on the chassis to remove the power supply unit form the chassis 3 6 Remove the right side cover plate by unscrewing the 2 hex screws on the right side Unscrew Unscrew Unscrew Unscrew Unscrew Unscrew ...

Страница 13: ...EMP 370 371 Reference Manual User s Manual 13 3 7 Remove the right side cover door by lifting out 3 8 Remove the 2 mounting screw and slide the drive cage outward from its rail Unscrew Unscrew ...

Страница 14: ... only on the left side of the chassis opening and the proper standoff mounting according to the system board mounting opening 3 10 Remove the 4 screws for holder of the internal removable tray assembly Unscrew I O Plate Location Unscrew Standoff Mount 3 5 Device Screw 5 25 Device Screws Slim DVD ...

Страница 15: ...r s Manual 15 3 11 You can remove the 3 5 attachment alone by removing the bottom assembly The Slim DVD can also be optional 3 12 You can install all devices and configuration of your choices in different combinations Unscrew Unscrew ...

Страница 16: ... Manual User s Manual 16 3 13 Install your add in card as necessary and secure tightly 3 14 Fit the VGA or DVI cable through the top the slot first prior to installation display card and connect the header Fit Cable Through ...

Страница 17: ...e or floppy Depending on the execution sequence you have set in the batch file you will usually get a DOS prompt after loading Window Boot up Windows boot up requires you to have Windows installed in the hard disk drive During Windows boot up you will see a sequence of access to your hard disk drive which will eventually take you into a graphical user interface environment Other O S description Ma...

Страница 18: ...that the screen do not suffer from internal damage or cracks 5 4 Handling of Power Always make sure the power cord is in top condition before using them with the EMP Make sure your power source is reliable and of proper standard The EMP power supply is capable of handling 100 240V and 50 60Hz Do not use the EMP on an already overloaded circuit 5 5 Handling of K B The keyboard is essential in that ...

Страница 19: ... machine 6 4 No display LCD 1 Check all the proper power up procedure has been taken 2 Hook up an external CRT to the VGA port to check if video is present 3 If video is present on external CRT check the internal LCD cable connection 4 Or check your VGA setting using a CRT to make sure LCD video is enabled 5 If there is no video on external check make sure everything is seated properly 6 If everyt...

Страница 20: ...for additional packaging 1 3 110 Power Cord 220 Power Cord Option 110 Power Cord 220 Power Cord Option 1 4 Screw Pack Screw Pack stabilizer 1 5 Stabilizer Supports Pack Additional clip for card holder to secure add in card 1 6 EMP370 371 System Main system unit chassis 1 7 Carrying Bag Tow bag with wheel 1 7 0 Standard SKD Accessory Kits ...

Отзывы: