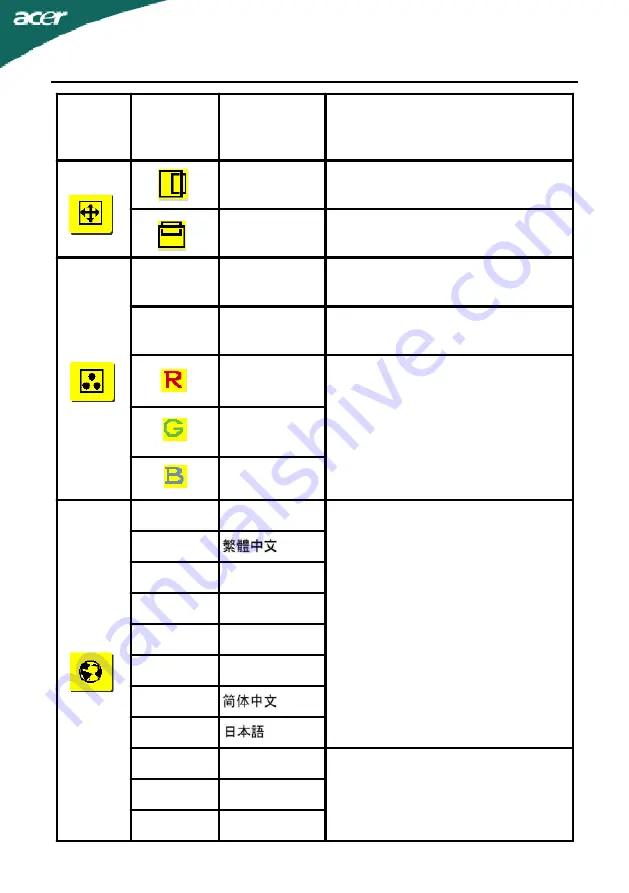
Acer X223WDB Скачать руководство пользователя страница 19

X

223

W

EN-18

Main

Menu

Icon

Sub Menu

Icon

Sub Menu

Item

Description

H. Position

Adjust the horizontal position.

(available in Analog  mode only)

V. Position

Adjust the vertical position.

(available in Analog  mode only)

N/A

Warm

Set the color temperature to warm

white.

N/A

Cool

Set the color temperature to cool

white.

User /Red

Adjusts Red/Green/Blue intensity.

User /Green

User /Blue

N/A

English

Multi-language selection.

N/A

N/A

Deutsch

N/A

Francais

N/A

Espanol

N/A

Italiano

N/A

N/A

N/A

Suomi

EMEA version OSD only

N/A

Nederlands

N/A

Pyccknn

Содержание X223WDB

Страница 1: ...and comfort 2 Unpacking 5 Screen position adjustment 6 Connecting the power cord 7 Safety precaution 7 Cleaning your monitor 7 Power saving 8 DDC 8 Connector Pin Assingment 9 Standard Timing Table 11...

Страница 2: ...u may find slightly uneven brightness on the screen depending on the desktop pattern you use The LCD screen has effective pixels of 99 99 or more It may include blemishes of 0 01 or less such as a mis...

Страница 3: ...e product and to protect it from overheating These openings must not be blocked or covered The openings should never be blocked by placing the product on a bed sofa rug or other similar surface This p...

Страница 4: ...n Tips and information for comfortable use Computer users may complain of eyestrain and headaches after prolonged use Users are also at risk of physical injury after long hours of working in front of...

Страница 5: ...oking away from the monitor and focusing on a distant point Blink frequently to keep your eyes from drying out Display Keep your display clean Keep your head at a higher level than the top edge of the...

Страница 6: ...llowing items are present when you unpack the box and save the packing materials in case you will need to ship or transport the monitor in future User Manual AC Power Cord 15 pin D Sub Cable Quick Sta...

Страница 7: ...f your hands to hold the edges of the monitor as shown in the figure below up down height adjustment cated by arrow below SCREEN POSITION ADJUSTMENT Only The monitor can be adjusted to 3 degrees Forwa...

Страница 8: ...hands and then turn 90 degrees in clockwise direction After rotation is complete adjust the screen height to suit your own position To return to original position turn 90 degress in counter clockwise...

Страница 9: ...flect on the face of the monitor Place the monitor just below eye level Handle with care when transporting the monitor Refrain from giving shock or scratch to the screen as screen is fragile SAFETY PR...

Страница 10: ...CONNECTOR PIN ASSIGNMENT 15 Pin Color Display Signal Cable DDC To make your installation easier the monitor is able to Plug and Play with your system if your system also supports DDC protocol The DDC...

Страница 11: ...2 4 Shield 15 GND return for 5V hsync vsync 4 TMDS Data4 16 Hot Plug Detect 5 TMDS Data4 17 TMDS Data0 6 DDC Clock 18 TMDS Data0 7 DDC Data 19 TMDS Data 0 5 Shield 8 Analogue Vertical Sync 20 TMDS Dat...

Страница 12: ...24 70Hz To reduce the need for adjustment for different modes the monitor has default setting modes that are most commonly used as given in the table below For optimum adjustment the user is suggested...

Страница 13: ...oth the monitor and computer are powered OFF b Connect one end of the 24 pin DVI cable to the back of the monitor and connect the other end to the computer s port 2 Connect power cord Connect the powe...

Страница 14: ...tton Exit 1 When OSD menu is in active status this button will act as EXIT KEY EXIT OSD menu 2 When OSD menu is in off status press this button for 2 seconds to activate the AutoAdjustment function Th...

Страница 15: ...esired function 3 Press the MENU button to select the function that you want to adjust 4 Press or to change the settings of the current function 5 To exit and save select the exit function If you want...

Страница 16: ...cer eColor Management OSD and access the scenario modes Step 2 Press or to select the mode Step 3 Press Key to confirm the mode and run Auto Adjust Automatic Adjustment Step 1 Press Auto Key to initia...

Страница 17: ...X223W EN 16 I Only Analog Input Model 2 USER If selected to USER item will appear the Standard OSD Features and Benefits...

Страница 18: ...scription Contrast Adjusts the contrast between the foreground andbackground of the screen image Brightness Adjusts the background brightness of the screenimage ACM ACM Adaptive Contrast Management AC...

Страница 19: ...tical position available in Analog mode only N A Warm Set the color temperature to warm white N A Cool Set the color temperature to cool white User Red Adjusts Red Green Blue intensity User Green User...

Страница 20: ...X223W...

Страница 21: ...onnected at the back of monitor Check if the power of computer system is ON Abnormal Picture Unstable Picture Check if the specification of graphics adapter and monitor is in compliance which may be c...

Страница 22: ...ss and contrast to maximum or reset to their default settings LED OFF Check the power switch Check if AC power cord is properly connected to the monitor LED displays amber color Check if video signal...

Страница 23: ...harmful interference and 2 this device must accept any interference received including interference that may cause undesired operation The following local Manufacturer Importer is responsible for thi...

Страница 24: ...and other relevant provisions of the following EC directives and that all the necessary steps have been taken and are in force to assure that production units of the same product will continue comply...

Страница 25: ...with an ENERGY STAR logo This product has been shipped enabled for power management Activate display Sleep mode within 15 minutes of user inactivity Activate computer s Sleep mode within 30 minutes o...

Отзывы: