7
6
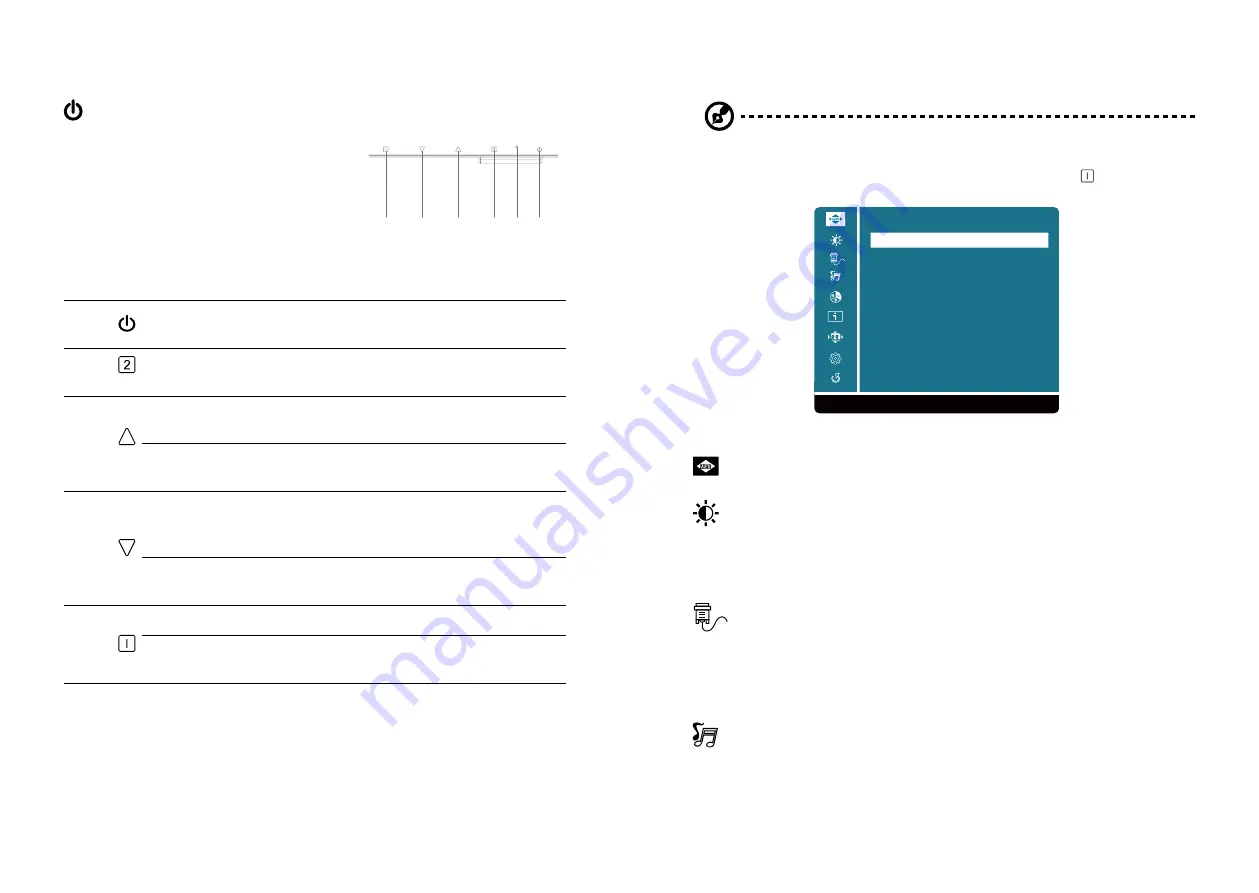
User controls
Power Switch / Power LED:
To turn the monitor ON or OFF.
Lights up to indicate the power is turned ON.
Using the Shortcut Menu
External controls
1 & 2
LED Indicator/
Power button
Turns the monitor on/off. Blue indicates power on.
Amber indicates standby/power saving mode.
3
Confirm
When the OSD menu is displayed, press this
button to confirm the OSD selection.
4
Audio Adjust
a.
When not in OSD menu, directly enters Audio
Adjust menu.
Up/Right
b.
Press this button to select the desired item
when in OSD menu.
5
Contrast /
Brightness
Adjust
a.
When not in OSD menu, directly enters
Contrast/Brightness menu.
Down/Left
b.
Press this button to select the desired item
when in OSD menu.
6
OSD functions
Press to view the OSD.
Exit
When the OSD menu is active, this button will act
as the exit key (exit OSD menu).
6
5
4
2
1
3
Adjusting the OSD settings
Note:
The following content is for general reference only. Actual product specifications may
vary.
The OSD can be used for adjusting the settings of your LCD Monitor. Press the key to open the
OSD. You can use the OSD to adjust the picture quality, OSD setting and general settings.
1:Exit
Select:2
Auto Image Adjust
Input Select
Audio Adjust
Color Adjust
Information
Manuel Image Adjust
Setup Menu
Memory Recall
Contrast / Brightness
Short Cuts Function from the button(s)
Auto Image Adjust:
To automatically adjust H./V. Position, Phase adjust and Clock adjust.
Remark:
There may need manual adjustment of “phase”for optimized performance for various
VGA tolerance
.
Contrast:
Contrast from register. Each step will increase / decrease value by 1.
Brightness:
Backlight Adjustment. Each step will increase / decrease value by 1
Adv. Contrast:
To control Adv. Contrast function off/on
ECO Mode:
To select ECO function Off ,On
Over Drive:
To select OD (Over Driver) Off/On
Input Select:
When Input Select is pressed, change Input signal to VGA, HDMI, Display Port or
Auto.
VGA:
Select D-SUB signal source as input.
HDMI:
Select HDMI signal source as input.
Display Port:
Select DisplayPort signal source as input.
Auto:
Auto Detect input signal.
Audio Adjust:
To adjust the audio functions.
Volume:
To adjust the output of speaker from Amplifier. Each step will increase / decrease
value by 5.
Mute:
To turn on/off the mute function.
Audio Input:
To select DisplayPort/Line-in as signal source input
.
Содержание UT222Q
Страница 1: ...Acer LCD Monitor User s Guide ...


