background image


- 3 - 


3


Important Safety Notice


ACER S190HQL


1


Product Announcement:


This product is certificated to meet RoHS Directive and Lead-Free produced definition. Using approved 

critical components only is recommended when the situation to replace defective parts. Vender assumes 

no liability express or implied, arising out of any unauthorized modification of design or replacing non-

RoHS parts. Service providers assume all liability.


Qualified Repairability:


Proper service and repair is important to the safe, reliable operation of all series products. The service 

providers recommended by vender should being aware of notices listed in this service manual in order 

to minimize the risk of personal injury when perform service procedures. Furthermore, the possible 

existed improper repairing method may damage equipment or products. It is recommended that service 

engineers should have repairing knowledge, experience, as well as appropriate product training per 

new model before performing the service procedures.


NOTICE:


To avoid electrical shocks, the products should be connect to an authorized power cord, and turn off 

the master power switch each time before removing the AC power cord.


To prevent the product away from water or exposed in extremely high humility environment.


To ensure the continued reliability of this product, use only original manufacturer

’s specified parts.


To ensure following safety repairing behavior, put the replaced part on the components side of PWBA, 

not solder side.


To ensure using a proper screwdriver, follow the torque and force listed in assembly and 

disassembly procedures to screw and unscrew screws.


Using Lead-Free solder to well mounted the parts.


The fusion point of Lead-Free solder requested in the degree of 220°C.


Содержание B277

Страница 1: ...1 ACER_B277 LIFECYCLE EXTENSION GUIDE...

Страница 2: ...Mechanical Instructure 6 4 Assembly and Disassembly Procedures 7 5 Troubleshooting 15 6 FRU List 18 Safety Notice Any person attempting to service this chassis must familiarize with the chassis and be...

Страница 3: ...repairing method may damage equipment or products It is recommended that service engineers should have repairing knowledge experience as well as appropriate product training per new model before perfo...

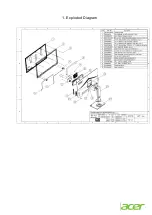
Страница 4: ...4 1 Exploded Diagram...

Страница 5: ...5 2 Wiring Connectivity diagram If without USB hub sku just ignore USB board and USB board to main board FFC...

Страница 6: ...and size of the tools that would typically can be used to disassemble the product to a point where components and materials requiring selective treatment can be removed Tool Description working table...

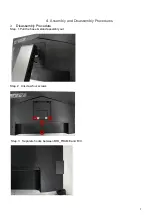
Страница 7: ...7 4 Assembly and Disassembly Procedures Disassembly Procedure Step 1 Pull the base stand assembly out Step 2 Unscrew four screws Step 3 Separate hooks between MID_FRAME and R C...

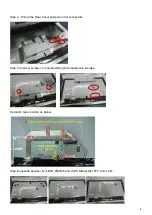
Страница 8: ...up the Rear Cover and pull out all connectors Step 5 Unscrew screws on main shielding and disassemble AL tape Detail AL tape location as below Step 6 separate speaker from MID_FRAME and LVDS Backlight...

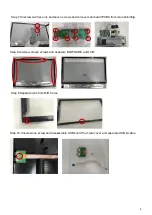
Страница 9: ...screws and remove main board PCBA from main shielding Step 8 Unscrew eleven screws and separate MID FRAME and LCM Step 9 Separate lens from MID frame Step 10 Unscrew one screw and disassemble USB boar...

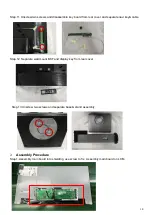
Страница 10: ...r cover and separate navi key cable Step 12 Separate wall mount BKT and display key from rear cover Step 13 Unscrew two screws and separate base stand assembly Assembly Procedure Step1 Assembly main b...

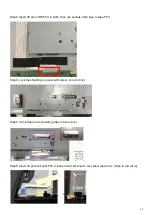
Страница 11: ...acetate cloth tape to tape FFC Step3 Lock the shielding on panel with screw in red circle Step4 Use Al tape to fix shielding tape in blue circle Step5 Insert 10 pin back light FFC to panel and main b...

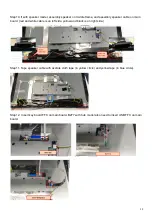
Страница 12: ...k light FFC and 30 pin LVDS FFC to main board Use yellow tape to fix Step7 Tape AL tape to fix FFC Tape in red circle Step8 Assembly middle frame with LCM and fix screw in red circle Step9 Lock middle...

Страница 13: ...le on main board red and white cable is on left side yellow and black is on right side Step11 Tape speaker cable with acetate cloth tape in yellow circle and yellow tape in blue circle Step12 Insert k...

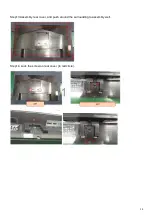
Страница 14: ...14 Step13 Assembly rear cover and push around the surrounding to assembly well Step14 Lock the screw on rear cover in red circle...

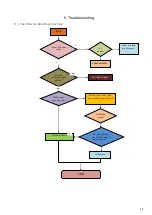
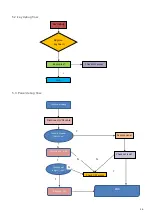
Страница 15: ...nto AC source AC power Check adaptor Key s LED indicator is light or blink No input signal BLACK screen but a little light Re insert 30pin LVDS cable between LCM and main board Still BLACK screen 5VD_...

Страница 16: ...Debug Replace keyboard Check U12 works END N Y Key works Disconnect LVDS cable Replace panel Check set is ok Check U12 works N Y Check LCM power R82 5V ok Check Q1 pin2 is 5V N N Y Check Q2 pin2 is h...

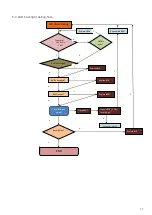
Страница 17: ...19V Replace FB36 FB36 is open BD4 is damaged BU3 is damaged Replace BU3 Check U12 works END N Y Y N Y N Replace BD4 Backlight on Y N BR31 is open Replace BR31 Y N Open BR67 Y N Check BU5 pin5 is high...

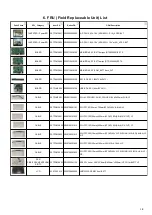
Страница 18: ...1 WH KY 2501HS01 04 KY 2501HS01 04 24 50mm W B LF CABLE 50 TFQM5 002 R046728081101 WH FFC 8P 0 5mm 750mm 3FOLD 60V A8 A5 LF CABLE 50 TFPM5 001 R046128101020 WH FFC 10P 0 5mm 550mm 4FOLD 90V A8 A12 V C...

Отзывы: