background image

 2 Setting up your computer

10

Connecting peripherals

Setting up your computer is easy. For the most part, you only have four things 
to connect: the mouse, the keyboard, the monitor, and the power cable.

Note: The peripherals shown in the connections below are 
for your reference only. Actual device models may vary in 
select countries.

Connecting your mouse and keyboard
(for selected models)

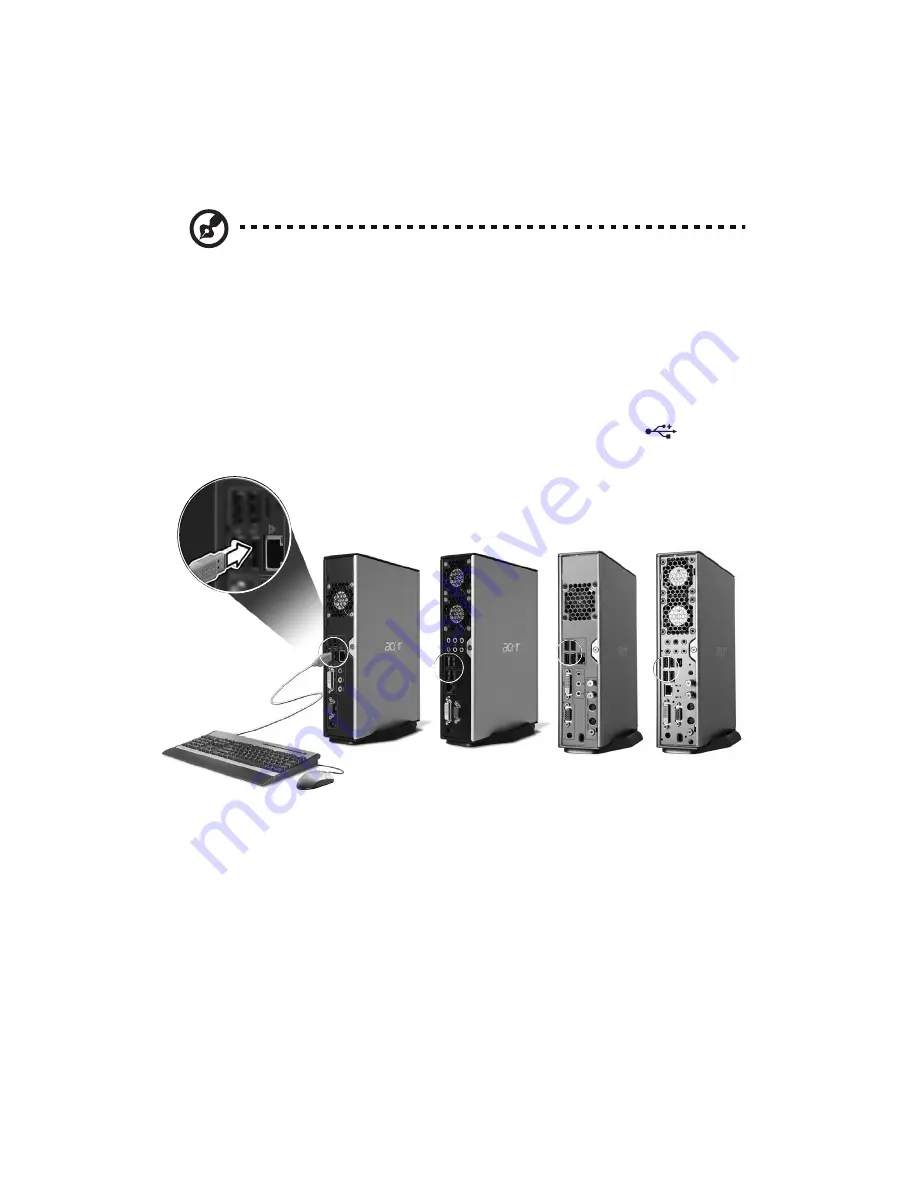
Plug your USB mouse or keyboard cable into any of the USB ports 

 located 

on the front and rear panels of your computer.

Содержание Aspire L100

Страница 1: ...AcerSystem User s Guide...

Страница 2: ...to your computer All correspondence concerning your unit should include the serial number model number and purchase information No part of this publication may be reproduced stored in a retrieval sys...

Страница 3: ...ntilation is provided Never push objects of any kind into this product through cabinet slots as they may touch dangerous voltage points or short out parts that could result in a fire or electric shock...

Страница 4: ...llowing requirements detachable type UL listed CSA certified type SPT 2 rated 7 A 125 V minimum VDE approved or its equivalent 4 6 meters 15 feet maximum length Product servicing Do not attempt to ser...

Страница 5: ...amp s inside this product contain mercury and must be recycled or disposed of according to local state or federal laws For more information contact the Electronic Industries Alliance at www eiae org F...

Страница 6: ...refrain from staying too long in one fixed posture avoid slouching forward and or leaning backward stand up and walk around regularly to remove the strain on your leg muscles take short rests to relax...

Страница 7: ...anging the display s viewing angle using a glare reduction filter using a display visor such as a piece of cardboard extended from the display s top front edge Avoid adjusting your display to an awkwa...

Страница 8: ......

Страница 9: ...er 12 Connecting to the network 13 Turning on your computer 14 Turning off your computer 15 3 Frequently asked questions 17 Frequently asked questions 19 Appendix A Regulations and safety notices 21 R...

Страница 10: ...Index 31...

Страница 11: ...1 1 System tour...

Страница 12: ...This chapter discusses the features and components of your computer...

Страница 13: ...e enough space to set up your computer Carefully unpack the carton and remove the contents If any of the following items are missing or damaged contact your dealer immediately AcerSystem computer Item...

Страница 14: ...1 System tour 4 User s guide for selected models warranty card and installation poster AC adapter and power cable...

Страница 15: ...out jack USB ports Microphone in jack Kensington lock Headphone Speaker out line out port DC in jack Line in jack IEEE 1394 port for selected models Media card reader for selected models Optical disk...

Страница 16: ...information on how to connect your keyboard see Connecting your mouse and keyboard for selected models on page 10 No Description No Description 1 Sleep button 2 Internet Email Search keys 3 Multimedi...

Страница 17: ...2 Setting up your computer...

Страница 18: ...This chapter contains step by step instructions on how to set up your computer and connect additional peripherals...

Страница 19: ...elevisions copy machines or heating and air conditioning equipment Avoid dusty areas and extremes of temperature and humidity You may place your computer beside your desk or under your table as long a...

Страница 20: ...e the keyboard the monitor and the power cable Note The peripherals shown in the connections below are for your reference only Actual device models may vary in select countries Connecting your mouse a...

Страница 21: ...itor To connect a monitor simply plug the monitor cable into the monitor port blue port or DVI port located on the rear panel of your computer Note Refer to the monitor manual for additional instructi...

Страница 22: ...ere are some ways to take care of your AC adapter Do not connect the adapter to any other device Do not step on the power cable or place heavy objects on top of it Carefully route the power cable and...

Страница 23: ...al Area Network LAN using a network cable To do so simply plug the network cable into the network port on the rear panel of your computer Note Consult your network system administrator or operating sy...

Страница 24: ...work To turn on your computer 1 Turn on all peripherals connected to your computer such as the monitor printer speakers etc 2 On the front panel of your computer press the Power button Important Make...

Страница 25: ...sta taskbar click on the Start button and click Turn Off Computer then click Turn Off 2 Turn off all peripherals connected to your computer If you cannot shut down your computer normally press and hol...

Страница 26: ...2 Setting up your computer 16...

Страница 27: ...3 Frequently asked questions...

Страница 28: ...chapter tells you what to do in case your computer is not working properly However if a more serious problem arises contact your dealer or the technical support center www acersupport com for assista...

Страница 29: ...work you can restart your computer If restarting your computer does not work contact your dealer or technical support center for assistance The printer does not work Do the following Make sure the pr...

Страница 30: ...or DVD is clean and unscratched Check your drive by using a good undamaged disk If your drive can not read the information on the good disk there may be a problem with the drive Contact your dealer o...

Страница 31: ...Appendix A Regulationsand safety notices...

Страница 32: ...ception which can be determined by turning the device off and on the user is encouraged to try to correct the interference by one or more of the following measures Reorient or relocate the receiving a...

Страница 33: ...es is in compliance with the essential requirements and other relevant provisions of Directive 1999 5 EC Compliant with Russian regulatory certification Modem notices Notice for USA This equipment com...

Страница 34: ...between the individual PSTNs provided in different countries the approval does not of itself give an unconditional assurance of successful operation on every PSTN termination point In the event of pr...

Страница 35: ...t shall go on hook for a period of not less than 30 seconds between the end of one attempt and the beginning of the next call attempt 4 Some parameters required for compliance with Telecom s Telepermi...

Страница 36: ...LAVATTAESSA OLET ALTTINA LASERS TEILYLLE VARNING LASERSTR LNING N R DENNA DEL R PPNAD L TUIJOTA S TEESEENSTIRRA EJ IN I STR LEN VARNING LASERSTR LNING NAR DENNA DEL R PPNADSTIRRA EJ IN I STR LEN ADVA...

Страница 37: ...s EU member states as of May 2004 are Belgium Denmark Germany Greece Spain France Ireland Italy Luxembourg the Netherlands Austria Portugal Finland Sweden United Kingdom Estonia Latvia Lithuania Polan...

Страница 38: ...r warranty Canada Low power license exempt radio communication devices RSS 210 a Common information Operation is subject to the following two conditions 1 This device may not cause interference and 2...

Страница 39: ...This device must accept any interference received including interference that may cause undesired operation The following local manufacturer importer is responsible for this declaration Product name...

Страница 40: ...ctrical business equipment This equipment has been approved to Council Decision 98 482 EC CTR21 for pan European single terminal connection to the Public Switched Telephone Network PSTN We Acer Inc he...

Страница 41: ...r not working 19 system cannot read disk 20 system cannot write to disk 20 system did not boot up 19 front panel 5 K keyboard 6 S safety CD or DVD 26 FCC notice 22 modem notices 23 setting up computer...

Отзывы: