


System Utilities
2-9
NOTE:
NOTE
:
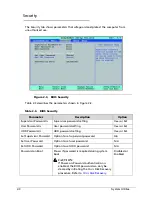
When prompted to enter password, three attempts are allowed before
system halts. Resetting BIOS password may require computer be returned
to dealer.
Setting a Password
0
Perform the following to set user or supervisor passwords:
1.
Use the
↑
and
↓
keys to highlight the
Set Supervisor Password
parameter and
press
Enter
.
The
Set Supervisor Password
dialog box appears.
NOTE:
NOTE
:
To change an existing password, refer to
Changing a Password
.
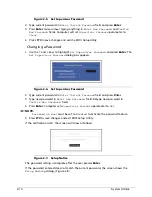
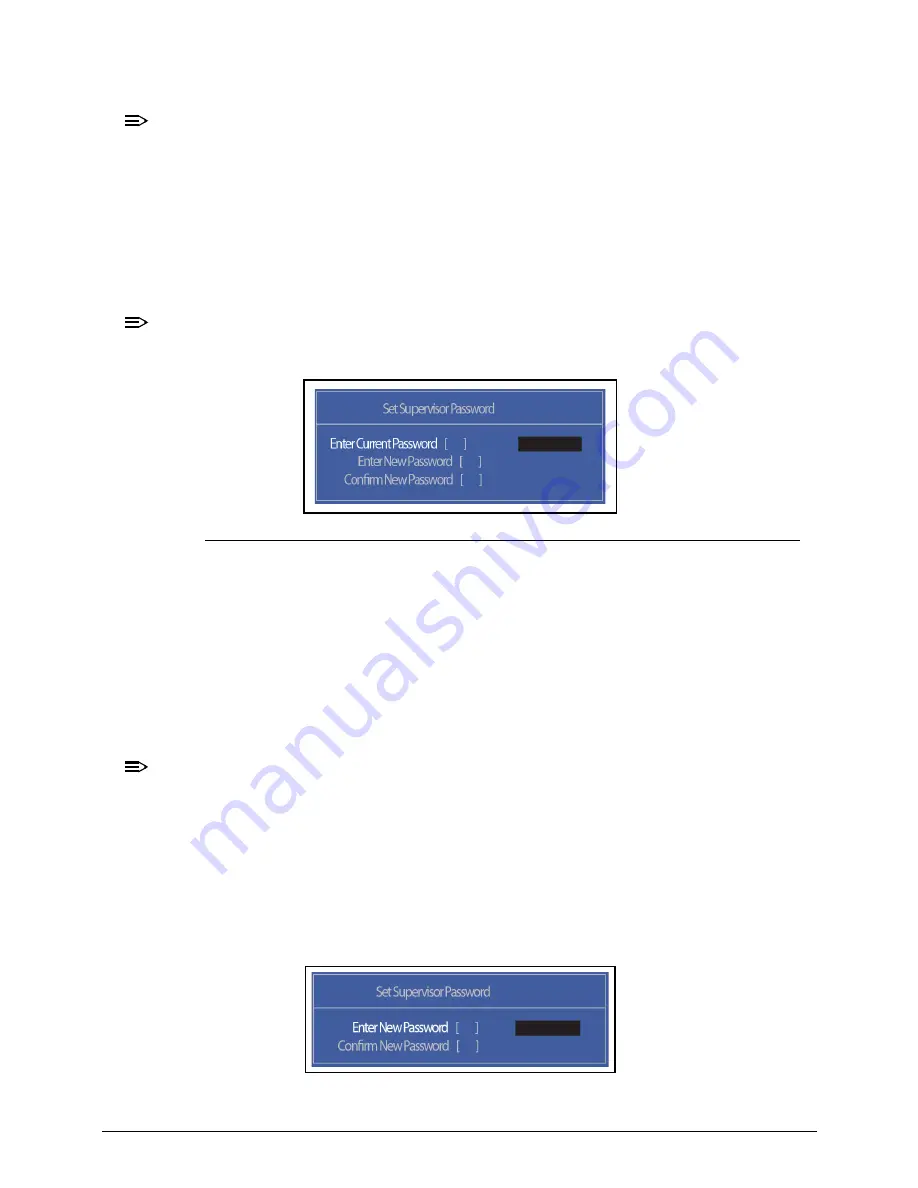
Figure 2-4.
Set Supervisor Password
2.
Type a new password in the
Enter New Password
field. Passwords are not case
sensitive and the length must not exceed 12 alphanumeric characters (A-Z, a-z, 0-9).
Retype the password in the
Confirm New Password
field.
IMPORTANT
:
+
Use care when typing a password. Characters do not appear on the
screen.
3.
Press
Enter
. After setting the password, the computer sets the
User Password
parameter to
Set
.
NOTE:
NOTE
:
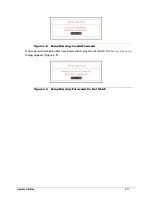
Password on Boot must be set to
Enabled
to activate password feature.
4.
Press
F10
to save changes and exit
BIOS Setup Utility
.
Removing a Password
0
Perform the following:
1.
Use the
↑
and
↓
keys to highlight
Set Supervisor Password
and press
Enter
. The
Set Supervisor Password
dialog box appears:
Содержание AOD257
Страница 1: ...Aspire One D257 Happy 2 SERVICEGUIDE ...
Страница 10: ...x ...
Страница 11: ...CHAPTER 1 Hardware Specifications ...
Страница 14: ...1 4 ...
Страница 55: ...CHAPTER 2 System Utilities ...
Страница 81: ...CHAPTER 3 Machine Maintenance Procedures ...
Страница 83: ...3 3 Camera Module Installation 3 40 ...
Страница 84: ...3 4 ...
Страница 107: ...Machine Maintenance Procedures 3 27 ID Size Quantity Screw Type C M2 0 3 0 NI 2 ...
Страница 116: ...3 36 Machine Maintenance Procedures Figure 3 33 LCD Panel ...
Страница 121: ...CHAPTER 4 Troubleshooting ...
Страница 127: ...Troubleshooting 4 7 9 If the issue is still not resolved refer to Online Support Information ...
Страница 128: ...4 8 Troubleshooting LCD Failure 0 If the LCD fails perform the following Figure 4 3 LCD Failure ...
Страница 144: ...4 24 Troubleshooting ...
Страница 145: ...CHAPTER 5 Jumper and Connector Locations ...
Страница 152: ...5 8 Jumper and Connector Locations ...
Страница 153: ...CHAPTER 6 FRU Field Replaceable Unit List ...
Страница 154: ...6 2 Exploded Diagrams 6 4 FRU List 6 7 Screw List 6 28 ...
Страница 181: ...CHAPTER 7 Model Definition and Configuration ...
Страница 182: ...1 2 Aspire One D257 7 1 Aspire One Happy 2 7 109 ...
Страница 388: ...7 206 Model Definition and Configuration ...
Страница 389: ...CHAPTER 8 Test Compatible Components ...
Страница 390: ...8 2 Microsoft Windows 7 Environment Test 8 4 ...
Страница 398: ...8 10 Test Compatible Components ...
Страница 399: ...Test Compatible Components 8 11 ...
Страница 400: ...8 12 Test Compatible Components ...
Страница 401: ...CHAPTER 9 Online Support Information ...
Страница 402: ...9 2 Introduction 9 3 ...
Страница 404: ...9 4 Online Support Information ...


