-
5
-
Getting started
Follow these steps:
1.
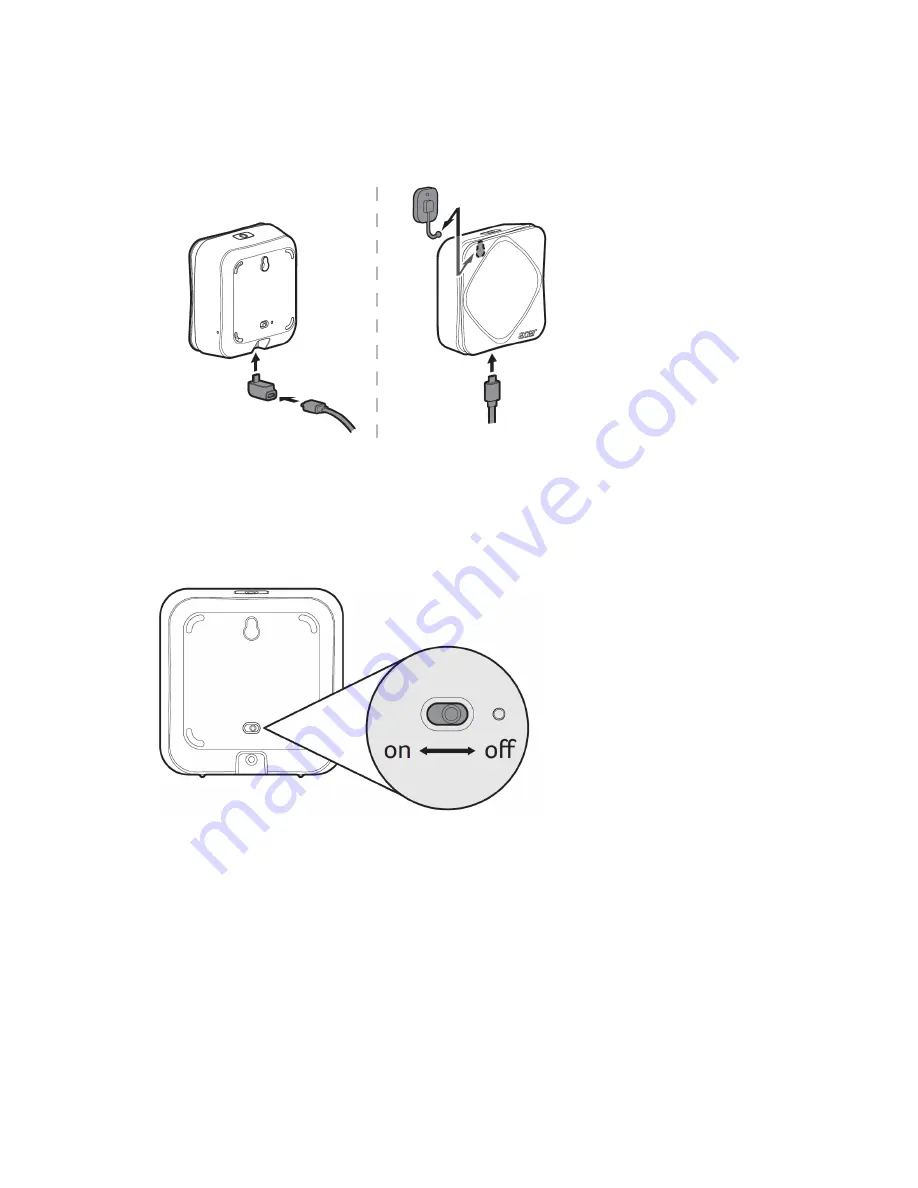
Attach the appropriate power adapter plug to the USB power adapter.
2.
Connect the micro-USB cable to the port on the Air Monitor. If necessary, attach the micro-USB extension
plug first to the device before you connect the micro-USB cable.
Note:
Air Monitor should be plugged in at all times, but it also has a built-in backup battery and can function for a limited time when
power is cut off. Air Monitor should be placed in the room you want to monitor on a flat, stable surface with open air around it –
preferably at the normal height level of your nose, such as on a bookshelf or a side table in the living room, or on a nightstand in a
bedroom, as a few examples. The more open the placement, the better the air reading and Wi-Fi connection.
For the backup battery, it
can function for about 6 hours with a Wi-Fi connection. (without Wi-Fi connection, it can function for about 12 hours)
3.
Slide the power switch to the left to turn on the Air Monitor.
Note:
The breathing LED light will first cycle through the different colors and begin gathering data.
To get the most accurate data, please always place the Air Monitor such as the function key is facing upwards
Do not cover the light sensor or place the device in the shade in order to ensure the best experience.
Warming up Air Monitor:
each time you power on your Acer Air Monitor, the TVOC sensor will need about 5 minutes to warm up. During
this time, please put it in an area with adequate air circulation (such as near a window) to ensure accurate results.
Further, the temperature and humidity sensors will need approximately 60 minutes to warm up for the most accurate results.
4.
Download the Air Monitor app from either the iOS App Store or the Google Play store.
Note:
Mobile system requirements:
Android : Android 5.0 and above
iOS : iOS 9.0 and above
Содержание AM100
Страница 1: ...Air Monitor AM100 AM110 User s Guide ...


