background image


2

3

1

Audio

AC

VGA

3

1

2

AC

Audio

VGA


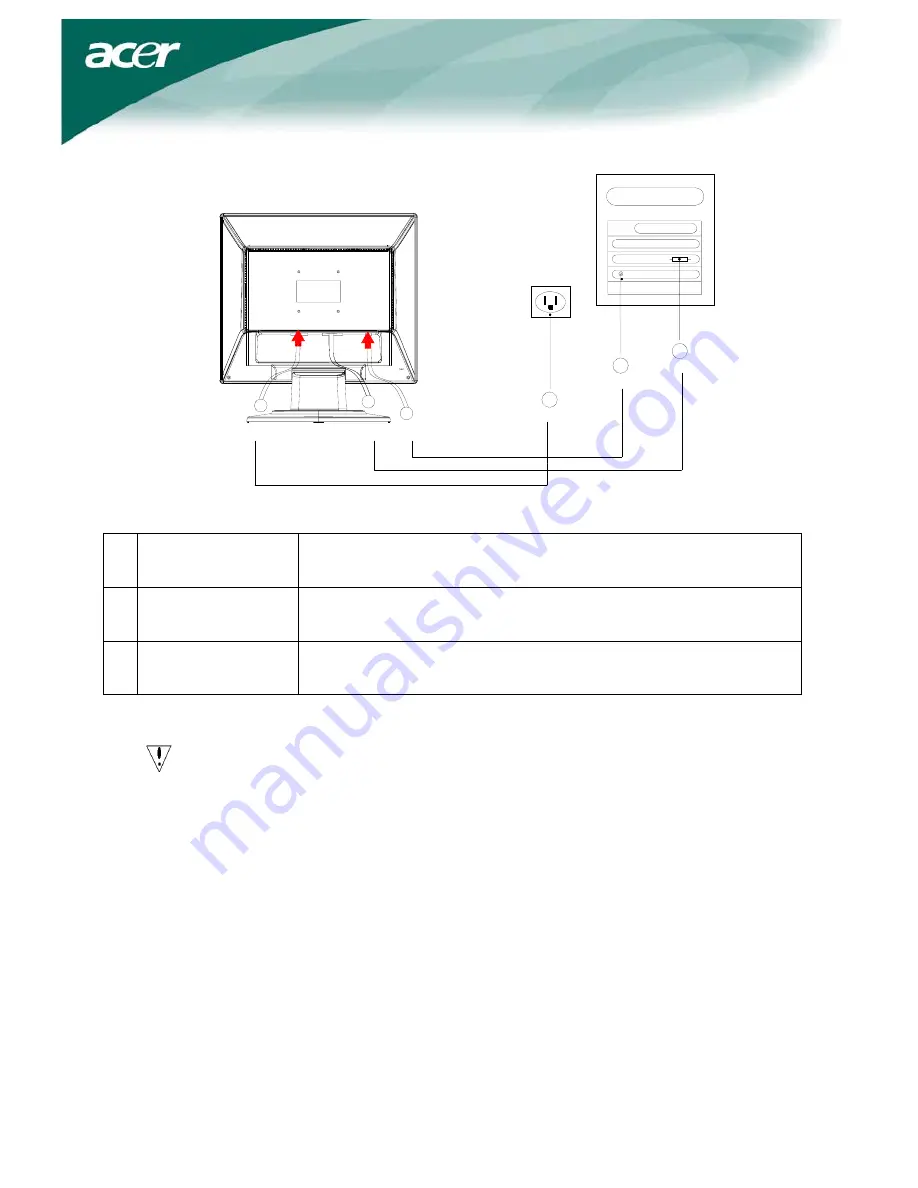
  Power Code 

Attach the monitor to the power cord which should then be inserted 
into a properly grounded electric socket. 

  VGA Cable 

(Attached) 

Connect the signal cable to the VGA output socket of    the graphics 
card on the computer. Then tighten the thumbscrews on the connector. 

  Audio cable 

(Optional) 

Connect the audio input socket of the LCD monitor and the computer 
by means of the audio cable. 


WARNING

:

 The D-Sub 15 pin plug of the VGA cable is trapezoid in shape. Make sure 

the shape of the plug matches the shape of the socket it is inserted into, and 
that none of the pins are bent or otherwise damaged. 


Switching the Power 

First, switch the power on to the monitor, then switch the power on to the computer. When you 
see the LED on the power button go green, this indicates the computer is ready for use. Allow 
about 10 seconds for the video signal to appear. If you do not see the green light on the power 
button or a video signal, check the connections. 


Содержание AL1511

Страница 1: ...ion instructions 3 Assembling the Monitor 3 Detaching the Monitor 3 Adjusting the Viewing Angle 3 Connecting the Devices 3 Switching the Power 4 Adjusting display settings 5 External Controls 5 OSD op...

Страница 2: ...ld be used to clean the outside of the monitor A cloth very slightly moistened with a mild detergent solution will clean stubborn stains Keep liquids away from the display screen including sprays Do n...

Страница 3: ...make sure the power is off 2 Pull the 4 hooks on bottom side of the base and hold 3 Separate the monitor and base and put them into carton Important First find a clean flat surface to place the monito...

Страница 4: ...computer by means of the audio cable WARNING The D Sub 15 pin plug of the VGA cable is trapezoid in shape Make sure the shape of the plug matches the shape of the socket it is inserted into and that n...

Страница 5: ...lect or adjust OSD options If OSD is inactive press once then press the buttons marked or to adjust the volume X 3 PLUS If OSD is active press to select or adjust OSD options If OSD is inactive press...

Страница 6: ...ive to each other to achieve a comfortable contrast Brightness This adjusts the brightness of the picture on the screen Focus This removes any horizontal distortion and makes the picture clear and sha...

Страница 7: ...itional Chinese French Italian and Japanese OSD SETTING This changes the position of the OSD window on the screen and staying time Auto Config System runs auto configuration INFORMATION This shows bri...

Страница 8: ...inappropriate colors See Color Adjustment to adjust RGB color or to select color temperature Picture bounces or a wave pattern is present in the picture Move or switch off electrical devices that may...

Страница 9: ...ttons Auto MENU OSD Function Contrast Brightness Contrast Brightness Focus Clock Focus Clock Position Position Color Color Language Language OSD setting OSD Setting Auto config Auto config Information...

Отзывы: