


14
Chapter 1
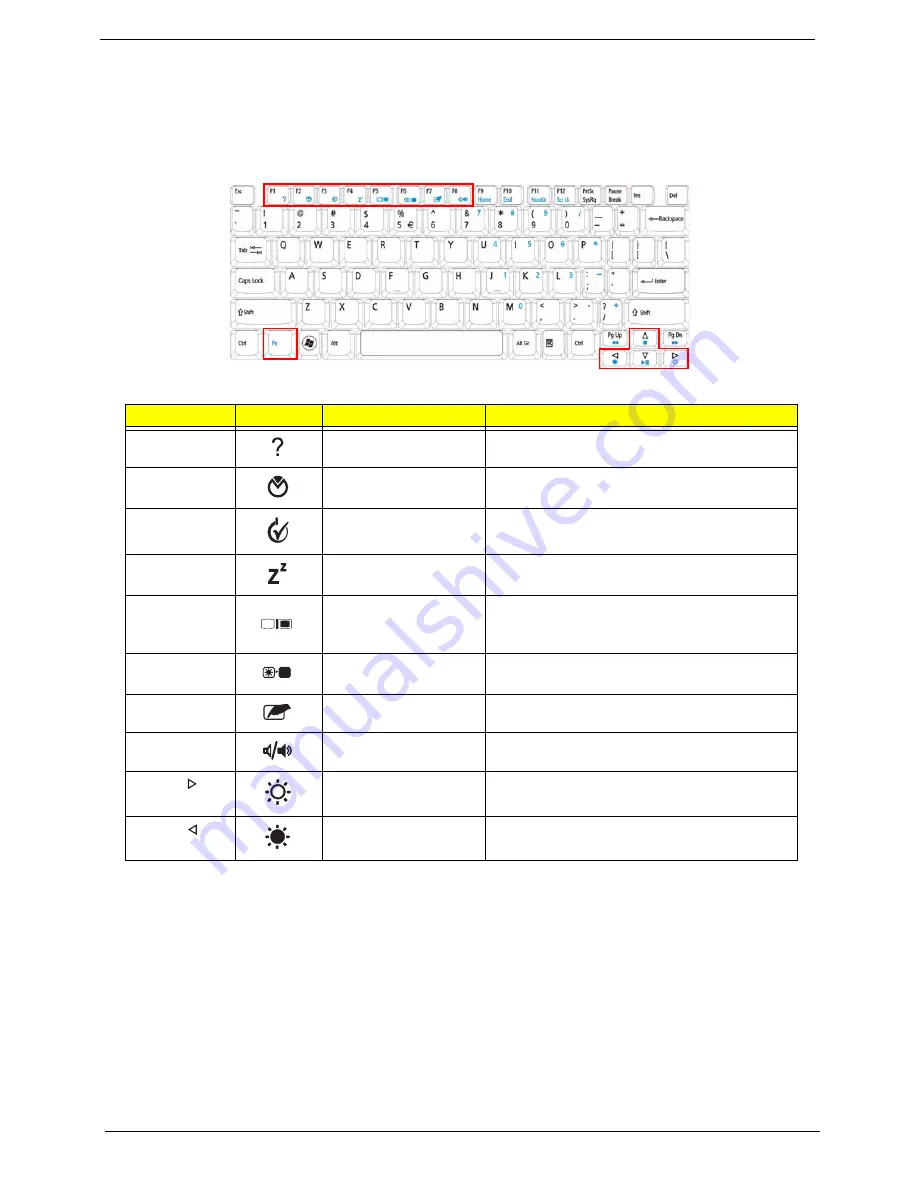
Hot Keys
The computer employs hotkeys or key combinations to access most of the computer’s controls like screen
brightness, volume output and the BIOS utility.
To activate hot keys, press and hold the <
Fn>
key before pressing the other key in the hotkey combination.
Hotkey
Icon
Function
Description
<Fn> + <F1>
Hotkey help
Displays help on hotkeys.
<Fn> + <F2>
Acer eSettings
Management
Launches Acer eSettings Management in Acer
Empowering Technology.
<Fn> + <F3>
Acer ePower
Management
Launches Acer ePower Management in Acer
Empowering Technology.
<Fn> + <F4>
Sleep
Puts the computer in Sleep mode.
<Fn> + <F5>
Display toggle
Switches display output between the display
screen, external monitor (if connected) and
both.
<Fn> + <F6>
Screen blank
Turns the display screen backlight off to save
power. Press any key to return.
<Fn> + <F7>
Touchpad toggle
Turns the internal touchpad on and off.
<Fn> + <F8>
Speaker toggle
Turns the speakers on and off.
<Fn> + < >
Brightness up
Increases the screen brightness.
<Fn> + < >
Brightness down
Decreases the screen brightness.
Содержание 6930 6082 - Aspire - Core 2 Duo GHz
Страница 6: ...VI ...
Страница 10: ...X Table of Contents ...
Страница 42: ...32 Chapter 1 ...
Страница 55: ...Chapter 2 45 3 Reboot the system and key in the selected string qjjg9vy 07yqmjd etc for the BIOS user password ...
Страница 56: ...46 Chapter 2 ...
Страница 70: ...60 Chapter 3 5 Lift the HDD carrier to remove 6 Grasp the HDD connector and pull firmly to remove ...
Страница 91: ...Chapter 3 81 4 Grasp the module by the right side and lift up to remove ...
Страница 99: ...Chapter 3 89 7 Disconnect the Mic cable and remove the LCD bezel ...
Страница 110: ...100 Chapter 3 4 Replace the ten securing screws and screw caps on the LCD bezel ...
Страница 112: ...102 Chapter 3 3 Connect fan cable to the mainboard as shown ...
Страница 126: ...116 Chapter 3 7 Turn the computer over and replace the ten screws as shown ...
Страница 234: ...224 Appendix B ...
Страница 236: ...226 Appendix C ...


