


C
HAPTER
1
| Introduction
Hardware Description
– 20 –
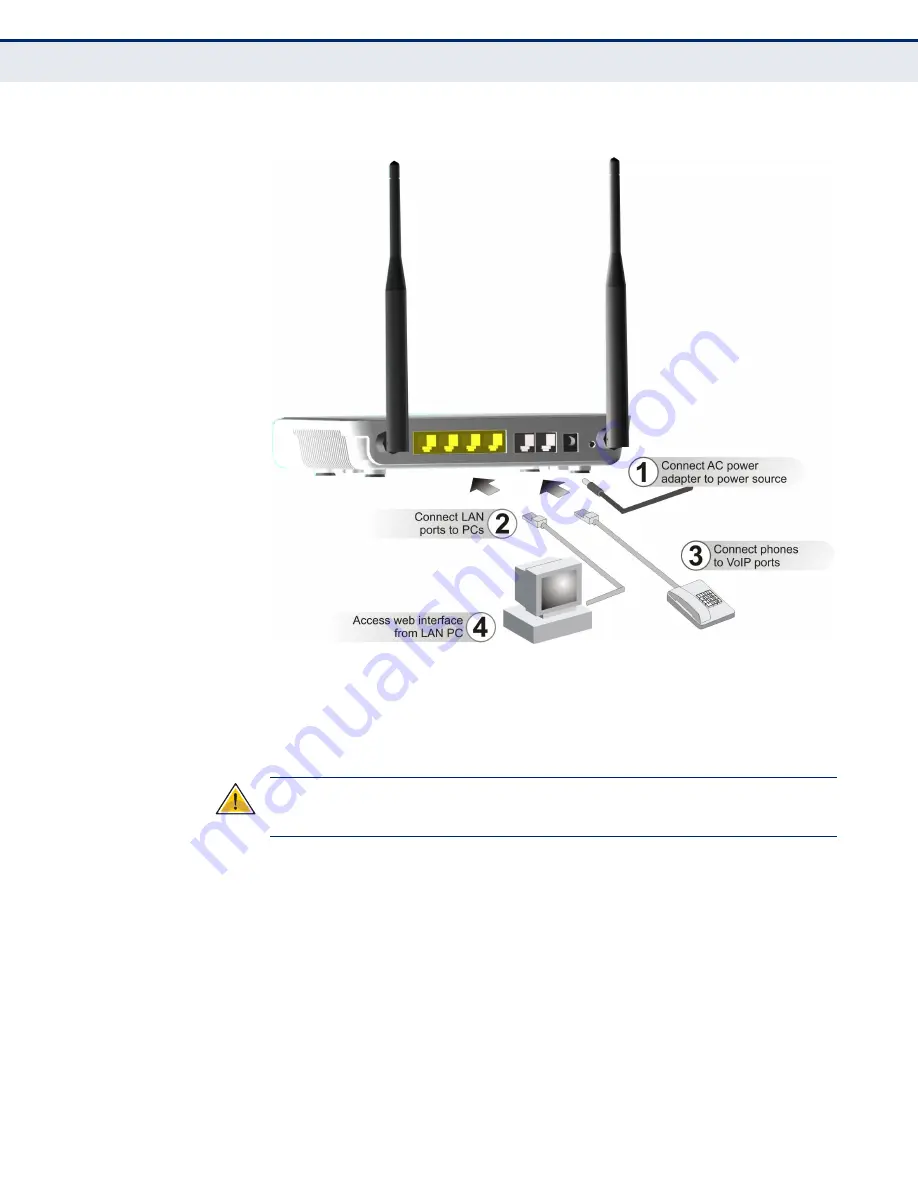
Figure 5: Connecting the RG211
T
O
CONNECT
THE
RG211:
1.
Power on the RG211 by connecting the AC power adapter and plugging
it into an AC power source.
C
AUTION
:
Use ONLY the power adapter supplied with the RG211. Otherwise,
the product may be damaged.
2.
Observe the Indicator LEDs. When you power on the BreezeMAX Si,
verify that the Power LED turns on and that the other LED indicators
start functioning as described under
.
3.
Connect Category 5 or better Ethernet cables from the RG211’s LAN
ports to the network ports of your PCs. Alternatively, you can connect
the LAN ports to an Ethernet switch or other devices. Make sure the
length of each cable does not exceed 100 meters (328 ft).
4.
If your PCs are powered on, the RJ-45 LAN port LED on the RG211
should turn on to indicate valid links.
Содержание RG211-2.3G
Страница 1: ...USER GUIDE WIMAX 802 16E INDOOR CPE RG211 2 3 2 5 3 5 3 8G ...
Страница 2: ...USER GUIDE RG211 2 3 2 5 3 5 3 8G WiMAX IEEE 802 16e Indoor CPE RG211 81 E122009 DT R01 149100000033W ...
Страница 15: ...CHAPTER 1 Introduction Hardware Description 15 HARDWARE DESCRIPTION Figure 1 Top Panel LED Indicators Antennas ...
Страница 43: ...CHAPTER 5 WiMAX Settings Integration Time 43 ...
Страница 49: ...CHAPTER 7 NAT Settings Demilitarized Zone DMZ 49 ...
Страница 51: ...CHAPTER 8 Firewall Settings Firewall Settings 51 ...
Страница 59: ...CHAPTER 9 Management Settings TR Parameters 59 ...
Страница 67: ...CHAPTER 11 Logout Logging Out 67 ...
Страница 82: ...INDEX 82 W WAN settings 29 ...
Страница 83: ...INDEX 83 ...
Страница 84: ...RG211 81 E122009 DT R01 149100000033W ...


