background image

29

English

8. Getting started 

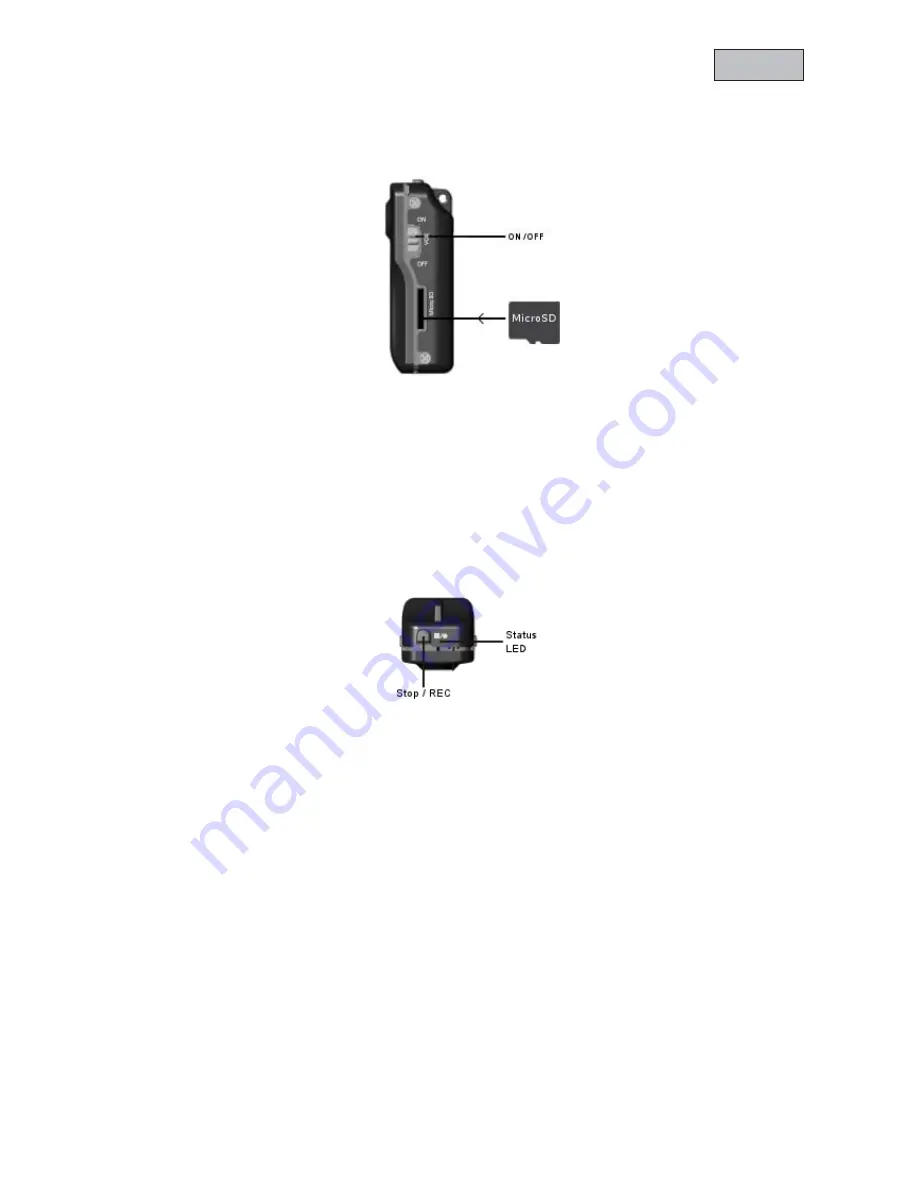
8.1 Inserting SD card and turning on the Camcorder 

In order to get started first insert a MicroSD card into the SD card slot. 

Then turn on the Camcorder by pushing the POWER switch from OFF to ON. The status LED will turn blue. 

Notice: 

x


The Camcorder will automatically go into stand-by mode after 2 minutes of inactivity. 

x


The status LED will flash quickly green if no MicroSD card is inserted. 

x


If the battery is low the status LED will slowly flash blue and the Camcorder will automatically turns 
itself off after 2 minutes. 

8.2 Manual recording 

After turning on the Camcorder press once the “Stop / REC” button to start recoding manually. The status will 
start to flash slowly green. Press the “Stop / REC” button again to stop the recording. 

Notice: 

x


Do not remove the MicroSD card during recording. The current recording will be damaged and cannot 
be viewed.

x


Longer recordings will be put into AVI files, each 30 minutes long and 1GB big. 

x


If the MicroSD card is full the status LED will turn green and turn itself off after 30 minutes. No further 
buttons are functional at this state so please turn the Camcorder off. 

8.3 Sound trigger recording 

After turning on the Camcorder also activate the sound trigger by pushing the VOX from OFF to ON. 
The Camcorder will automatically start a 2 minute recording if it recognizes any noise above 65dB.  
If during the recording the noise level raises again above 65db the recording time will be extended. 
If the Camcorder is not triggered by sound within 2 minutes the Camcorder will switch to stand-by mode and 
will automatically start recording at the next noise detection. 

Содержание TVVR10000

Страница 1: ...19 TVVR10000 User manual Version 05 2010 Original English user manual Keep for future use...

Страница 2: ...ument are registered trademarks All rights reserved If you have any questions please contact your installer or your local dealer 3 Disclaimer This user manual was prepared with greatest care If you sh...

Страница 3: ...e 1 Mains supply 90 250V AC 50 60Hz Operate this product only from the type of power supply indicated on the marking label If you are not sure of the type of power supplied to your home consult your l...

Страница 4: ...o not insert metal or inflammable objects inside the product x In order to avoid any damage during lighting use a surge protection 3 Do not use the product when it is out of order If you continue to u...

Страница 5: ...ecification 33 13 Disposal 33 1 Intended use Thanks to its 2 hour battery life time the Eytron Camcorder can be used for mobile surveillance as well as for sport and leisure recordings Furthermore it...

Страница 6: ...24 English 2 Scope of delivery Camcorder Power supply Clip Wall bracket Velcro and screws for bracket Silicon case Pouch Chain USB cable USB connector CD Manual...

Страница 7: ...g for easy playback using a PC x Supports standard microSDHC cards max 8GB x Compact aluminum housing x Can be used as PC webcam 4 Charging the battery In order to charge the battery you need to conne...

Страница 8: ...while please proceed as following x Create a text file named time txt x Enter date and time in following way Year month Day Hour Minute Seconds Example 2009 10 30 09 35 30 x Copy the file to the Micr...

Страница 9: ...ctor The different colors of the status have following meaning LED color State Description Blue Off Stand by mode Always on Camcorder is ready Flashing slowly Low battery Flashing quickly Copying data...

Страница 10: ...he wall bracket safely You can then use the Velcro or the clip bracket to install the Camcorder After mounting the wall bracket you can adjust the viewing angle by turning the clip 7 3 Further mountin...

Страница 11: ...he Stop REC button again to stop the recording Notice x Do not remove the MicroSD card during recording The current recording will be damaged and cannot be viewed x Longer recordings will be put into...

Страница 12: ...d camera the drivers from the included CD have to be installed After the successful driver installation you can use the Camcorder as webcam for communication in any messenger program or use the includ...

Страница 13: ...the current playback Stop Stop the current playback Snap Creates a bmp bitmap snapshot in Play or Pause mode which can be opened by drawing programs e g Paint Full Full screen display of the video Par...

Страница 14: ...Delete selected files you have added Remove Delete all files you have added Up Move selected file upwards Top files will be merged first Down Move selected file downwards Top files will be merged las...

Страница 15: ...gle 72 Min Illumination Day 1 Lux White balance Automatic Gain Control Automatic Backlight compensation Automatic Battery operation 1 5 hours continuous recording Power supply 3 7 VDC Power consumptio...

Отзывы: