28
RE (refresh time): Sets the reference image change time (motion velocity control) (range: 01 to 99).
DET: Enables (“ON”) or disables (“OFF”) the motion sensors for cameras 1~4.
AREA: Defines the area of the camera picture in which a motion is detected. Select a maximum of 192 fields
(16 columns x 12 rows).
Select the detection area as follows:
•
Press [
←
] and [
→
] in the menu to select “AREA”.
•
Press [PLAY].
•
Press [
←
] and [
→
] to move the cursor (red rectangle) on the screen to the left or right, or press [+] and [–]
to move the cursor up or down. Keep the keys pressed to move the cursor faster in the respective
direction.
•
Press [AUTO] to select a field for motion detection (green field) or deselect it (clear field).
•
Press [QUAD] to select whole rows for motion detection (green field) or deselect them (clear field).
•
Press [PLAY] to select all fields for motion detection (green screen) or deselect them (clear screen).
•
Press [MENU] to exit the AREA settings.
BUZZER ALARM TIME: Sets the time for the alarm tone (range: 0 – 240 seconds). To disable the alarm tone
function, select 0.
RELAY OUT TIMER: Sets the time the relay output is to remain active in the event of an alarm (time range: 8
– 120 seconds).
VCR FREEZE HOLD TIME: Sets the time for the duration of frozen pictures (range: 0 – 30 seconds). To
disable the frozen picture function, select 0.
PIP/POP SETUP
Fig. 6
Sets the PIP function (Picture in Picture) or the POP function (Picture on Picture) in the full-screen display of a
single camera.
Select a channel (1~4), then press [+] and [–] to select full-screen (OFF), PIP display or POP display.
If you select POP, the other cameras are shown on the right of the screen.
If you select PIP, you can make further settings:
•
Select PIP for a camera.
•
Press [
→
] to go to SON. Select the camera to be integrated as PIP in full-screen camera mode. The
following options are available for the channels: CH1 (2,3,4), CH2 (1,3,4), CH3 (1,2,4), CH4 (1,2,3)
•
Select POSITION to change the position of the PIP camera in the full screen. Do this by pressing
[+] and [-] (X: horizontal (0~15), Y: vertical (0~7)).
•
Select SIZE to select between two sizes for the PIP display (A: large, B: small).
Important:
The LEDs over the camera keys specify which cameras are shown on the screen in the PIP display.
PIP.POP SETUP
TYPE SON POSITION SIZE
CH1: OFF
CH2: PIP 3 X:15 Y:7 A
CH3: PIP 1 X:14 Y:7 B
CH4: POP
Содержание TV8239
Страница 4: ...4 Lieferumfang Umverpackung Quadrantenteiler Netzteil Installationshandbuch ...
Страница 16: ...16 ...
Страница 17: ...4 channel quad for colour and B W cameras PAL NTSC TV8239 INSTALLATION GUIDE ...
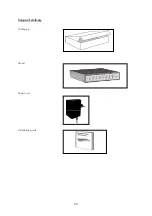
Страница 20: ...20 Scope of delivery Packaging Quad Power unit Installation guide ...
Страница 34: ...34 Livraison Emballage Diviseur en quadrants couleur Transformateur Instructions d installation ...
Страница 46: ...46 ...
Страница 47: ...4 kanaals quad voor kleuren of z w camera s PAL NTSC SYSTEEM TV8239 INSTALLATIEHANDLEIDING ...
Страница 50: ...49 Omvang van de levering Verpakking Quad Adapter Installatie handleiding ...
Страница 62: ...4 kanals quad for farve og S H kameraer PAL NTSC SYSTEM TV8239 INSTALLATIONSVEJLEDNING ...
Страница 65: ...64 Leveringsomfang Forpakning Quad Strømforsyning Installationshåndbog ...
Страница 76: ...75 ...


