25
|
24
24
10. User menu
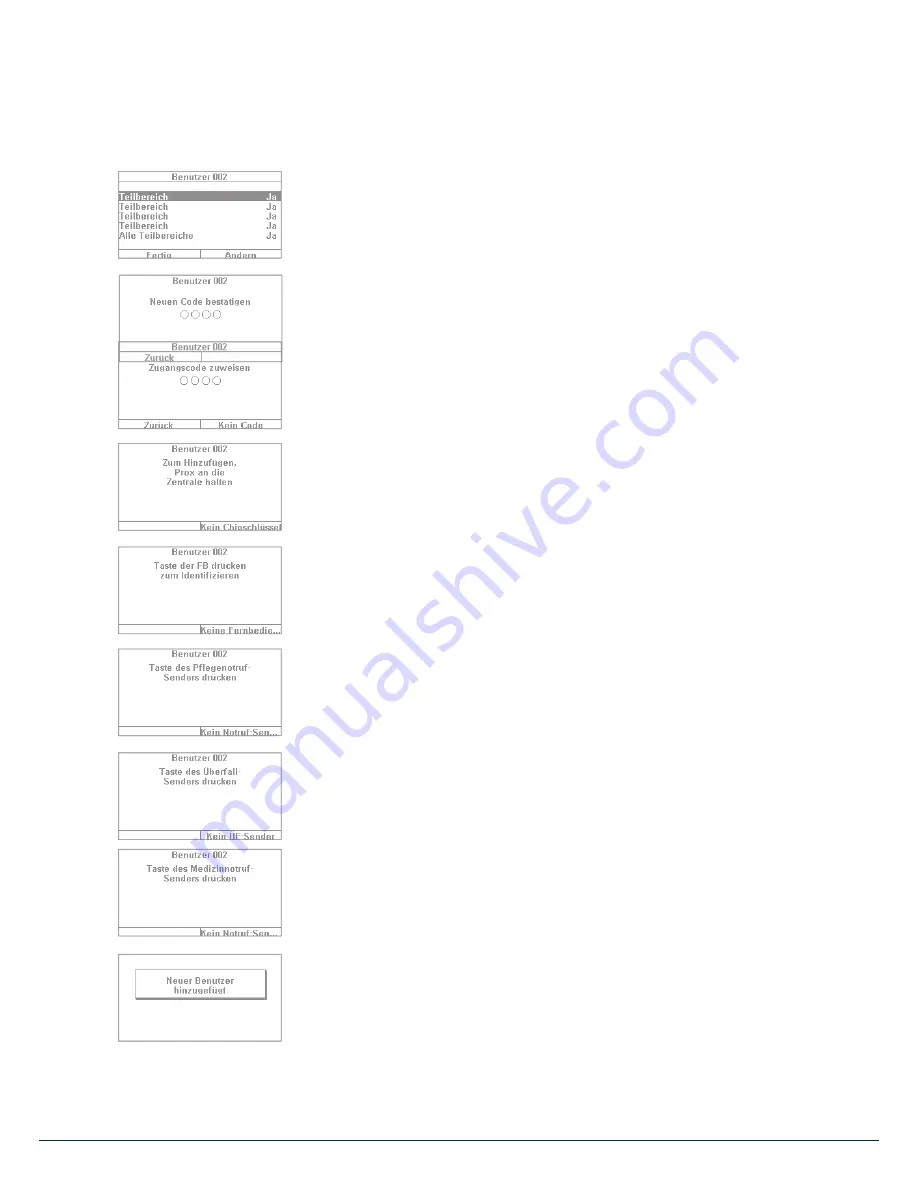
6. The next step involves assigning arming/disarming authorisation for sub-
areas. Select "Done" if the user will be authorised for all 4 sub-areas.
Otherwise make adjustments using the "Change" function.
7. Assign an access code. This code should ideally be changed by the user
themselves and kept safe by them. Ensure that the code is "secure". Code
combinations such as "5678" are less secure than "2671", for example.
For a higher degree of security, the system can be preconfi gured to accept
6-digit codes. Speak to your specialist installation contractor if your system is
confi gured for only 4-digit codes. A 4-digit code is created in this example.
This code must be confi rmed once aft er it is fi rst entered. Alternatively you
can also select "No code". In this case the user can only arm the system via
chip key or remote control.
8. Additional components can be assigned to the new user. The fi rst prompt is
for a chip key. Take the chip and swipe it across the ABUS logo in close
proximity to the housing. If no chip key is desired, select "No chip key".
9. A remote control can then be assigned. Press any key of the remote control.
If no remote control is desired, select "No remote control".
10. Nursing emergency call if your household includes a vulnerable person, you
can give them a mobile emergency call button. This button is used to trigger
an internal alarm quickly if the person needs help. Press the nursing
emergency call button key once to assign it.
11. Panic alarm button: you can also use the emergency call button as a panic
alarm button. Note that if the button is already being used as an emergency
call button, it cannot also be used as a panic alarm button at the same time.
12. Medical emergency call: you can also use the emergency call button/panic
alarm button as a medical emergency call button. Note that if the button
is already being used as a emergency call button or panic alarm button,
it cannot also be used as a medical emergency call button at the same time.
13. The following confi rmation then appears: "New user added". You can create
additional users in the same way.
Содержание SECVEST
Страница 1: ...Secvest User guide V2 01 08...
Страница 7: ...7 6...


