23
English
7.
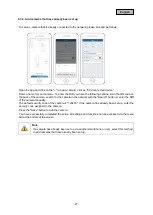
Select your camera using the identification number. You will find the identification number (DID) of
your camera under the QR code that is on your camera and also enclosed in the packaging. Then
tap on "Next".
8.
Select your home network/Wi-Fi in which you want to operate the camera permanently. Then tap
on "Next".
Note
For optimal setup, the location services must be activated in the settings.
9
10
11
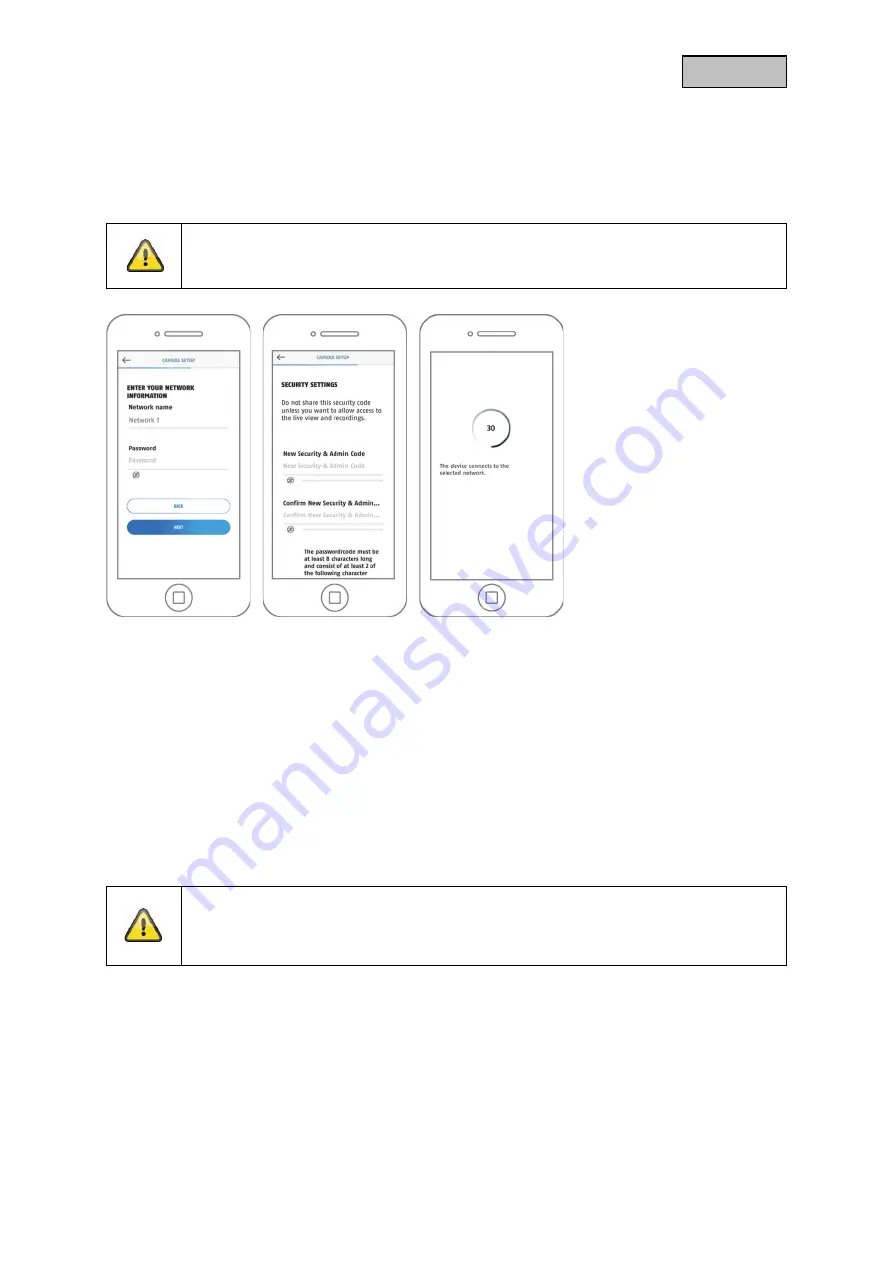
9.
Enter the password of your network. Then tap on "Next".
10. Now assign a security code or admin password. These must be identical when setting up via
Bluetooth. Then tap on "Next".
11. The camera will now restart. If the start-up was successful up to this point, the app displays the
camera's item number in the "Overview" screen. This can take up to 120 seconds.
12. You have successfully completed the setup. All settings and functions can be accessed via the
menu bar at the bottom of the screen.
13. If the Bluetooth setup was not successful, you can alternatively use the installation via WI-FI or
network cable.
Note
For the best possible camera experience, we recommend that you always operate the
camera with the latest firmware. You can find the current firmware version and available
updates under "Advanced options" > "Device settings".
Содержание PPIC42520
Страница 8: ...8 English 2 Hardware description 2 1 Wi Fi Pan Tilt Outdoor Camera ...
Страница 9: ...9 English ...
Страница 10: ...10 English 2 2 Wi Fi Outdoor Camera ...
Страница 11: ...11 English ...


