User Operations Guide—Mira Instant Replay Server
152
Copyright ©2014, Abekas Incorporated
Revised: 5 September 2014
There are three possible ways to export clips stored on the Mira Server: (a) Export Whole Clips—which exports the contents of the entire
clip; (b) Export Segments from within Clips—which exports one or more segments from within each clip; and (c) Export Segments from
within ISO Clips—which exports one or more segments from a multi-angle ISO clip.
Choose the Export procedure you’re interested in from the list below.
Preparing Target Volume for Export ............................................ Page 152 (
this page
)
Exporting Whole Clips ................................................................. Page 154
Exporting Segments from within Clips ......................................... Page 158
Exporting Segments from within ISO Clips .................................. Page 163
Prepare Target Volume for Export
When exporting clips from Mira, media files are created which must be written to a computer storage device; either across a local area
network (LAN) via Gigabit Ethernet, or to a portable memory device or hard drive plugged into one of the USB 2.0 or eSATA ports on Mira.
W A R N I N G !
Do NOT
export media files to the system “
C:
” volume or media “
H:
” volume inside Mira!
These two volumes are reserved for the Windows operating system and record/play of real-time media clips, respectively.
Exporting to either of these drive volumes will cause interruption to the server system, and/or
cause video stuttering and corruption of real-time video recording and playback within the Mira server!
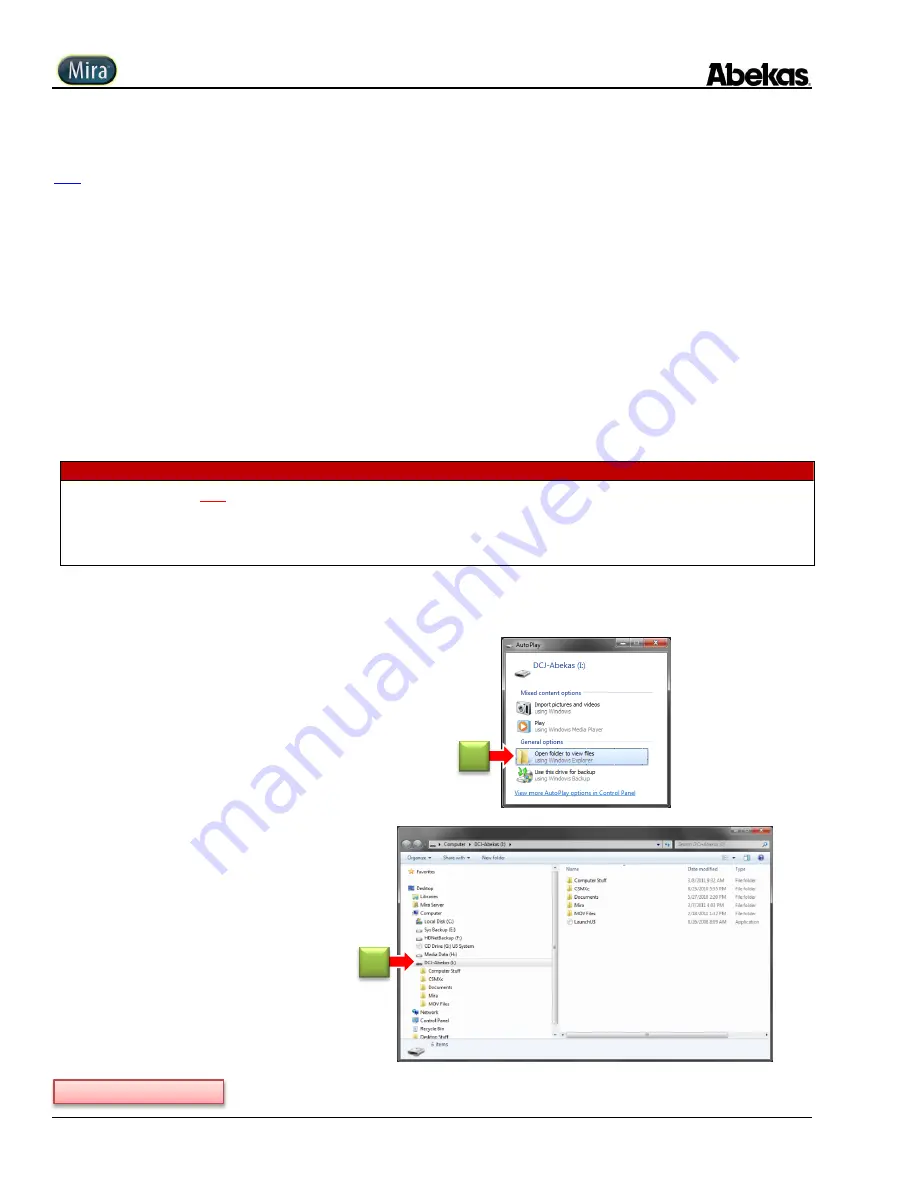
The following procedure outlines the steps necessary to plug in a portable hard drive on one of the USB 2.0 ports in Mira, and to create a
target directory (or folder) on the portable device.
1.
Plug portable hard drive into an available
USB 2.0 or eSATA port on Mira chassis;
The
AutoPlay
window appears in a few seconds.
2.
Click “
Open folder to view files
” item in
AutoPlay window.
“
Windows Explorer
”
window appears, as shown
in next step below.
3.
Navigate to location on portable device
where you want to create “Export Folder”:
Continued on next page…
2
3


