background image

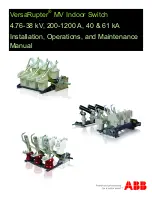
VersaRupter

®

 MV Indoor Switch 

4.76-38 kV, 200-1200 A, 40 & 61 kA 
Installation, Operations, and Maintenance 
Manual 

Содержание VersaRupter

Страница 1: ...VersaRupter MV Indoor Switch 4 76 38 kV 200 1200 A 40 61 kA Installation Operations and Maintenance Manual ...

Страница 2: ...ce The user s personnel are to act responsibly in all matters affecting safety at work and the correct handling of the switchgear If you have any further questions on this instruction manual the members of our field organization will be pleased to provide the required information Always observe the instruction manual and follow the rules of good engineering practice Hazardous voltage can cause ele...

Страница 3: ... on Left Side of VersaRupter K mech 26 Installing the Type E Ground Switch on VersaRupter 27 Installing the Type E Ground Switch on VersaRupter Fuse Base 28 Installing the Mechanical Interlock 29 Installing the Bottom Mounted Fuse Base with Fuse Tripping 31 Installing the Top Mounted Fuse Base with Fuse Tripping 34 Mounting the HE HM Operating Handles 37 Installing the Chain Drive Handle 38 Instal...

Страница 4: ...VersaRupter MV Indoor Switch Installation and Operation Manual 4 Table of Contents Direct Drive Handle Right Side 78 Direct Drive Handle Left Side 79 HE HM Handles 80 Renewal Parts List 81 Notes 82 ...

Страница 5: ...parate containers These assemblies must be installed on the switch as required to complete the switch package Contact ABB customer service if it is determined that parts are missing or other field warranty authorization is required Information to contact customer service can be found on the last page of this manual VersaRupters assembled with K mechanisms are shipped in the closed position VersaRu...

Страница 6: ... from the shipping container gently pull the main contacts fully open by hand Connect the drawbars onto the shaft of the eccentric bolt Install the provided washer and cir clip to secure the drawbar to the eccentric bolt The proper contact penetration was set at the factory before removing the draw bars from the shaft To operate the switch with an A mechanism the shaft must be turned clockwise to ...

Страница 7: ... the removable handle from the manual drive and secure with a padlock if equipped For all other handles engage padlocks or key interlocks if equipped K mechanism opening operation 1 Make sure all enclosure doors are closed 2 Disengage any padlocks or key interlocks required to operate the VersaRupter if equipped 3 For HE handles apply the removable handle on the splined shaft of the manual drive p...

Страница 8: ...ovable handle from the manual drive and secure with a padlock if equipped For all other handles engage padlocks or key interlocks if equipped A mechanism opening operation 1 Make sure all enclosure doors are closed 2 Disengage any padlocks or key interlocks required to operate the VersaRupter if equipped 3 For HE handles apply the removable handle on the splined shaft of the manual drive pull the ...

Страница 9: ... Contacts not operating simultaneously Contacts should not exceed 3 mm in normal conditions 3 Deterioration of contacts in the closed position 4 Displacement of the symmetry plane of moving con tacts in relation to the pole symmetry plane which results in asymmetrical contact of the fixed contacts and moving contacts To avoid these defects mentioned above it is recom mended to only tighten three o...

Страница 10: ...anism should appear as it does in figure 4 If not ro tate the shaft counter clockwise to release the spring then return the shaft to its neutral posi tion 2 Locate the mounting holes in the A mechanism for the shunt trip shown in figure 5 Loosely in stall a bolt lock washer and nut into the lower hole allowing the shunt trip to rest on the A mechanism as shown in figure 6 3 Place the white disk on...

Страница 11: ...ure 8 5 Re install the shunt trip permanently onto the A mech with the two sets of bolts lock washers and nuts using a 10 mm socket Slide the white disk back onto the half moon shaft and secure with a cir clip as shown in figure 9 6 The shunt trip features a pull apart wiring termi nal that can be separated by a small flat head screw driver Gently pry the white plastic hous ing away from the femal...

Страница 12: ...e base 1 Locate the mounting hole and slot on the side of the A mechanism with the operating shaft shown in figure 11 2 Bolt the open fuse auxiliary switch to the mounting hole on the A mechanism and loosely install the screw hardware to allow the switch to rotate into the slot pictured in figure 12 3 Place the white disk onto the half moon shaft and rotate the switch into place as shown in figure...

Страница 13: ...e white disk and switch back onto the A mechanism Rotate the white disk until it reaches its max imum rotation and contacts the switch as in figure 16 An audible click should be heard If not remove the white disk and move the long bolt and nuts to the appropriate hole Once adjusted properly secure the switch with a 13 mm socket and Phillips screw driver 7 Install the cir clip onto the half moon sh...

Страница 14: ...ting bracket with a Phillips screw driver as seen in figure 18 2 Slide the switch onto the studs located on the motor brack et and secure with the provided nuts Place the white plastic disc onto the half moon shaft as shown in figure 19 3 Rotate the white plastic disc to its maximum rotation and mark the hole adjacent to the white roller on the open fuse auxiliary switch as shown in figure 20 Figu...

Страница 15: ...5 Rotate the white plastic disc shown in figure 22 to its maximum displacement and listen for a click This indi cates that the switch will make contact If a click is not heard relocate the screw to a closer hole Ensure the white disc reaches its maximum rotation just as the click is heard to prevent over rotation If the setup is correct secure the white disc with the provided cir clip onto the hal...

Страница 16: ...structions for installing the shunt trip but do not secure the clamp onto the half moon shaft so the white disk can be removed as shown in figure 23 2 Bolt the open fuse auxiliary switch to the mounting holes as shown in figure 24 3 Rotate the white disk until it reaches its maximum displacement and mark the hole adjacent to the white roller on the open fuse auxiliary switch as shown in figure 25 ...

Страница 17: ...olt and two nuts on the marked hole on the white disk as shown in figure 26 5 Re install the white disk back onto the A mechanism and rotate the open fuse auxiliary switch back onto the A mechanism as shown in figure 27 6 Rotate the white disk until it reaches its maximum rotation and makes contact with the open fuse aux switch shown in figure 28 An audible click should be heard from the switch If...

Страница 18: ...d ensure the audible click is not heard on the open fuse auxiliary switch as shown in figure 29 If it occurs remove the white disk and move the long bolt and two nuts to the appropriate hole Once adjusted properly secure the switch with a 13 mm socket and Phillips screw driver 8 Install the clamp onto the half moon shaft to secure the white disk to the A mechanism Figure 29 Figure 30 ...

Страница 19: ...e field if necessary 1 Locate the mounting holes on the back of the Ver saRupter frame as well as the switch lever welded to the jack shaft shown in figure 31 2 Install the auxiliary switch by bolting it with both pro vided bolts and lock washers to the pre tapped mount ing holes using a 6 mm Allen key as seen in figure 32 3 Connect the lever on the auxiliary switch to the lever on the jack shaft ...

Страница 20: ...stall the ring retainer onto the shaft extension and loosely slide the white plastic retainer onto the shaft as shown in figure 34 2 Slide the shaft extension through the hollow jackshaft located on the left side of the switch where a similar white plastic retainer is bolted to the switch frame as shown in figure 35 The loose white plastic retainer should align with the stationary bolt threads 3 S...

Страница 21: ...ng wiring and other data Use M8 or 5 16 bolts and hardware to secure mounting bracket and motor 1 Ensure that the VersaRupter is in the open position Locate the mounting holes for the motor bracket on the K mechanism The bolt in the lower right corner of the K mechanism will have to be removed and rein stalled to secure the motor mounting bracket See figure 37 2 Rotate the spline on the NM motor t...

Страница 22: ...llation and Operation Manual 22 Mounting the NM Motor Operator on K Mechanism 4 Slide the NM motor onto the splined shaft of the K mechanism and secure it with bolts washer lock washers and nuts as shown in figure 40 Figure 40 Figure 41 ...

Страница 23: ...erator supplied with the motor concerning wiring and other data Use M8 or 5 16 bolts and hardware to secure mounting bracket and motor 1 Ensure that the VersaRupter is in the open position and the A mechanism is not charged Locate the mounting holes for the motor bracket on the A mechanism See figure 42 2 Rotate the spline on the NM motor till the spacing is within 4 8 mm as shown in figure 43 3 R...

Страница 24: ...llation and Operation Manual 24 Mounting the NM Motor Operator on A Mechanism 4 Slide the NM motor onto the splined shaft of the A mechanism and secure it with bolts washer lock washers and nuts as shown in figure 45 Figure 45 Figure 46 ...

Страница 25: ... for the motor bracket located on the left side of the switch and bolt the bracket to the frame as shown in figure 47 Make sure the switch is in the open posi tion 2 Rotate the splined tube on the motor to achieve a 4 8 mm spacing as shown in figure 48 3 Adjust the spacing on the operating mechanism to match the required spacing found in figure 44 located in the instructions to mount the motor to ...

Страница 26: ... for the motor bracket located on the left side of the switch and bolt the bracket to the frame as shown in figure 51 Make sure the switch is in the open posi tion 2 Rotate the splined tube on the motor to achieve a 4 8 mm spacing as shown in figure 52 3 Adjust the spacing on the operating mechanism to match the required spacing found in figure 39 located in the instructions to mount the motor to ...

Страница 27: ...r operating handle 1 The three bus pieces must be installed on the lower contacts of the VersaRupter which are supplied with the ground switch Each of these pieces has a clear ance hole for the Allen head screw and a bolt hole that aligns with the bolt hole of the lower terminal The 1200 A switches have a clearance hole and two bolt holes Do not fully tighten the nuts and bolts See figure 55 2 Vis...

Страница 28: ...rsaRupter must have a left hand shaft extension installed for either the mechanical interlock or operating handle 1 The three bus pieces must be installed on the contacts of the fuse base which are supplied with the ground switch Do not fully tighten the nuts and bolts See figure 59 2 Visually align the contacts and lubricate the stationary contacts with the provided lubricant in the kit 3 Secure ...

Страница 29: ... shown in figure 63 Ensure that the side that the interlock will be installed on has the pin in stalled in the normal hole opposed to the slotted hole The slotted hole is used for the side with the operating handle The pin can be removed and re installed to ac commodate either the mechanical interlock or operating handle on either side of the switch This is done by remov ing the cir clips and wash...

Страница 30: ...of the interlock guide plate onto the splined shafts and install the nuts to tighten the assembly together using a 13 mm socket Install the remaining clamps onto the splined shafts to secure the mechanical interlock See figure 67 7 Positively ground the braided ground connection found on the ground switch to the enclosure grounding sys tem Note For A mech applications A mech must be charged in ord...

Страница 31: ...nce based on fuse length from the fuse clips mount ed on the VersaRupter terminals Fuse tripping installation 1 Install the provided fuse clips to the lower terminals of the VersaRupter using a 19 mm socket as shown in figure 68 2 Referring to figure 71 fix the lower bearing mount 8 to the fuse clip 10 installed on the lower terminals of the VersaRupter using provided screws and washers Shown in f...

Страница 32: ...aft 1 on the right hand side as shown in figure 73 6 Mount the disk 3 onto the A mech shaft 4 found on the operating mechanism as shown in figure 74 7 Slide the bearing 5 and washer 6 onto the left side of the release shaft 1 engage the release shaft 1 with the disk 3 and place the left side of the release shaft 1 into the hole found on the left side of the VersaRupter frame Refer to figure 75 Fig...

Страница 33: ...me position shown in figure 76 when the VersaRupt er is in the open position with the A mechanism open ing spring charged Fuse tripping control 1 Turn the operating shaft of the mechanism a maximum of 60 clockwise and return the handle back to the neutral position opening spring housing must not be latched 2 Mount a new fuse link or test fuse in accordance with DIN 43625 in one of the phases 3 If ...

Страница 34: ... fuse length from the fuse clips mount ed on the VersaRupter terminals Fuse tripping installation 1 The fuse clip must be assembled on the upper terminal of the VersaRupter Locate the fuse clip parts and install according to figure 80 2 Referring to figure 83 fix the lower bearing mount 8 to the fuse clip 10 installed on the lower terminals of the VersaRupter using provided screws and washers as s...

Страница 35: ...t 1 on the right hand side as shown in figure 85 6 Mount the disk 3 onto the A mech shaft 4 found on the operating mechanism as shown in figure 86 7 Slide the bearing 5 and washer 6 onto the left side of the release shaft 1 engage the release shaft 1 with the disk 3 and place the left side of the release shaft 1 into the hole found on the left side of the VersaRupter frame Refer to figure 87 Figur...

Страница 36: ...int Fuse tripping control 1 Turn the operating shaft of the mechanism a maximum of 60 clockwise and return the handle back to the neutral position opening spring housing must not be latched 2 Mount a new fuse link or test fuse in accordance with DIN 43625 in one of the phases 3 If the distance between the fuse clips is longer than shown in figure 90 max e 8 mm the adjustment must be made with the ...

Страница 37: ...t The bolt holes should not exceed 10 mm Refer to drawing S 20361 at the end of this document for fabri cation instructions For HE handles 3 Remove the Seeger ring spring and nut See figure 92 4 Slide the arrestor ring off of the splined shaft See figure 93 The splined shaft should be free to rotate 5 If paired with an A mechanism use the removable handle to charge the A mechanism 6 Test the insta...

Страница 38: ...that was previously installed The angle is slotted to allow for depth adjustment The chain guard assembly is not required if chain drive is installed on the left hand side 5 Install the chain onto the sprockets securing them with the turnbuckles and chain guard If the switch is mounted upright the chain must be crossed as shown in the referenced drawing If the switch is inverted the chain does not...

Страница 39: ...ght Side Left Side for details 1 Ensure that the VersaRupter is closed and the handle is in the closed position 2 Mount the direct drive handle to the switchgear enclo sure using a 9 16 socket making sure the hub assem bly slides onto the operating shaft of the VersaRupter 3 Check that the VersaRupter opens and closes when the handle is operated ...

Страница 40: ...sulated bus bars to the standoff insulators using one 3 8 bolt a steel 3 8 washer and two red washers 4 Install the GPO 3 washers such that they are posi tioned on each side of the back connect bus bar to protect the bus bar insulation The steel 3 8 washer should be between the GPO 3 washer and the head of the 3 8 bolt 5 The back connect bus bar is attached to the Ver saRupter terminals with the h...

Страница 41: ... jack shaft connection point in figure 96 into the jack shaft and the studs into the mounting holes of the frame The jack shaft may need to be wiggled for the mechanism to engage 3 Secure the mechanism with the provided loose bolt in figure 97 and the other two studs in figure 98 Tight en nuts to 25 Nm using a 13 mm socket 4 Check that the mechanism properly opens and closes the VersaRupter Figure...

Страница 42: ...iding the jack shaft connection point in figure 100 into the jack shaft and the studs into the mounting holes of the frame The jack shaft may need to be wiggled for the mechanism to engage 3 Secure the mechanism with the provided nuts and washers in figures 101 and 102 Tighten nuts to 25 Nm using a 13 mm socket 4 Check that the mechanism properly opens and closes the VersaRupter Figure 99 Figure 1...

Страница 43: ... 15 year intervals if the following service conditions are met 1 VersaRupter must be transported and stored in a genu ine box 2 Installation service conditions a VersaRupter must work in indoor application under normal service conditions according to IEEE C37 20 4 b VersaRupter must be installed by staff who have read this manual and installed according to manufacturer s recommendation c Maximum n...

Страница 44: ...se type ISOFLEX TOPAS NCA 52 must be used if additional grease is re quired 4 Operate the VersaRupter several times Check the main contact position while closed After all adjust ments this position must be in accordance with the specifications shown in Figure 105a In the case where the fixed contacts are 38mm in height the main con tact should not exceed 2mm above or 4mm below the top surface of t...

Страница 45: ...low out any small particles in the threaded holes with proper eye protec tion 2 The screw must be reinstalled carefully into the threads of the insulator and tightened with care See correct torque values in Torque Values for Self Tap ping Screws If a new insulator is being installed the holes in the insula tor should be threaded about 10 mm deep by the self tap ping screw before mounting Remove th...

Страница 46: ...aching the draw bar to the main shaft Eccentric bolt does not have to be loosened See figure 109 2 Unscrew the screw s 2 2 attaching the main contact to the insulator using a T40 Torx socket see figure 110 Remove the fixed contact with the contact knife and draw bar shown in figure 111 Figure 108 Figure 109 Figure 110 These operations must be carried out by specialists only Improper installation m...

Страница 47: ...ing chamber when closing and opening The arcing knife does not have the same position related to the contact knife during the closing and opening move ment The contact knife must rotate firmly at the pivot point without jerking 5 Attach the draw bar to the main shaft near the eccen tric bolt 2 3 and secure with the washer and cir clip 2 1 6 The depth of the engagement between the fixed and the mov...

Страница 48: ...et unscrew the two screw 3 1 and lift up the arcing chamber and the thermal disc 3 4 600 A while pressing the main contact 3 5 firmly against the hollow insulator See figure 115 2 Lift up the main contact 3 5 by the arcing contacts 3 6 which penetrate the main contact Remove the pressure spring 3 7 and clean the top of the insulator and the hole Blow out the threaded holes See figure 116 Figure 11...

Страница 49: ...orque values in the Torque Values for Self Tapping Screws section Note Damaged parts must be replaced The arcing contacts 3 6 must be seated correctly on the pressure spring 3 7 When mounting the thermal disc 3 4 and the arcing chamber 3 3 the main contact 3 5 must be pressed firmly against the hollow insulator 3 8 Attach the whole assembly by screws 3 1 For correct torque values see the Torque Va...

Страница 50: ...w insulator to the frame by the two self tapping screws 3 9 Notes Remember to mount the piston with piston rod 3 10 For correct torque values see the Torque Values for Self Tapping Screws section Do not forget to install the washer and spring washer for the self tapping screws Figure 120 These operations must be carried out by specialists only Improper installation may result in serious injury or ...

Страница 51: ... to the frame by the two self tapping screws 2 5 4 Attach the main contact with the contact knife to the top of the insulator and adjust according to proce dures from Replacement of Contact Knife with Draw Bar Notes For correct torque values see the Torque Values for Self Tapping Screws section Do not forget to install the washer and spring washer for the self tapping screws Figure 121 These opera...

Страница 52: ...0 Torx socket unscrew screws 4 2 and detach the fuse clips and contact blocks respectively 2 Unscrew screws at the base 4 3 of the insulator and detach the insulator 3 Attach the new insulator to the frame by the two self tapping screws 4 3 4 Attach the fuse clips and contact block to the top of the insulator and secure with screws 4 2 Figure 122 ...

Страница 53: ...o the lower terminal with the contact screw from the previous step 4 Ensure that the contact knives can easily move and operate while making connection with the stationary contacts when closing 5 Check the alignment of the arc blades when entering the arc chute 6 Connect the draw bar to the jack shaft and secure it with a cir clip 7 Put contact grease on the main contacts before test ing The conta...

Страница 54: ... figure 125 2 Push the top of the arcing blade such that the draw bar bolt in figure 126 will be exposed and can be pushed out freeing the upper end of the draw bar 3 Remove the lower end of the drawbar by removing the cir clip securing the draw bar to the jack shaft in fig ure 127 4 Reinstall the new draw bar by attaching the upper part of the draw bar first then the lower Figure 125 Figure 126 F...

Страница 55: ...e contact item 2 in figure 128 from the lower insulator 2 The insulator can be removed by unscrewing bolt 3 in figure 128 3 Screw the new insulator back onto the frame with bolt 3 4 Replace the contact item 2 with the bolts removed from step 1 5 Ensure the contact blades align properly Figure 128 These operations must be carried out by specialists only Improper installation may result in serious i...

Страница 56: ...p 4 Remove the screws item 3 in figure 129 to remove the upper insulator 5 If contact blocks and arc extinguishing chambers are to be used again they must be installed on the new upper insulator before the insulator is installed on the frame 6 Replace the operating mechanism and attach all the drawbars and pistons to the jackshaft with cir clips 7 Check the alignment of the contact and arcing blad...

Страница 57: ...the draw bar from the jackshaft by removing the cir clip in figure 130 2 Disconnect the piston rod from the jackshaft by re moving the cir clip figure 131 and the piston can be removed 3 Insert the new piston into the insulator and connect it to the draw bar with a cir clip 4 Do not grease or lubricate the new piston or cylinder 5 Connect the lower part of the draw bar back onto the jack shaft wit...

Страница 58: ...VersaRupter MV Indoor Switch Installation and Operation Manual 58 Torque Values for Self Tapping Screws 38 kV Figure 132 Figure 133 5 27 kV ...

Страница 59: ...VersaRupter MV Indoor Switch Installation and Operation Manual 59 Outline Drawing 8 25 kV 200 600 A 40 kA ...

Страница 60: ...VersaRupter MV Indoor Switch Installation and Operation Manual 60 Outline Drawing 8 25 kV 1200 A 40 kA ...

Страница 61: ...VersaRupter MV Indoor Switch Installation and Operation Manual 61 Outline Drawing 15 kV 200 600 A 40 kA ...

Страница 62: ...VersaRupter MV Indoor Switch Installation and Operation Manual 62 Outline Drawing 15 kV 1200 A 40 kA ...

Страница 63: ...VersaRupter MV Indoor Switch Installation and Operation Manual 63 Outline Drawing 15 15 5 kV 600 1200 A 61 kA ...

Страница 64: ...VersaRupter MV Indoor Switch Installation and Operation Manual 64 Outline Drawing 17 kV 200 600 A 40 kA ...

Страница 65: ...VersaRupter MV Indoor Switch Installation and Operation Manual 65 Outline Drawing 17 kV 1200 A 40 kA ...

Страница 66: ...VersaRupter MV Indoor Switch Installation and Operation Manual 66 Outline Drawing 27 kV 200 600 A 40 kA ...

Страница 67: ...VersaRupter MV Indoor Switch Installation and Operation Manual 67 Outline Drawing 27 kV 1200 A 40 kA ...

Страница 68: ...VersaRupter MV Indoor Switch Installation and Operation Manual 68 Outline Drawing 38 kV 600 800 A ...

Страница 69: ...VersaRupter MV Indoor Switch Installation and Operation Manual 69 Back Connect Kit 5 kV 200 600 A 40 kA ...

Страница 70: ...VersaRupter MV Indoor Switch Installation and Operation Manual 70 Back Connect Kit 15 kV 200 600 A 40 kA ...

Страница 71: ...VersaRupter MV Indoor Switch Installation and Operation Manual 71 Back Connect Kit 17 kV 200 600 A 40 kA ...

Страница 72: ...VersaRupter MV Indoor Switch Installation and Operation Manual 72 Back Connect Kit 27 kV 200 600 A 40 kA ...

Страница 73: ...VersaRupter MV Indoor Switch Installation and Operation Manual 73 Back Connect Kit 15 kV 600 A 61 kA ...

Страница 74: ...VersaRupter MV Indoor Switch Installation and Operation Manual 74 Auxiliary Switch Kit ...

Страница 75: ...VersaRupter MV Indoor Switch Installation and Operation Manual 75 Chain Drive Assembly ...

Страница 76: ...VersaRupter MV Indoor Switch Installation and Operation Manual 76 Left Hand Shaft Extension ...

Страница 77: ...VersaRupter MV Indoor Switch Installation and Operation Manual 77 Mechanical Door Interlock ...

Страница 78: ...VersaRupter MV Indoor Switch Installation and Operation Manual 78 Direct Drive Handle Right Side ...

Страница 79: ...VersaRupter MV Indoor Switch Installation and Operation Manual 79 Direct Drive Handle Left Side ...

Страница 80: ...VersaRupter MV Indoor Switch Installation and Operation Manual 80 HE HM Handles ...

Страница 81: ...200 A 61 kA 245 879 501 Chain Drive Handles Chain kit 29 625 to 34 247 100 501 Chain kit 34 625 to 39 247 100 502 Chain kit 39 625 to 44 247 100 503 Chain kit 61 625 to 66 247 100 504 Chain sprocket mounted on switch set screw 2RGA024432A0001 sprocket 650107C00 set screw Closed and Open indicator labels 2RGA024746P0002 Closed 2RGA024746P0001 Open Caution labels English and French 2RGA024120P0001 E...

Страница 82: ...VersaRupter MV Indoor Switch Installation and Operation Manual 82 Notes ...

Страница 83: ...nie jenkins us abb com www abb com mediumvoltage All sales are subject to ABB Inc General Terms and Conditions of Sale While every effort has been made to assure accuracy the information in this document is subject to change without notice Copyright 2011 ABB Inc All rights reserved IB 2 1 2 7 4A Rev H January 2016 ...

Отзывы: