ABB Busch-ComfortTouch 12.1 Скачать руководство пользователя страница 57

Operating Instructions 


Busch-

ComfortTouch

®


Operation


Operating Instructions | 1473-1-8041 

— 57 —


5.


Confirm the changes by touching the tick in the right-hand top corner. 


Via the arrow in the top bar you again return to the overview. 
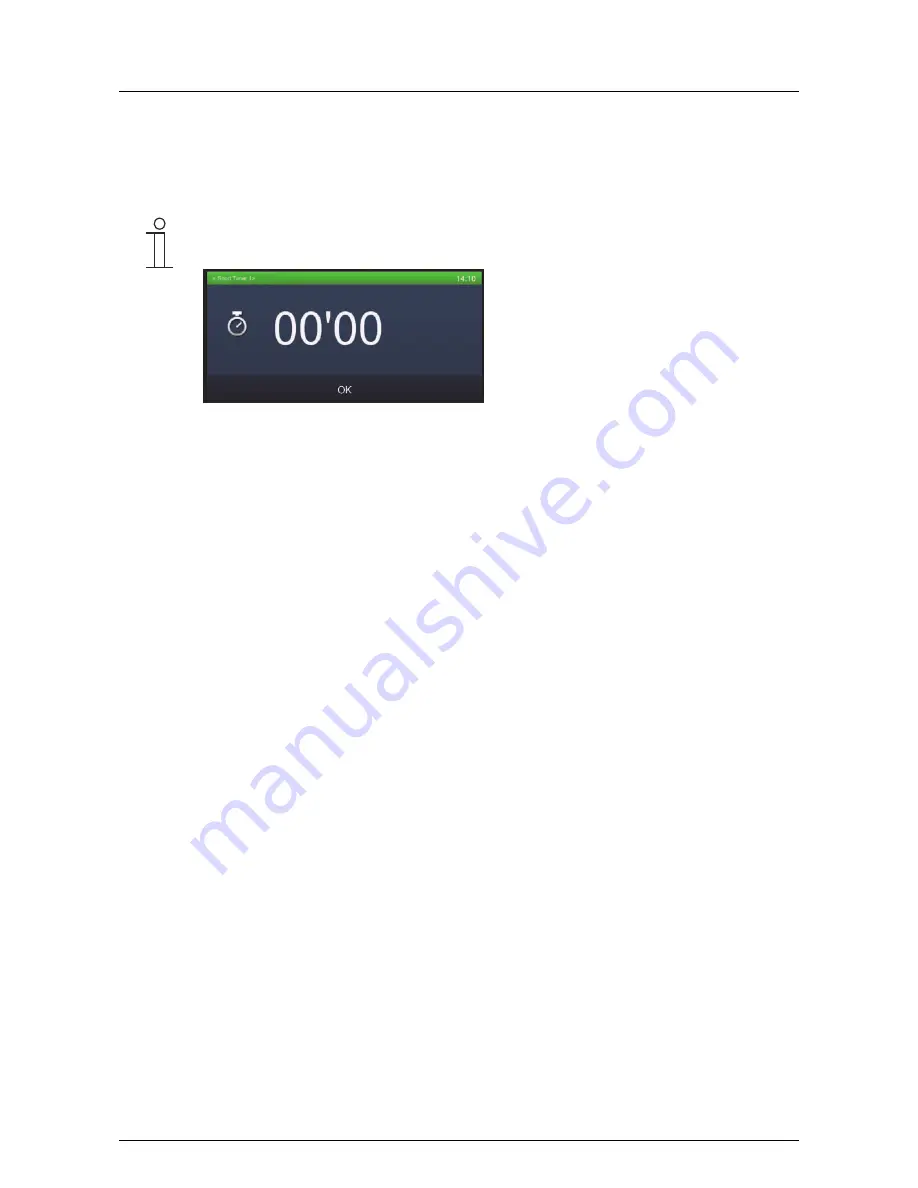


Note 

At the end of the running time, a message appears which must be confirmed. 


Pos: 15.6.30 /Layout bis 2014-11-11/Online-Dokumentation (+KNX)/Steuermodule - Online-Dokumentation (--> Für alle Dokumente <--)/++++++++++++ Seitenu+++++++++++ @ 9\mod_1268898668093_0.docx @ 52149 @  @ 1 


Содержание Busch-ComfortTouch 12.1

Страница 1: ...ion KNX Titelblätter KNX ComfortPanel 3 0 Titelblatt Bedienungsanleitung CP 3 0 ABB 36 mod_1364392422833_15 docx 293647 1 Busch ComfortTouch 9 8136 09 811 500 CP U 9 3 1 8136 09 825 500 CP U 9 4 1 Busch ComfortTouch 12 1 8136 12 811 500 CP U 12 3 1 8136 12 825 500 CP U 12 4 1 Ende der Liste für Textmarke Cover ...

Страница 2: ...sses on the touchdisplay 16 5 2 1 Buttons 16 5 2 2 Control elements 17 5 2 3 Entries 30 5 2 4 Swiping motions scrolling 30 5 3 Explanation of functions 31 5 3 1 Page types 31 5 3 2 Basic functions of switching dimming blinds value scenes RTC and measured values 32 5 3 3 Media Player 33 5 3 4 Sonos loudspeaker 35 5 3 5 Image messaging 36 5 3 6 Voice messages 39 5 3 7 E mail 41 5 3 8 Feed Reader 43 ...

Страница 3: ...g Instructions Busch ComfortTouch Operating Instructions 1473 1 8041 3 5 4 17 Import and export of files 84 5 4 18 System settings 85 5 4 19 Device information 85 6 Cleaning 86 Ende der Liste für Textmarke TOC ...

Страница 4: ...k ComfortPanel 3 0 Bedienungsanleitung Aufbau des Handbuches Aufbau des Handbuches Bedienungsanleitung 35 mod_1363592055121_15 docx 288058 1 This manual provides you with the detailed information about the operation This will ensure reliable operation and long service life of your product The chapters Information on the manual Safety Environmental information and Product overview contain general s...

Страница 5: ...ntrol monitoring and visualisation functions for numerous devices and media within a building The device makes available numerous functions The range of functions is contained in chapter Description of Functions Note The device must only be used in dry indoor rooms Note Making and saving video recordings can infringe on personal rights Always observe applicable legal and labeling requirements for ...

Страница 6: ...f security unauthorized access intrusions information leaks and or piracy of data and information ABB and associated companies are not liable for damages and or losses in connection with the violation of security unauthorized access malfunctions intrusions information leaks and or piracy of data or information Pos 10 1 Layout bis 2014 11 11 Modul Struktur Online Dokumentation Überschriften Für all...

Страница 7: ...n the entire building control the blinds or regulate the room temperature or scenes using a combination of the functions mentioned above even via remote control Please note that additional components of building automation are required for this The operation and control is carried out via the text labelled touch surfaces in a clear menu structure and or via floor plans and room views It is a label...

Страница 8: ...aker Replay of audio data News Image messaging Recording and displaying of notes Voice message Recording and playback of voice messages E mail Reading of e mails Feed Reader Reading of feeds news feeds Home automation KNX Control and monitoring of a KNX bus system Scene editor Editing and calling up of scenes and sequences Weekly programs Editing of weekly programs Calendar twelve month timer Sett...

Страница 9: ...le access Remotely controlling the Busch ComfortTouch via MobileApp Camera module Use in various applications e g door communication Control elements Basic functions of switching dimming blinds value scenes RTC and measured values All conventional functions in building automation can be controlled and have their status displayed No directly visible application with an operating page The setting is...

Страница 10: ...erät Bed 40 mod_1418725076081_15 docx 309530 1 1 2 3 5 6 7 4 8 9 Fig 1 Overview of devices 1 Design bar 2 Colour touchdisplay 3 Camera 4 Camera adjustment 5 9 IR sensors 6 Slot for SD card 7 Reset button 8 Slot for USB stick Caution Risk of damaging the device due to touching The USB connection contains many sensitive contacts They must not be touched directly Note Some USB sticks which do not cor...

Страница 11: ...will set up the Busch ComfortTouch for you individually and according to your wishes In the project planning software the scope of available functions is specified Also consult your specialist electrical dealer Pos 15 2 3 1 Layout bis 2014 11 11 Online Dokumentation KNX Überschriften Für alle Dokumente 3 Ebene A F Farbkonzept 34 mod_1361784416110_15 docx 281801 3 1 5 1 1 Colour concept Pos 15 2 3 ...

Страница 12: ...usch ComfortTouch depend on their individual installation This means that also the display image of the operating page and the naming of the functions vary from Busch ComfortTouch to Busch ComfortTouch However the basic structure always remains the same 1 Title 2 Operating surface 3 Navigation bar 4 Status bar Element Description Title pages etc 1 Specification of page or directory Control button ...

Страница 13: ...on page is represented by an access in the navigation bar This means that each access on the navigation bar stands for exactly one page Or conversely each access to the navigation bar stands for exactly one page Pressing an access takes you directly to the respective page Also the functions are activated via the pages The various accesses can also be bundled topically Then after a press an option ...

Страница 14: ...arm clock and Timer are available for selection depending on the activation The functions are described in greater detail in section Explanation of functions Depending on the setting it displays the current room temperature or outside temperature as well as the current operating mode of the local room temperature controller Displays the current room temperature or the outside temperature as well a...

Страница 15: ...xplanation of functions Presence simulation Indicates that presence simulation is being recorded During recording by your Busch ComfortTouch presence simulation runs continuously to constantly have up to date information available This is how a typical daily routine is recorded and stored This function is described in greater detail in section Explanation of functions Presence simulation Indicates...

Страница 16: ... KNX KNX Aktorik ComfortPanel 3 0 Bedienungsanleitung Bedienungsvorgänge am Touchdisplay Schaltflächen Schaltflächen 34 mod_1361791449195_15 docx 282078 1 Operating surfaces are generally termed buttons which are frequently used in user operating surfaces The user can trigger a function by touching the button In the Busch ComfortTouch these are among others icons e g in the navigation and status b...

Страница 17: ...y due to individual adaptation NOTE The type and appearance of some control elements has been fixed and cannot be altered e g volume control However for some control elements e g light switches individual formats also icons can be selected This must be appropriately activated in the project planning software of the Busch ComfortTouch Please contact your electrical installer who will set up the Bus...

Страница 18: ...an speed levels are shown in white bright lettering icons The step or level values can be specified The following example shows the brightness value of 20 A 1 byte feedback signal results If a selection or setting cannot be made the colour of the lettering icons appears dark In the following example the uppermost setting for dimming has been reached 100 Increased dimming is not possible and that i...

Страница 19: ...en actuated and alternates between two statuses e g On and Off Push button Neutral A simple neutral push button always transmits the same value when it is pressed Its status remains unchanged e g On Also value 1 can be sent at a rising edge and value 2 at a falling edge Switch Neutral A reverser light push button alternately sends one of two values when actuated and alternates between two statuses...

Страница 20: ...thout slider has a push button for switching on off in the centre and two buttons left and right for stepwise dimming brighter darker Dimmer with slider The version with slider has a push button for switching on off on the left side and a slider for dimming Dimmers with popup slider The version pop up slider has a push button for switching on off on the left side and another button on the right si...

Страница 21: ...on press Movement up to stop the icon in the centre changes Stop When the end stop has been reached or a brief press on icon Up Down depending on the direction of movement Change Followed by a long press on icon Up Down depending on the desired direction of movement The change of direction of movement with a brief press on icon UP Down Followed by a long press on icon Up Down depending on the desi...

Страница 22: ...a long press of the push button A progress bar is displayed An icon is displayed after the successful storage NOTE The scene to be called up must be assigned appropriately in the project planning software of the Busch ComfortTouch Please contact your electrical installer who will set up the Busch ComfortTouch for you individually and according to your wishes Scene List Scene can be called up Scene...

Страница 23: ...tart or stop a sequence The right button is used to pause a sequence and restart it the sequence continues from the spot where it was stopped Changes to the sequence are indicated by an icon and can be stored This is done with a long press of the left push button A progress bar is displayed An icon is displayed after the successful storage The remaining time of the sequence can be displayed at the...

Страница 24: ...ut slider has two buttons left and right for calling up the next or previous step and a button in the centre By pressing the right left button a few times one reaches the next higher or lower step The button in the middle returns the step switch to the bottom step Off The icon in the middle can be animated during adjusting Step switch with step display Device is off Device on and adjustable adjust...

Страница 25: ...s here Graphic display element The Graphics display version can display values graphically which are sent from a temperature sensor for example The values are also displayed as a number For the graphic display element you can choose between a wind rose and a dial type gauge This must have been appropriately assigned in the project planning software of the Busch ComfortTouch Please contact your ele...

Страница 26: ...lable with a corresponding plug in More detailed information is available from your electrical installer He will also carry out the commissioning process with the aid of the commissioning software Miele control elements basic versions which can be adapted further With the Miele control element you have the option of transferring information and data about kitchen appliances from Miele to the Busch...

Страница 27: ...epending on the lamp type and the default settings in the commissioning software additional functions can be called up via the arrow as shown in the example colour or white control for example Links in the floor plan Links in the floor plan are used to jump to individual operating pages from the start page Control element Status Function Links Pages Room view Web Internet site Camera News centre S...

Страница 28: ...rried out by pressing the icon This is also how additional functions can be opened such as controllers for example The Bubble opens itself accordingly Additional functions can also be displayed by pressing the arrow buttons Examples of special control Blind controller Press the icon The controller opens Brief press on the arrows Stepwise adjustment Long press on the arrows Standard procedure Dimme...

Страница 29: ...o the controllers for the system volume Example System volume Special case Media volume With this it can be selected whether the setting refers to the Busch ComfortTouch and or to connected loudspeakers devices The controller for the volume appears with a long press on the loudspeaker icon in the status bar The volume is adjusted by sliding the controller With a brief press on the loudspeaker icon...

Страница 30: ...Touch Pos 15 4 7 1 Layout bis 2014 11 11 Online Dokumentation KNX Überschriften Für alle Dokumente 3 Ebene U Z Wischbewegungen Scrollen 34 mod_1361792432573_15 docx 282234 3 1 5 2 4 Swiping motions scrolling Pos 15 4 7 2 Layout bis 2014 11 11 Online Dokumentation KNX Bedienung KNX KNX Aktorik ComfortPanel 3 0 Bedienungsanleitung Bedienungsvorgänge am Touchdisplay Wischbewegungen Scrollen Wischbewe...

Страница 31: ...yed to the user after a certain time interval or after returning from the screensaver It thus represents the face of the Busch ComfortTouch and serves as an orientation point The start page is the starting point of any navigation Access to the start page is always provided on the left side of the navigation bar The start page of the Busch ComfortTouch plays another important role Here functions th...

Страница 32: ...et up the Busch ComfortTouch for you individually and according to your wishes Each application page has access in the navigation bar Note The page types can contain buttons control elements as well as input options The basic operation is explained in section Control processes at the touchdisplay Pos 15 6 3 1 Layout bis 2014 11 11 Online Dokumentation KNX Überschriften Für alle Dokumente 3 Ebene G...

Страница 33: ...yback of audio and video data as well as Internet radio streams and Internet TV streams Note Both music data MP3 AAC WAV and films MPG MPEG MP4 AVI can be replayed directly unless they are copy protected by DRM Digital Rights Management Press the Media Player icon in the navigation bar to access the Media Player Via the directory you can select whether you wish to read in audio or video data via U...

Страница 34: ...n external sound system or active speakers Up to ten streams each can be set via the project planning software of the Busch ComfortTouch The image can be displayed in reduced size at the upper left or in full screen mode Note The quality of the full screen display depends on the image size of the stream being broadcast Note Via the Web interface there is the option of making settings independently...

Страница 35: ... Ebene S T Sonos Lautsprecher 44 mod_1448005027867_15 docx 404485 3 1 5 3 4 Sonos loudspeaker Pos 15 6 6 2 Layout bis 2014 11 11 Online Dokumentation KNX Bedienung KNX KNX Aktorik ComfortPanel 3 0 Bedienungsanleitung Erläuterung der Funktionen Sonos Lautsprecher Sonos Lautsprecher 44 mod_1448004860591_15 docx 404449 1 Sonos loudspeaker control elements can be used to define specific settings for S...

Страница 36: ...nktionen BildnachrichtBildnachricht 40 mod_1418727990694_15 docx 309612 1 The Image messaging function serves for recording and displaying notes This enables users to leave image messages for other users on the Busch ComfortTouch An image message is a handwritten text message or drawing created with the finger on the display Press the Image messaging icon in the navigation bar to access the functi...

Страница 37: ...Operating Instructions 1473 1 8041 37 Leave a handwritten message for members of you family and others 3 Select the receiver of the message by inserting a tick 4 Press Save An icon appears in the status bar which indicates that a new message has arrived ...

Страница 38: ...l available messages is displayed News that has been read is marked with a light blue dot All the messages can be selected and read again The messages can also be deleted here To do this touch the following icon Cross icons appear next to the messages A message is deleted by touching it Note The list of all available messages for a receiver can be called up at any time via the Image messaging func...

Страница 39: ...hrichten 40 mod_1418729614462_15 docx 309705 1 The Voice messages function serves for recording and playback of voice messages They are recorded with the integrated microphone and can therefore be played back later 1 Press the Voice messages icon in the navigation bar to access the function 2 Press New message to record a new voice message 3 Now select rec red dot and speak into the integrated mic...

Страница 40: ...ssage by clicking the cross in the right hand top corner A list of all available messages is displayed Messages that heve been heard are marked with a light blue dot All the messages can be selected and replayed again The messages can also be deleted here To do this touch the following icon Cross icons appear next to the messages If they are touched the message is deleted Note The list of all avai...

Страница 41: ...768626_15 docx 282587 1 E mails can be displayed without the need for a separate computer E mails can be easily answered via a graphic or voice message 1 Press the E mail icon in the navigation bar to access the function The list of e mails received with a blue dot indicates new ones that have not yet been read E mails that have been read are marked with a light blue dot 2 Press an entry to open t...

Страница 42: ...ns Image message or Voice messages are opened see sections Image message or Voice message The receivers are selected automatically Note E mails cannot be deleted in the Busch ComfortTouch Pos 15 6 13 Layout bis 2014 11 11 Online Dokumentation KNX Steuermodule Online Dokumentation Für alle Dokumente Seitenumbruch 9 mod_1268898668093_0 docx 52149 1 ...

Страница 43: ...xample current news weather information traffic information etc 1 Press the Feed Reader icon in the navigation bar to access the function The list shows the Feeds news services that have been previously specified via the project planning software of the Busch ComfortTouch Please see your electrical installer A blue dot shows that the latest news has arrived at the Feeds Otherwise the dot remains l...

Страница 44: ... Via the Web interface there is the option of making settings independently on the Busch ComfortTouch Practical changes in the Busch ComfortTouch are for example adjustments of the news services Feeds for the Feed Reader It is activated via the project planning software of the Busch ComfortTouch Please see your electrical installer He will also explain the operation to you Pos 15 6 15 Layout bis 2...

Страница 45: ...sting on the Busch ComfortTouch can then be carried out by the user Validity intervals e g holidays can be assigned to weekly programs during which the preset weekly program is not triggered but the program of a specially defined day This could be days such as Xmas Sylvester or New Year In this way weekly programs can be automatically activated and deactivated A maximum of 8 periods of validity ca...

Страница 46: ...he day s in the calendar 6 Also specify the characteristics of the intervals Interval characteristics Description Always The weekly program is continuous there is no assignment to an interval Include Within the marked days The weekly program runs only within the marked days Exclude Outside the marked days The weekly program is suspended during the marked days 7 Press OK You return to the overview ...

Страница 47: ...or later each day in dependence of the annual season A blocking function with Not before and Not after fixes the blocking times before or after which no functions are carried out For this a tick must have been set in the blocking function 11 Touch the Hours or Minutes The setting is made via 12 Press OK You return to the overview of scenes Pos 15 6 17 Layout bis 2014 11 11 Online Dokumentation KNX...

Страница 48: ...ograms can be made The weekly programs are created via the project planning software of the Busch ComfortTouch Also the holiday intervals are specified here Please see your electrical installer The activation and minor adjustments on the Busch ComfortTouch can then be carried out by the user 1 Press the Simple weekly program icon in the navigation bar to access the function The overview displays e...

Страница 49: ...unction can for example be used to automatically raise or lower blinds a few minutes earlier or later each day in dependence of the annual season A blocking function with Not before and Not after fixes the blocking times before or after which no functions are carried out For this a tick must have been set in the blocking function 7 Touch the Hours or Minutes The setting is made via 8 Press OK You ...

Страница 50: ...triggered These default settings can be repeated annually 1 Press the Calendar icon in the navigation bar to access the function The overview by means of coloured boxes shows the days that have been specified 2 If you wish to specify additional days or you wish to change specifications touch a month 3 Touch one or several days in the calendar They are highlighted in colour For these days special s...

Страница 51: ...meraüberwachung 34 mod_1361798576547_15 docx 283284 3 1 5 4 3 Camera surveillance Pos 15 6 23 2 Layout bis 2014 11 11 Online Dokumentation KNX Bedienung KNX KNX Aktorik ComfortPanel 3 0 Bedienungsanleitung Erläuterung der Funktionen Kameraüberwachung Kameraüberwachung 34 mod_1361793748768_15 docx 282507 1 Camera surveillance provides fast visual information about events occurring within the detect...

Страница 52: ...ether camera surveillance is displayed as a small window at the start page The current camera image is the displayed permanently With a press on this window the Camera surveillance function opens Pos 15 6 24 Layout bis 2014 11 11 Online Dokumentation KNX Steuermodule Online Dokumentation Für alle Dokumente Seitenumbruch 9 mod_1268898668093_0 docx 52149 1 ...

Страница 53: ...ot intended to serve as a VDS certified German Association of Property Insurers alarm system but to merely offer the option of monitoring windows doors or interior rooms via movement detectors It is no substitute for an alarm system The status of the alarm control unit is displayed in the status bar The function is opened by pressing the icons The function can however also be called up via the nav...

Страница 54: ...idual sensors can be activated deactivated by setting a tick under Monitored With the aid of Ignore it can be specified that an alarm can be set in spite of an existing message By touching the lettering Overview you return to the previous view Pos 15 6 26 Layout bis 2014 11 11 Online Dokumentation KNX Steuermodule Online Dokumentation Für alle Dokumente Seitenumbruch 9 mod_1268898668093_0 docx 521...

Страница 55: ...r with the following icons Please note that you must always create a presence simulation beforehand so that the simulation can be played back later 1 Open the function by pressing the icons shown above Additional text windows are then displayed 2 Press Record scene to record a presence simulation 3 Press Play back scene to play back the presence simulation recorded The status of the presence simul...

Страница 56: ...ated for a 9 Busch ComfortTouch and five for a 12 1 Busch ComfortTouch A tone sequence can be set after the time has expired There is also the additional option of running an automated scene at the start and or end of a short time timer 1 Press the Short timer icon in the navigation bar to access the function The overview displays the available shot time timers Here the timers can be set 2 Touch t...

Страница 57: ...ck in the right hand top corner Via the arrow in the top bar you again return to the overview Note At the end of the running time a message appears which must be confirmed Pos 15 6 30 Layout bis 2014 11 11 Online Dokumentation KNX Steuermodule Online Dokumentation Für alle Dokumente Seitenumbruch 9 mod_1268898668093_0 docx 52149 1 ...

Страница 58: ...ne to precede the alarm to prepare the home environment for its occupants prior to rising the heating for example is switched on already one hour before to the alarm clock This allows a scene or a sequence to be started for the lead in time specific time set before alarm time for alarm time at activation of Snooze and switching off the alarm clock 1 Press the Alarm clock icon in the navigation bar...

Страница 59: ...set individually 5 Touch the Hours or Minutes The setting is made via 6 Confirm the changes by pressing Save Via the arrow next to Save you again access the overview Note After the alarm clock has been activated the alarm clock icon appears in the status bar Here all the time settings can be called up again Pos 15 6 32 Layout bis 2014 11 11 Online Dokumentation KNX Steuermodule Online Dokumentatio...

Страница 60: ...e the power of a photovoltaic system or the fill level of an oil tank can be visualised for example Note The data logger can display up to 4 graphs data points in one view The individual graphs can be named and colour coded For this the legend is displayed The Busch ComfortTouch can store the values as file in a specified directory to allow the determined values to be further processed The followi...

Страница 61: ...of all stored bookmarks are displayed This list can be selected at any time When the user selects an Internet site it opens 1 Press the Web browser icon in the navigation bar to access the function The buttons have the following functions Button Function One page back One page forward Call up of the Bookmark list Scaling Quitting the loading process also a progress bar appears during the loading p...

Страница 62: ... used as an Internet protocol telephone VoIP telephone Please check the requirements with your electrical installer The following requirements must be fulfilled A broadband Internet connection with a transfer rate of at least 100 kbit s in both directions must exist The Internet provider must allow VoIP telephony For the Busch ComfortTouch to be reachable via a conventional call number an SIP acco...

Страница 63: ...g the number directly 1 Enter the number via the numbers keyboard The digit entered last can only be deleted by touching the following sign 2 Touch the following button The connection is being made The time starts to run as soon as the call is answered 3 Terminate the call with the following button ...

Страница 64: ...h Operation Operating Instructions 1473 1 8041 64 Dialling a stored number via the address book 1 Touch the entry Address book A list with the stored address entries opens 2 Set a tick at the desired party The name appears in the right field ...

Страница 65: ... image on the right shows this accordingly Note Via the Web interface there is the option of making settings independently on the Busch ComfortTouch Practical changes in the Busch ComfortTouch are for example adjustments to the address book for the telephone application It is activated via the project planning software of the Busch ComfortTouch Please see your electrical installer He will also exp...

Страница 66: ...Touch as a door call The Busch ComfortTouch automatically switches to the door communication application and depending on the configuration displays a note or the camera image of the corresponding station The user can now accept or reject the call and switch to mute during the conversation open the door and switch on the light In addition the user can view all previous events via History progress ...

Страница 67: ... cameras the arrow buttons can be used to switch between the cameras Open and edit the history progress of snapshots 1 Open a list of connected stations on the right hand side with the aid of the following arrow 2 Now select the station 3 Press History 4 Select an entry The snapshot is displayed With the aid of the arrows one can switch between all snapshots of the station ...

Страница 68: ...t For this additional pages open which enquire the storage medium and the directory Attention The entire list can be deleted with the cross next to Export 8 Return by pressing each time on the following arrow Deactivating the ring tone The ring tone can be activated or deactivated via the following buttons top right Button Description Activating the ring tone the ring tone is on the icon is white ...

Страница 69: ... the camera image of the respective station Via the project planning software of the Busch ComfortTouch it can also be specified that the camera image is displayed in full page mode Please see your electrical installer Control options Accept the bell call Activate the door opener at the station Activate the light at the station Deactivate the light at the station Control options after acceptance o...

Страница 70: ...emains open until it is automatically closed Please see your electrical installer The running time is displayed in the status bar If the time has run down to 10 seconds the expired time also appears in the camera image see the following figure Pos 15 6 40 Layout bis 2014 11 11 Online Dokumentation KNX Steuermodule Online Dokumentation Für alle Dokumente Seitenumbruch 9 mod_1268898668093_0 docx 521...

Страница 71: ...Touch can send alarm messages via e mail The e mail address of the receiver to which the alarm messages of the assigned sensor are to be sent can be specified via the project planning software In this way the individual alarm messages are assigned to the sensors 1 Press the Fault and alarm messages icon in the navigation bar to access the function By inserting a tick in Settings you can assign to ...

Страница 72: ...aller with the aid of the project planning software Programming of a new IR remote control is also possible on the device later 1 Press the IR remote control icon in the navigation bar to access the function The functions suitable for the IR remote control are described on the left 2 Press an entry in the list and then Programming to assign this function to the remote control A time of 5 seconds r...

Страница 73: ...nge so called Special scenes that have been permanently assigned to an application page or a software module e g alarm clock scenes Note In the Scene editor on the Busch ComfortTouch the user cannot create new scenes This is only possible with the scene editor in the project planning software Press the Scenes and sequences icon in the navigation bar to access the function The function can also be ...

Страница 74: ...the scene Select an entry for this The overview shows components functions of the selected scene or the sequence These components can be changed to a limited extent The adjustments that can be made are shown on the right 4 Press the following icon to enable you to make adjustments for the entire scene Note If the start time is changed all the following scenes adjust their start times automatically...

Страница 75: ... Additional components functions can also be added Press Insert function Set a tick at the desired function and press the following icon to confirm the adjustment With the right top arrow icon you go back On the scene overview page the adjustments must then be programmed 8 To do this press Programming The scene can then be played sequence see the figure above Pos 15 6 46 Layout bis 2014 11 11 Onli...

Страница 76: ...ture sensor and the Busch ComfortTouch can then control the temperature Note The local room temperature controller on the Busch ComfortTouch is opened via the status bar 1 An external room temperature controller 2 is opened via the control element When the comfort mode has been activated the status bar indicates the actual or set point temperature of the room Also the set operating mode of the loc...

Страница 77: ... and display elements of the room temperature controller 1 Operating modes 2 Set set point temperature 3 Operating buttons 4 Display of modes 5 Display of availability of additional operating modes Operating modes Description The room temperature controller is deactivated Presence comfort temperature the residents are at home Absent eco mode cost saving temperature the residents are not at home Fr...

Страница 78: ...ion The modes and settings are visually highlighted by means of a colour system Some typical applications are shown in the following Heating mode active Star heating mode since the actual temperature is lower that the set point temperature Cooling mode active Start cooling mode since the actual temperature is higher than the set point temperature Manual adjustment The set point temperatures can al...

Страница 79: ...are made via the project planning software of the Busch ComfortTouch Here it can also be specified that a manual adjustment is admissible Only fan operation Here only the fan system can be operated for a description see page 78 Fan setting The room temperature controller is deactivated No settings can be made To reactivate the room temperature controller a different operating mode must be selected...

Страница 80: ...onfigure There are lamps without a colour component for example In this case there is only one white control Which control is possible is indicated in the control element in the example RGB W equals colour and white control 1 Switching the lamp on and off The lamps are switched on and off by pressing the control element The icon changes according to the status 2 White and colour control The contro...

Страница 81: ...nction is an option and only available with a corresponding plug in More detailed information is available from your electrical installer He will also carry out the commissioning process with the aid of the commissioning software Control normally takes place using an RGB control element That is why the explanations for the RGB control elements in the previous chapters can also be used here Note In...

Страница 82: ...NX Aktorik ComfortPanel 3 0 Bedienungsanleitung Erläuterung der Funktionen Datum und Zeiteinstellungen Datum und Zeiteinstellungen 34 mod_1361793692586_15 docx 282299 1 Set date The current date is displayed in the status bar 1 Press on the date An option opens 2 Here select the Date setting Additional date relevant functions are available for selection depending on the activation 3 Select the dat...

Страница 83: ...nctions alarm clock and timer are available for selection depending on the activation 3 Select the date format Press the arrow to open an options list 4 Press an entry here 5 Set the time 6 Touch the hours or minutes or the seconds The setting is made via 7 Press the Save button Pos 15 6 50 Layout bis 2014 11 11 Online Dokumentation KNX Steuermodule Online Dokumentation Für alle Dokumente Seitenum...

Страница 84: ...Dateien 40 mod_1418739108714_15 docx 309951 1 The Busch ComfortTouch contains a simple import and export function for files This can be used to import project and firmware files as well as export existing project files An export of the project file is especially practical prior to carrying out a firmware update This function is started via System Import Export The export function is described in t...

Страница 85: ...y the electrical installer Dialog settings signal tones and messages Temperature settings temperature unit and internal temperature offset User settings system language user language tone when pressing a button Screen saver Running time Start saver running time Monitor off effects interval change and order Modification of system settings 1 Select a category 2 Then select the desired entry or first...

Страница 86: ...an be cleaned with a slightly moistened cloth If this is insufficient the cloth can be moistened also with a soap solution Caution Incorrect cleaning can damage the device Incorrect cleaning agents can cause permanent damage to the surface of the device Never use caustic cleaning agents or solvents Note Cleaning blockage To ensure that no functions is triggered unintentionally when cleaning the Bu...

Страница 87: ...Notice We reserve the right to at all times make technical changes as well as changes to the contents of this document without prior notice The detailed specifications agreed to at the time of ordering apply to all orders ABB accepts no responsibility for possible errors or incompleteness in this document We reserve all rights to this document and the topics and illustrations contained therein The...

Отзывы: