background image


25

When a flue lining is fitted (to stainless steel or pumice chimney systems) it should be supported independently 
to the appliance, i.e. with clips, brackets, flue lintels, etc. 

NOT

 simply resting on top of the appliance. It should 

be possible to remove the fire for major maintenance work. 
 

Note: if the appliance is fitted with a draught stabiliser or if one is fitted to the flue pipe or chimney in the 
same room as the appliance, then the permanent air entry opening (or openings) should be increased by 
300mm

2

 for each kW of rated output. 


24. INSTALLING THE FIRE 


A - The Stratford Sf 


Fitting and checking the thermostat (Integral Boilers only). 


To fit:

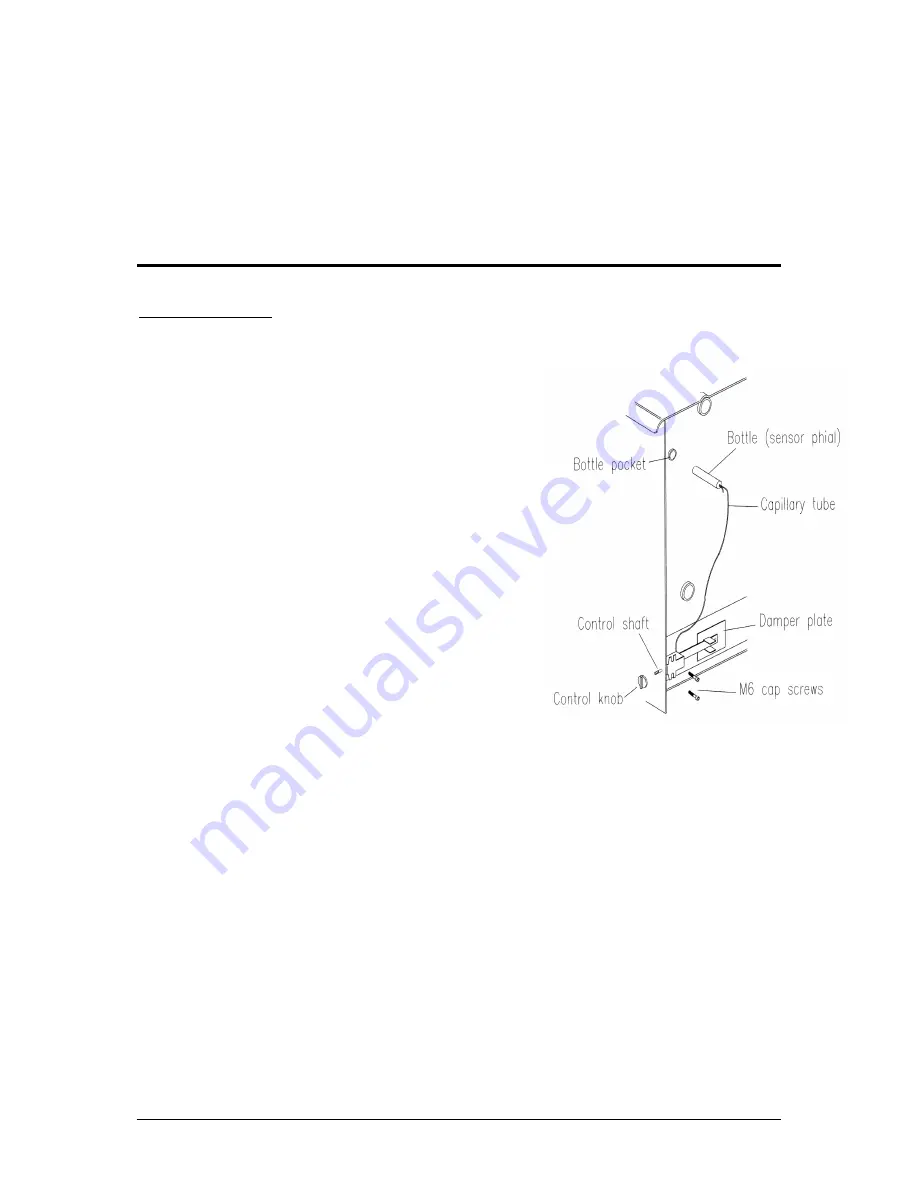
 Pass the control knob through the hole near the back edge of 

the right hand side of the appliance body, keeping the mounting 
brackets on the outside away from the fire. Pass the two M6 screws 
through the brackets and screw into the threaded holes in the back of 
the appliance. Before finally tightening the screws adjust the position 
of the thermostat so that the damper laps the air inlet opening on all 
edges. 
Tighten the screws sufficiently to hold the thermostat securely but do 
not over tighten. Uncoil the capillary tube taking care not to kink it, 
and insert the 'bottle' (sensor phial) into the pocket in the rear water 
jacket as far as it will go. 
Shape and trail the.capillary tube so that it is clear of pipe work, the 
damper arm, etc. The thermostat has been pre-set in the factory prior 
to despatch and should fit on to the appliance without requiring 
adjustment. However, it is advisable to check the cold setting distance 
prior to lighting a fire in it. With the control set at maximum there 
should be a gap of 23mm between the fire and the edge of the damper 
plate furthest from the control shaft. If this is not the case adjust by 
slackening off the lock nut and turning the adjusting nut on the 
damper plate. When the cold setting distance has been correctly set  
re-tighten the lock nut. 
 

Fitting the Flue Outlet and Hot Plate. 

The flue outlet spigot is found inside the appliance. The hot plate (blanking plate) is supplied fitted to the top 
opening and is removed by turning clockwise (as is the flue outlet). 
Smear a very thin layer of fire cement on the faces of the flue outlet and the blanking plate. Fit the outlet to the 
appliance in the position desired. 
Lock into place by rotating anti-clockwise and tighten by tapping with a block of wood and mallet. Similarly, fit 
the blanking plate to the unused opening. Clean off any surplus fire cement. 
Place the fire on the hearth and make sure that it is level and does not rock. 
Connect the chimney ensuring all joints are sealed with fire cement. The flue will accept 125mm (5'') or 150mm 
(6'') vitreous enamel pipe depending on which model is being installed. 
 

Integral Boilers. 

Integral boilers should be connected, with flow and return connection of any circuit on opposite sides of the 
appliance, (cross flowed), to an indirect hot water tank/system, adding Fernox or similar corrosion inhibitor to 
prevent corrosion and the formation of lime scale. 
 
It is also essential that the return water temperature remains in excess of 45 degrees centigrade (Celsius). The 
gravity return should be fitted with a thermostat, which will activate a cut-out on the radiator circulating pump, 
should the temperature drop below this level. 
 

Warning: if a pipe stat is not fitted then cold water corrosion can occur. 


FAILURE TO COMPLY WITH THESE REQUIREMENTS WILL INVALIDATE THE GUARANTEE. 


Содержание Stratford Sf 30

Страница 1: ...INSTALLATION OPERATING INSTRUCTIONS The Stratford Multifuel Sf Si Stoves Stratford Sf 50 Convector PLEASE RETAIN THESE INSTRUCTIONS FOR FUTURE REFERENCE...

Страница 2: ...we are so confident in the reliability of our product Should you have any questions about our Stratford Stoves that are not covered in this manual please contact the Aarrow dealer in your area or cal...

Страница 3: ...ments 13 9 Spare Parts List 14 A Stratford Sf B Stratford Si 10 Accessories 16 11 Fuels 17 12 Lighting the Fire 18 13 Overnight burning 19 14 Ash removal 20 15 Cleaning 21 16 Safety 22 Installation In...

Страница 4: ...OR WONDERCO MUST NOT BE BURNED IN THIS APPLIANCE TO USE THIS FUEL WILL INVALIDATE THE APPLIANCE WARRANTY IF IN DOUBT CONTACT THE SOLID FUEL ASSOCIATION TELEPHONE FREEPHONE 0800 600000 THE USE OF SPAR...

Страница 5: ...condary combustion and directs the flue gas around the whole upper firebox before allowing it to escape to the chimney The primary air for burning enters the ash pit chamber beneath the grate controll...

Страница 6: ...1 1 1 1 1 1 1 1 1 1 1 1 Operating Tool 1 1 1 1 1 1 1 1 1 1 1 1 Thermostat 1 1 1 1 1 1 1 1 Instructions 1 1 1 1 1 1 1 1 1 1 1 1 Only the knob the thermostat is already fitted to the stove The model an...

Страница 7: ...ate bars Periodic inspection of the bars is recommended and the removal of any nails or wire that may be present after burning wood All the grate bars in each appliance are identical and can easily be...

Страница 8: ...0 Sf50 see Fig 3 4 Figure 3 Figure 4 Remove front fuel retainer bars Set the two linings on the side ledges on either side of the firebox Set the rectangular linings on the upper surface of the grate...

Страница 9: ...uel retainer bars Note Neither the rear linings nor the side linings are handed and both faces are suitable for direct contact with the fire 5 THROAT PLATE INSPECTION The throat plate for all fires ty...

Страница 10: ...regulates the amount of under draught entering depending on the setting of the thermostat control knob located at the bottom rear of the right hand side of the unit and the temperature of the water t...

Страница 11: ...the ash door has been shut first When the fire door is shut the ash door knob can be turned anti clockwise by up to 95 degrees creating a variable gap between the top of the ash door and the body thr...

Страница 12: ...two glass retainer clips on one side only inwards towards the centre of the door as far as they will go Pull this side of the glass away from the door casting easing the tags on the glass retaining cl...

Страница 13: ...the fire door so that it is at a right angle to the front face of the fire Lift the fire door up off the hinges Gently tap the two hinge pins in a direction to compensate for the misalignment Refit t...

Страница 14: ...4 AFS165 AFS166 AFS167 Grate Bar 11 AFS001 AFS001 AFS002 AFS003 Fire Bed Surround 12 AFS007 AFS007 AFS007 AFS007 Grate Bar landing with fixings Convector Models Boiler Models 13 AFS074 AFS075 AFS076 A...

Страница 15: ...AFS203 Ash pan 9 AFS054 AFS055 Comb Comb Extension 10 AFS062 AFS065 Grate Bar 11 AFS003 AFS003 Fire Bed Surround 12 AFS007 AFS007 Grate Bar landing with fixings Convector Models Boiler Models 13 AFS0...

Страница 16: ...rear firebox liner panel Stratford Sf convector units can be fitted with slab type boilers only not cantilever type Fitting Remove the fuel retainers rear firebox liner panels and throat plate Knock...

Страница 17: ...eter mm 127 5 127 5 127 5 127 5 152 6 152 6 152 6 152 6 TECHNICAL DATA THE STRATFORD Si RANGE Si 40 Convector Si 40 Boiler Si 60 Convector Si 60 Boiler Room Heater only Min Max output kW 2 10 N A 4 15...

Страница 18: ...and creosote which may in extreme cases run down the chimney in liquid form This will seriously damage both the chimney and appliance Note If you have sticky tar inside the appliance or chimney your...

Страница 19: ...e fire if it is suspected that any part of the water system is frozen Note The high temperature paint acquires durability by being cured during the initial firings of the appliance During this process...

Страница 20: ...deposits in the chimney This effect can be minimised by burning hard for a short period about 20 minutes twice a day It is usually convenient to do this morning and night Note To avoid chimney problem...

Страница 21: ...orming on the grate should be removed when cold 15 CLEANING Important Under some circumstances soot can quickly build up on the throat plate and adjacent areas The throat plate should be removed and c...

Страница 22: ...painting make sure that the fire is out and is cold Remove the door glass and gilt trim Lightly wire brush or rub with wire wool the body of the appliance to remove any loose paint powder Mask or remo...

Страница 23: ...are not damaged during installation 19 HEARTH The fire should be installed to stand on a constructional hearth of non combustible materials not less than 125mm 5 thick conforming to Building Regulati...

Страница 24: ...y breast so that flow and return pipes can be connected to the appliance 23 CHIMNEY Please remember that chimney draught is dependent on four main factors Flue gas temperature Flue height Flue size Fl...

Страница 25: ...maximum there should be a gap of 23mm between the fire and the edge of the damper plate furthest from the control shaft If this is not the case adjust by slackening off the lock nut and turning the a...

Страница 26: ...ng off the lock nut Replace the casing on the unit front and refit the control knob on to the thermostat shaft Positioning Appliance in recess Apply a thin cement slurry to the back of the hearth so t...

Страница 27: ...reviously removed and check unit thoroughly 25 FLUES AND CHIMNEYS Flexible stainless steel liners used on all oil and gas appliances are NOT suitable for solid fuel and MUST NOT BE USED The diameter o...

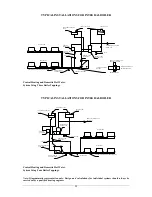
Страница 28: ...Soot door Horizontal 150mm 6 between support brackets 2 4 metres 8 0 maximum or Maximum 50mm 2 gap to wall 600mm 24 minimum TYPICAL PREFABRICATED Rain cap Non combustible ALL INSTALLATIONS MUST CONFOR...

Страница 29: ...ATER DRAW OFF DRAIN COCK RADIATORS RADIATORS CENTRAL HEATING RETURN 22mm PIPE GRAVITY RADIATOR 22mm OPEN VENTS GRAVITY FLOW 28mm PIPE PIPE STAT GRAVITY RETURN 28mm PIPE DRAIN COCK AT LOWEST POINT CIRC...

Страница 30: ...effective circulation can occur around the primary circuit to carry heat away and thus stop boiling The output of any radiator installed as a heat leak should not be less than 10 of the rated output...

Страница 31: ...FAIR BAD 4 What is the draught reading 14 What is the calculated output required to heat the system 5 Is the throat plate fitted YES NO 15 Is a heat leak fitted YES NO 6 What is the height of the flue...

Страница 32: ...price of replacement shall be shared by the manufacturer and purchaser as follows During the first year of purchase the manufacturer will pay 100 of the cost of parts only During the second year the...

Страница 33: ...p or Signature Should you have any questions about your fire that are not covered in this manual please contact our Technical Department on 01308 427234 Please keep all repair receipts safely Please e...

Страница 34: ...34 Manufactured by July 2001...

Отзывы: