Likewise, the black terminals are connected to each other. Failure to do this could result in damage
to your amplifier or reduced bass performance. Never allow the two conductors in the speaker
cable to touch each other, this could cause damage to your amplifier.
TIP: If you use the high level connection method, the amplifier should be told you have
large main speakers and no subwoofer.
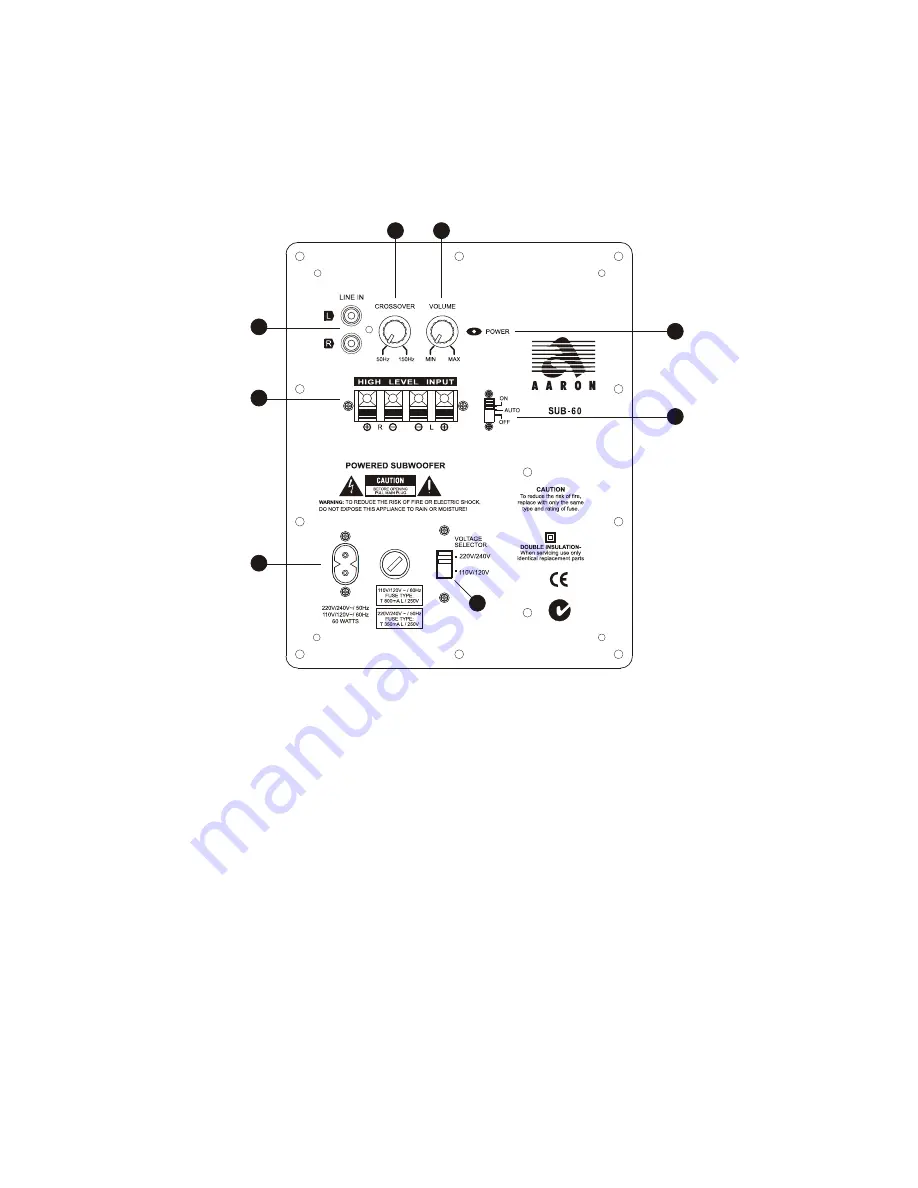
CONTROL FUNCTION AND FEATURES
Refer to Fig. 1
1: AC Power Cord Socket
Plug in the supplied AC power cord to this socket.
2: Voltage Selector.
Make sure this is set to your local voltage.
3: Power Switch
When switched up one position, the standby led lights up and Auto on/off is activated. When
pushed to the top position the unit is permanently on.
4: Power Indicator Led
If the led is red, it is in standby mode. If the led is green, the unit is on.
5: High Level Input
This input is for connecting to the amplifier`s main speaker outputs.
6: Low Level Input
Use for low level connection. Refer to previous page.
7: Volume Control
You are able to adjust the output level by rotating this control. Clockwise increases the level.
If the subwoofer makes a slight distortion noise, this lets you know that you are at it`s
maximum output level.
8: Frequency Crossover Control
By turning the knob clockwise, the crossover frequency is increased, so by doing this you are
allowing the subwoofer to reproduce more of the upper bass. If, for instance, you have main
speakers that already have reasonable bass, then you adjust the control in an anti-clockwise
direction. On the other hand, if you are using satellite speakers, then the control should be
set around mid position. The best way to use this control is setting it to your own personal
taste.
Fig. 1
4
3
7
1
2
5
6
8


