2
Download and install the a-rival app
Supported Devices:
Any Android (v4.3 and up suggested) mobile phone with built-in
4.0 Bluetooth or iOS device, such as iPhone 4S/5/5S/5C, iPad
mini/4 or iPod Touch 5.
Notes:
Although the device is useable in the rain, it is prohibited to be
used under water.
Please do not use any corrosive chemical to clean the device.
Bluetooth is disabled by default. Bluetooth will be activated
automatically upon detection of any sensor movement.
1.
2.
3.
For Android phone users, please download a-rival app from Google Play.
For iOS phone users, please download a-rival app from App Store.
1.
2.
1.
2.
3.
4.
5.
6.
Step 1. Set up personal profile
Open the a-rival app on your phone.
Select
[Profil]
, and fill in your personal information like
Name, Gender, Height, Weight and Age
Step 2. Scan for device and complete device calibration
Open the a-rival app on your phone, and tap on the Shoepod section.
The app will start device search. Once your device is found, tap on
Footpod
shown in the section of Detected sensor(s) to get connected,
and tap on. Afterwards to proceed with device calibration. (To start with
calibration, you’ll be guided via a wizard. Follow what’s stated on the
screen to complete the procedures.)
Properly install your device by either placing it in the shoe or on the shoe
as illustrated on the screen. Please stand still while placing the device,
then tap on
[Next]
to continue.
Stand on your tiptoe as illustrated. Tap on
[Next]
to continue.
Calibration is now complete, and the app has detected the position of your
device as illustrated on the screen.
You may now start using a-rival with the device installed.
Important Notice:
In order to ensure the accuracy of detection, the device must be calibrated every
time it is installed.
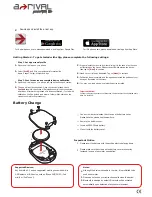
Battery Change
Use a screw driver to loosen the screws on the battery cover.
Please have the screws kept somewhere.
Remove the battery cover.
Insert an CR2032 coin battery.
Close it with the battery cover.
Please insert the battery with the positive electrode facing down.
Please make sure the screws on the battery cover are securely
fastened, in case of any water penetration.
1.
2.
Getting Started : To get started with sQip, please complete the following settings:
Important Notice
+


