A-Link IPC3 Скачать руководство пользователя страница 7


Note 

1: If no IP address is assigned within 30 seconds, the networked device will 

automatically assign 192.168.0.100. User may now open your web browser, and key in 

http://192.168.0.100


in the address bar of you web browser to logon Network Camera’s 

web configuration page. 


Note 2

: Power Line Frequency 

-


If you found the video image is flash, you may need to choose 50 or 60 Hz frequency 
(depends on country). 

-


World wide power line frequency table is inside user’s manual, Appendix 


Note 3:

 If you have problem when connecting the network camera to a router, please read 

user’s manual inside CD, the section “Installation to a router”.     
 
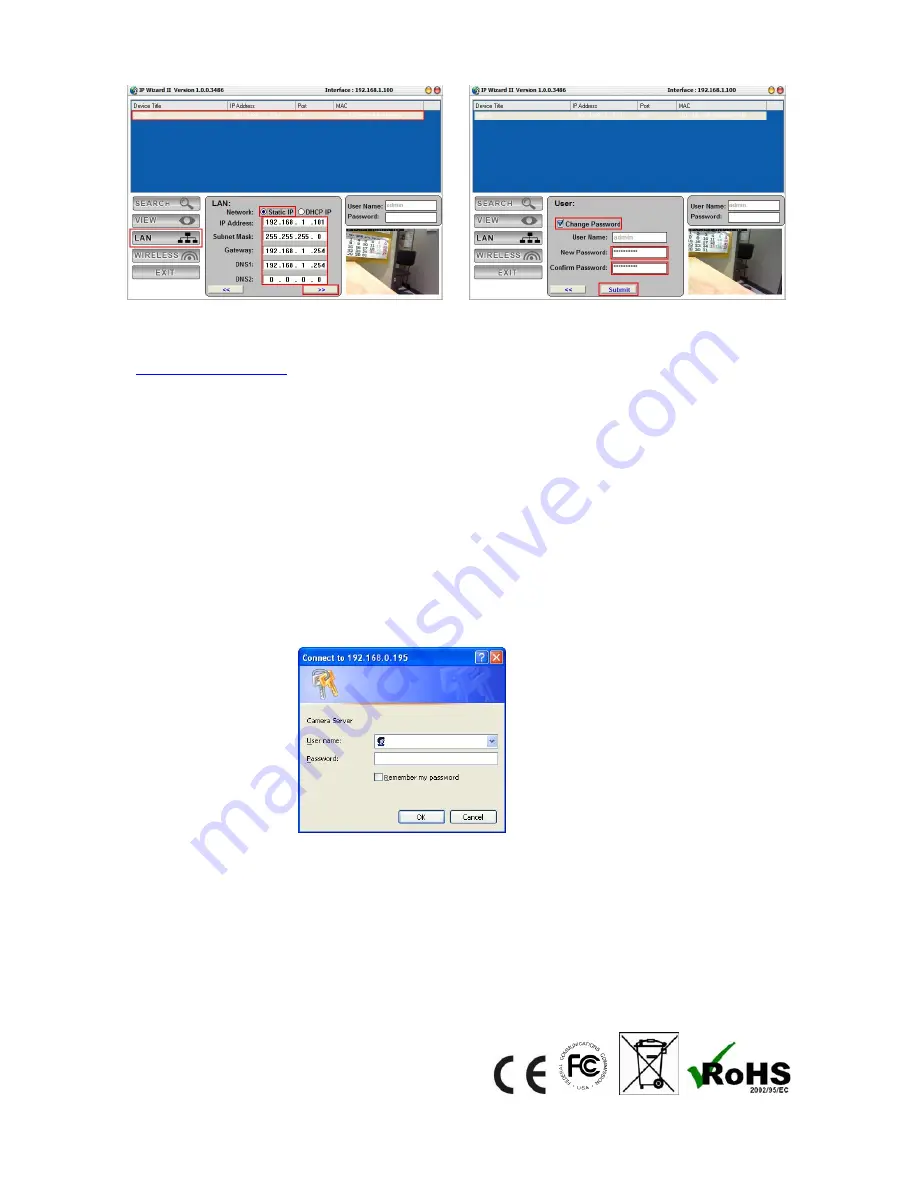
After connected to networked device, the device will prompt for User name and Password. 
For the first time, please enter: 

admin

 as username and no password to continue Web 

Management. 


If difficulty is met, please refer to the following steps to establish the connection:   
 

-


The A-Link IPC3 must be installed and powered ON.   


-


If the A-Link IPC3 default IP Address (

192.168.0.100

) is already used by another device, the 

other device must be turned OFF until the device is allocated a new IP Address during 
configuration.  


All Rights Reserved 2010


7

Содержание IPC3

Страница 1: ...IPC3 1 3 Mega Pixel Multi Profile IP Camera Ver 1 0 ...

Страница 2: ...2 Quick Installation Guide Table of Contents 1 System Requirements 3 2 Physical Installation 4 2 1 IP Camera Connectors 4 2 2 IP Camera Installation 4 3 IP Camera administration 6 ...

Страница 3: ...rer 6 0 or later System Hardware CPU Pentium 4 2GHz or above Memory Size 512 MB or above VGA card resolution 1024 x 768 or above Sound card for 2 way audio function System Requirement for Viewer Recorder Application Support OS Win7 XP Vista System Hardware 16 cameras surveillance application CPU Pentium Duo 2 8GHz or faster Memory Size 1GB or above VGA card resolution 1024 x 768 or above System Re...

Страница 4: ...t Ethernet network switch or hub or PoE injector Audio Output Jack Audio out Jack allows this device to output audio or alerting sound DC Power Jack The input power is 12VDC Note that supply the power to the IP Camera with the power adapter included in package Factory Default Reset This button is hidden in the pinhole beside the DC Power Jack 2 2 IP Camera Installation 1 Attach the Camera with the...

Страница 5: ...Network Camera on the table directly Fixed it by Screws 3 Plug an Ethernet cable into the Camera Connect an Ethernet cable to the LAN socket located on the IP Camera s bottom and attach it to the network 4 Connect the external power supply to Camera Note Do not use external power supply for IP Camera if PoE injector is used to supply power through LAN 5 ...

Страница 6: ...N Use IP Wizard II to locate IP address Press Search button IP Wizard II will list all networked devices in the LAN View function If IP Wizard II finds network devices View button will be available Please select the device you want to view and click the View button Furthermore you could double click the left button of mouse to link to the network device by browser LAN setting function The utility ...

Страница 7: ...e 3 If you have problem when connecting the network camera to a router please read user s manual inside CD the section Installation to a router After connected to networked device the device will prompt for User name and Password For the first time please enter admin as username and no password to continue Web Management If difficulty is met please refer to the following steps to establish the con...

Отзывы: